Before Using your Player
Ensure all packaging has beeen removed
Ensure that the household electrical circuit is compatiable with the product
If the product is unpack in cold damp conditions allow the product to aclimatise to the
conditions before switching on
Using your Player
Ensure the wall socket is switched off then insert the plug and switch on at the socket.
Unwind the FM cable at the rear of the product.
Do not stretch the cable to the socket site the product close to the socket. on a at level
surface away from
The Radio
Make sure the power is on before using the radio
Turn the function knob (3) to the radio
Use the AM/FM/FM ST band selector knob (5) to select the required frequency band. and using
the tuning knob (6) to select the radio station you require
The Record Player
Ensure that all the packaging and the tie wrap holding the arm in place has been removed (this is for
the rst use only)
Set the function knob to record (phono) (3)
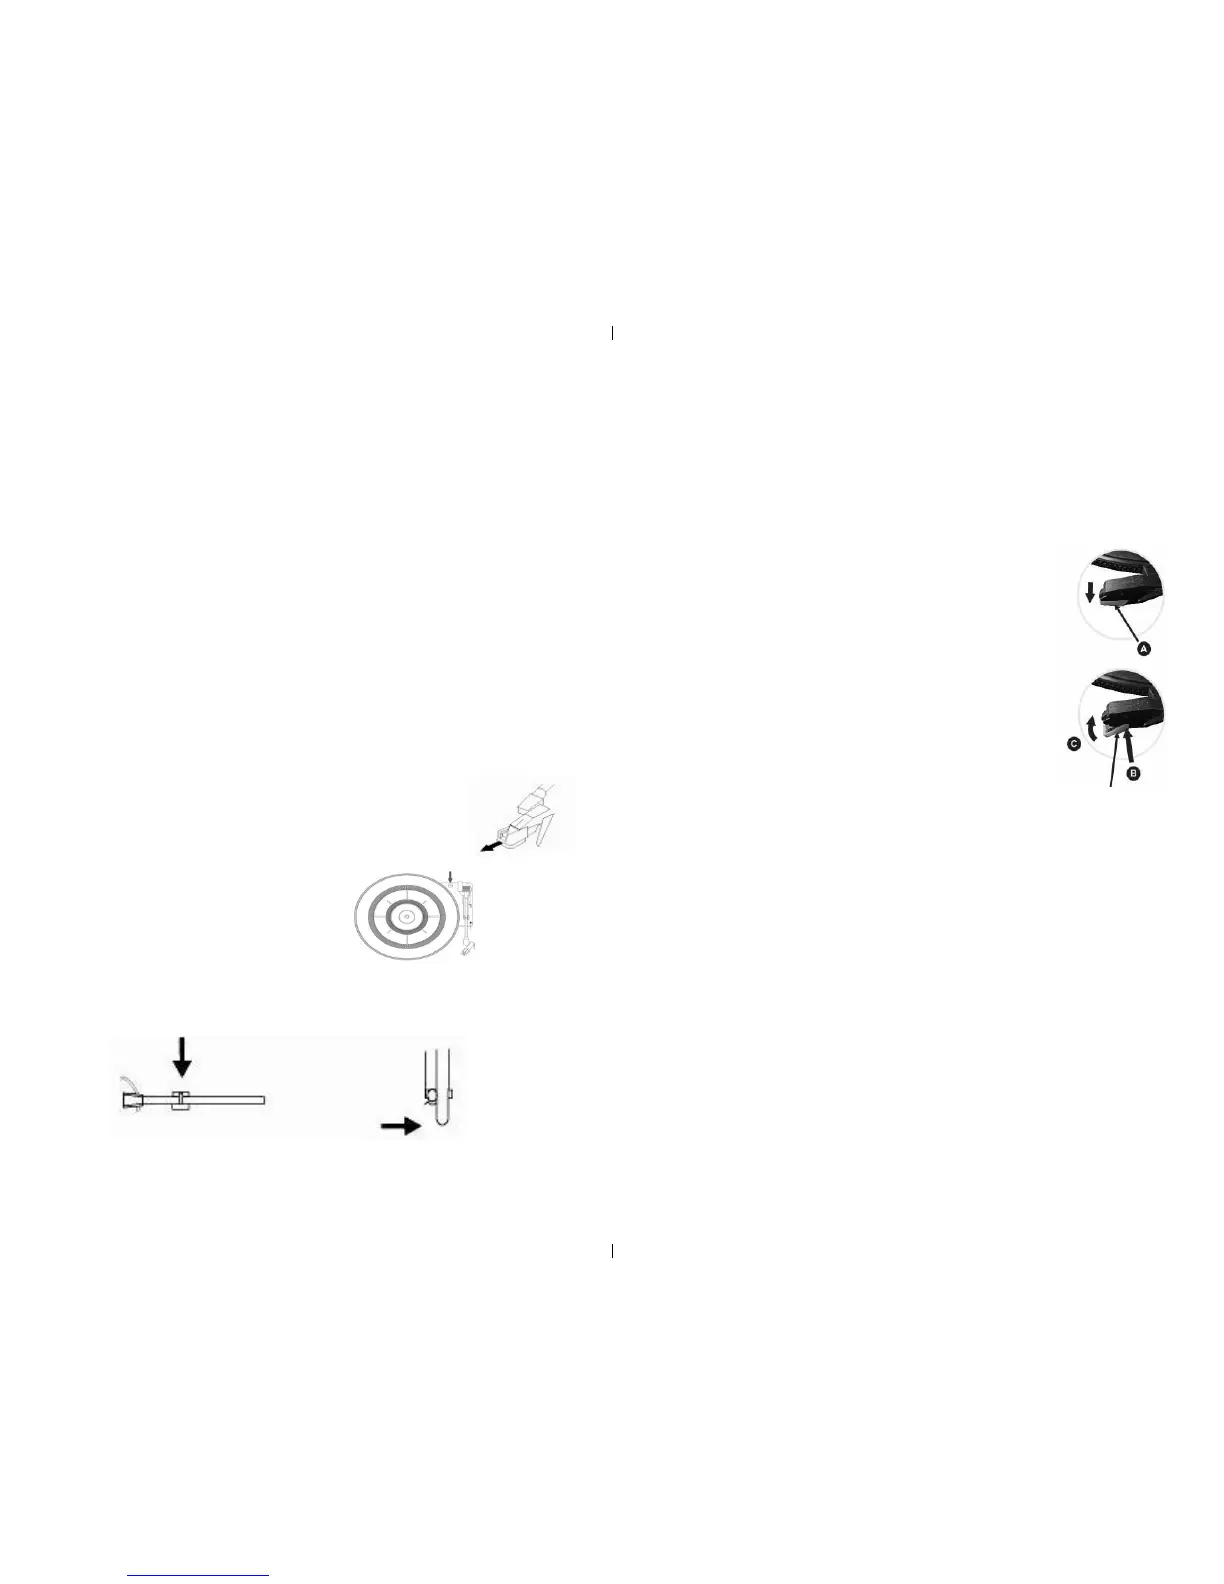
Remove the protective needle guard by gently
pulling it forward and toward the front of the product.
Turn the large chrome screw (31) (using a coin) clockwise untill
it is fully dow as this will allow the turn table to oat on its shock absorbers.
Place the record on the turn table.
Release the the security hook that keeps the tone arm (25) in place this is achieved by gently
pushing it to the right. This will release the tone arm lock (27) (use the security hook
set the turntable to the require speed for the record (33,45,78 )this is achieved using the speed
control switch (26)
Using the control perch (28) place the stylus on the begining of the record and lower the tone
arm gently using the control perch (28) however this can also be done by hand.
Set the volume to the desired level by using the volume knob (4)
When the stylus reaches the end of the the tone arm will atomatically stop and the turntable
(30) will stop turning
Removing the Stylus
Place the blade of a small at the tip of the stylus and
push down toward point A (As shown in the diagram opposite )
To remove the stylus pull forward and down
Replacing the Stylus
To replace hold the tip of the stylus and insert the toward
point B then when in place push up toward poin C
(as shown in the diagram opposite )
Using the CD Player Guide Pins (inside)
When handling a compact disc (CD) place a nger through the center and with your thumb
hold the edge of the disc.
To use the CD function
Set the function knob (3) to the CD position
Open the CD tray this can be achieved by pressing the door open button (18)
Please do not force as this may damage the tray.
Place the CD on the tray label side up and close the CD tray, at this point the CD will spin
breiy at this point the LED display will the number of tracks that are on the disc.
Please do not place anything other than a CD in the CD tray as this may cause damage to the
CD tray
If the disc is dirty or scratched it may not play correctly
Never force the CD tray as this may damage the product.
Never insert more than one CD in at a time
The Record Player ......Continued.
 Loading...