2. Alternatively, the USB connector can be connected to the USB port of another device.
Your receiver is equipped with short electrodes. For dogs with long hair, use long electrodes. Tighten the electrodes using the wrench on the
test lamp.
3. Turn the field width selector clockwise to the "on" position.
Turning on the receiver
charge the receiver only when the battery is empty.
1. Lift the rubber cover that protects the charging port of the receiver and connect the USB cable to the port
WARNING: Do not attach the receiver to the dog until you have tested the function of the enclosure on a clean surface.
Preparation of the receiver
on the left side of the transmitter. Move the transmitter to the "on" position.
6. The average charging time of the receiver is 1.5 to 2 hours.
7. Do not charge the receiver every night as this may have a negative effect on the battery. We recommend
Charging the receiver
4. The LED on the receiver will be red while the receiver is charging. Once the receiver is fully charged, the red will change to
blue.
Press and hold the button on the receiver for 3 seconds. You will hear two beeps to indicate that the receiver is on. Press the button again
and you will see the static correction light flashing red. The number of flashes determines the setting that is active (see table below).
5. When the receiver is fully charged, remove the charging cable. The LED turns off.
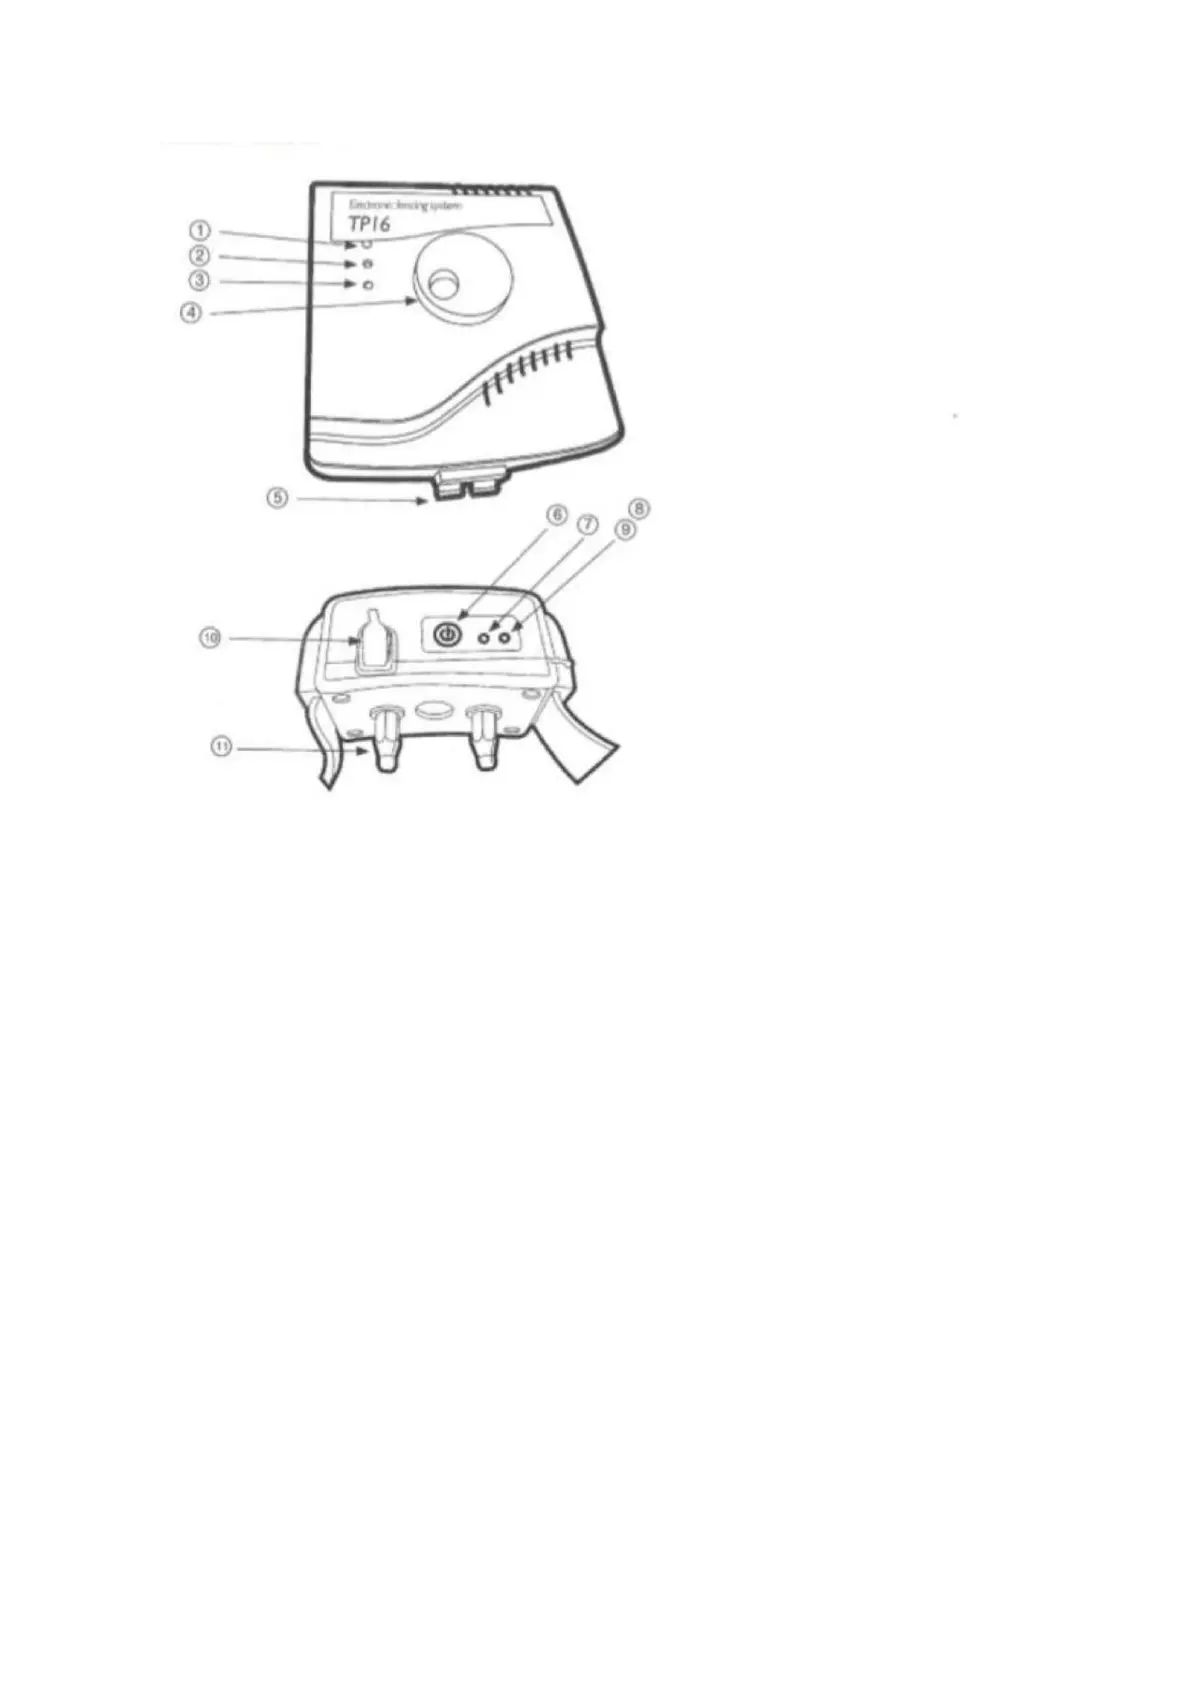
1) Wire damage check
2) Loop check
3) Power indicator light
4) bandwidth settings
5) Border clamps
6) On/Off
7) Red LED flashing - low battery
8) Red LED - static correction light
9) Blue LED - full charge indicator
10) Charging port
11) Electrodes
 Loading...