Do you have a question about the IVIEW ISD100 and is the answer not in the manual?
Doorbell enters sleep mode to save power; allows preview and remote monitoring via App after 3-4 seconds.
Receive calls from visitors and communicate via App. See and hear visitors if you answer.
Detects nearby presence and sends an alarm message to your cell phone.
Set a low-battery threshold (10%-50%) on the App; receive reminders when battery power drops below it.
Battery box locks immediately upon connection. Unlock via App settings to remove; 30 seconds allowed.
Share doorbell access with friends for online preview. Supports unlimited sharing, but only 6 simultaneous previews.
DC 5V ± 10%. Use screws to fix the power converter.
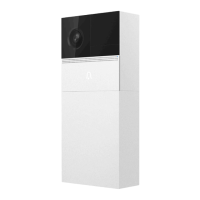
Press the button to activate the doorbell.
Indicates network status: solid red (abnormal), blinking red (connecting), solid blue (correct).
Captures sound for your video recordings.
Supports local SD Card storage up to a maximum of 128GB.
Press and hold for 5 seconds with a pin to reset; does not unbind the bell from the account.
DC5V ± 10% power supply via USB.
Red solid indicates charging; blue solid indicates charging is finished.
Tap reset button for 5 seconds for factory reset; does not unbind the device.
Locks the battery box securely using a bayonet lock mechanism.
6000mAh capacity, powered by two 18650 lithium-ion batteries.
Download and install the Smart Life App on your smartphone. WiFi is recommended for download due to traffic usage.
Requires 2.4GHz WiFi (802.11b/g/n) with WPA/WPA2 encryption. Phone can switch networks after initial setup.
Click 'Register', enter a valid phone number or email address, and click 'Next'.
Enter the verification code, create a password (min 6 alphanumeric characters), and then login.
Ensure password input is correct. A device can only be added to one App account. Unbinding resets the device.
Open Smart Life App, click '+', select 'Add Device', then 'All' on 'Select Device Type'.
Select 'Security Camera'. Power on the device and ensure the indicator flashes or a prompt tone is heard.
Enter WiFi password, click 'Confirm', then scan the QR Code with the device at approximately 20cm.
Click 'I heard the beep' when the device emits 'dong dong dong'. Configuration completes in about 30 seconds.
Device is successfully added. Nickname can be changed. Device locks automatically; unlock battery before unplugging.
Ensure you are using a 2.4GHz WiFi router and confirm the WiFi password.
After a failed addition, restart the device or power it off, then try adding again.
Check network status, move camera closer to router. Reset device and add again if necessary.
Remove and reset the device on the App, then reconfigure it through the App.
Confirm App is running, reminder functions are open, and mobile OS notification/permission settings are enabled.
Insert SD card after power cut. Verify card availability and FAT32 format. Poor internet can hinder identification.
Click '...', navigate to the 'Setting' page, and select 'Basic Feature Settings'.
In 'Basic Feature Settings', click 'Unlock the Battery'. The battery box can be pulled out after the motor finishes.
Connect input cable (AC 8-24V) to wall wires. Connect output terminal to doorbell host's power interface.
Remove double-sided adhesive from the mylar sheet. Cover the power interface on the back of the doorbell host.
Use a marker to draw the positions of the 4 screw holes on the wall surface for installation.
Screw 4 expansion screws into the newly marked positions on the wall.
Fix the mounting bracket securely to the wall.
Install the bottom door of the doorbell main unit and fix it with screws.
Pull power cable through bracket center hole, then slowly insert doorbell into door. Avoid pinching fingers.
Remove the doorbell bottom cover and bracket as shown in the figure.
Use a marker to draw 4 screw holes on the wall surface for installation.
Screw 4 expansion screws into the newly marked positions.
Fix the mounting bracket securely to the wall.
Snap the doorbell unit into the installed mounting bracket.
Align the battery box with the bayonet lock and push the battery box into the doorbell.
| Brand | IVIEW |
|---|---|
| Model | ISD100 |
| Category | Accessories |
| Language | English |