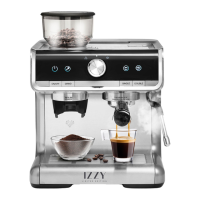
Grinding grades are from 0 to 30. 0 corresponds to finer grinding and 30 to thicker. The flow of
water in the finest grinding is smaller while in the thicker larger (light coffee). Make sure the coffee
grinder setting is aligned with the marking position on the top cover (as shown in the illustration
above).
Use
1. Insert the coffee grinder container (3) into the grinder reception (2) (see section "Coffee grinder
assembly").
Note: If the grinder is not installed correctly, the grinder indication light (21) will turn red.
2. Adjust the degree of grinding of your choice.
3. Add the appropriate amount of coffee beans to the container (3) and close the lid (4).
Note: To avoid the deterioration of the beans by moisture that affects the grinding and the final taste
of the coffee, please place as many beans as you need. Do not store coffee beans in the container
(3).
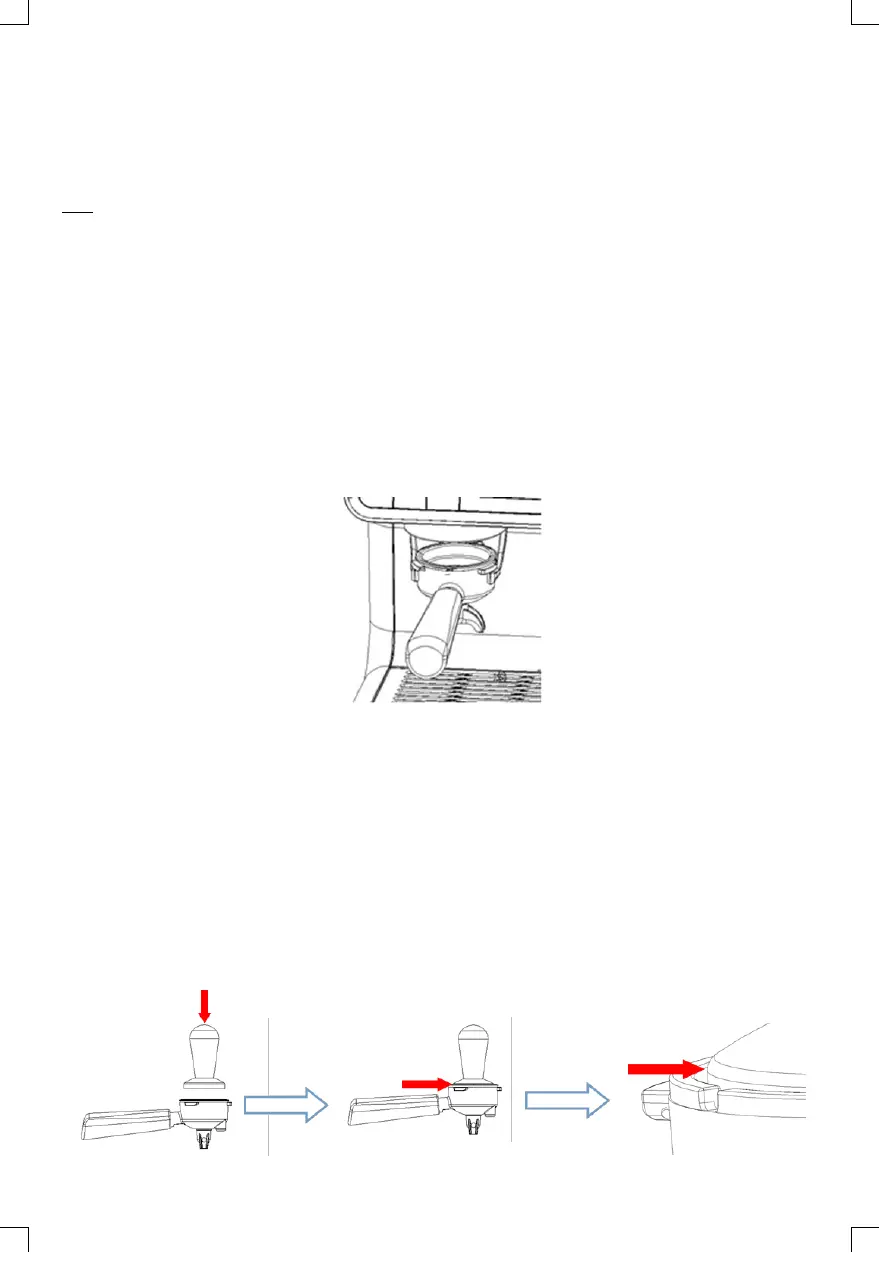
4. Insert the group (14) with the filter of your choice (15 or 19) into the group reception (8) as follows.
5. Press the “GRIND” button (31). The grinder indication light (21) will flash and the grinder indicator
(22) will remain on. The machine will start grinding.
6. The machine will stop automatically after grinding the specified amount. To stop grinding earlier
than specified, press the “GRIND” button again (31) or you can adjust the grinding quantity (see
section “Adjust the grinding quantity”).
Note: The factory setting of the grinding time is, for double dose of coffee. The appliance produces
about 19g. coffee powder (in about 14 seconds) at cutting degrees 5-10.
Note: For the single dose of coffee, it is recommended that the amount of ground coffee be 13g.
(about 10 seconds grinding).
7. Remove the group (14) from the reception (8) and tap on the counter. Press the coffee into the
filter with the tamper (10) using a force of about 12.5Kg as follows:
 Loading...