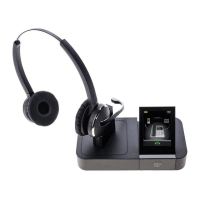
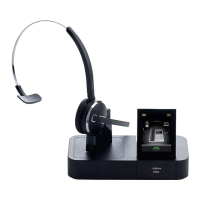
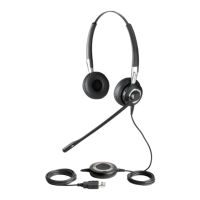
This document outlines the connection and setup procedure for Jabra PRO / GO headsets with various Avaya IP phones, specifically models IP 2410, IP 5410, IP 6416D, IP 6416M, 6424D, and 6424M. The instructions are tailored for the Jabra Pro 9465 Duo headset, requiring a Jabra PRO 9460 or 9470 base unit and a Jabra Link 14201-20 EHS adapter.
Function Description:
The primary function of this guide is to enable seamless integration between Jabra PRO / GO series wireless headsets and specified Avaya IP desk phones, facilitating remote call control and enhanced audio communication. This setup allows users to answer and end calls directly from their headset, providing greater mobility and convenience in an office environment. The Jabra Link 14201-20 EHS (Electronic Hook Switch) adapter is crucial for this functionality, as it translates the headset's signals into commands that the Avaya phone can understand, enabling features like ring detection and remote call answer/end. The Jabra PRO 94x0 base unit acts as the central hub, connecting the headset to the EHS adapter and the phone, and providing a user interface for configuration.
Important Technical Specifications & Components:
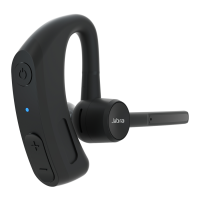
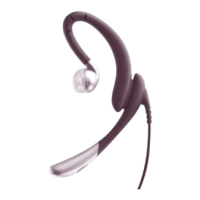
- Headset Compatibility: Jabra PRO / GO series (specifically Jabra Pro 9465 Duo, requiring Jabra PRO 9460 or 9470 base).
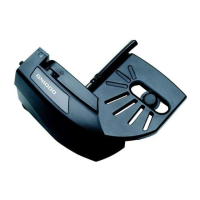
- EHS Adapter: Jabra Link 14201-20. This adapter is essential for electronic hook switch functionality, enabling remote call control.
- Avaya IP Phone Compatibility: IP 2410, IP 5410, IP 6416D, IP 6416M, 6424D, 6424M.
- Cabling:
- A supplied cable connects the Jabra PRO 94x0 base (phone socket) to the EHS adapter (phone symbol socket).
- A red cable connects the EHS adapter (AUX socket) to the Jabra PRO 94x0 base (AUX socket).
- A white cable marked "A" (or "B" for 6416D+M / 6424D+M phones) connects the EHS adapter (Headset/handset socket) to the phone's headset socket.
- Signal Sensor: This component attaches to the phone's loudspeaker to detect incoming ring tones, informing the headset of an incoming call.
Usage Features:
The setup process involves both physical connections and software configuration via the Jabra PRO 94x0 base's SmartSetup Wizard.
Physical Connection Steps:
- Base to EHS Adapter (Phone Connection): Connect the supplied cable from the "phone" socket on the Jabra PRO 94x0 base to the socket marked with a "phone" symbol on the EHS adapter. This establishes the primary audio path.
- Base to EHS Adapter (AUX Connection): Connect the red cable from the "AUX" socket on the EHS adapter to the "AUX" socket on the Jabra PRO 94x0 base. This connection is typically for auxiliary functions, potentially related to signaling or power.
- EHS Adapter to Phone (Headset Connection): Connect the white cable (marked "A" or "B" depending on the Avaya phone model) from the "Headset/handset" socket on the EHS adapter to the "headset" socket on the Avaya phone. This is the direct audio and control link to the phone's headset port.
- Important Note: For Avaya 6416D+M / 6424D+M phones, use the cable marked white and "B" instead of "C". This indicates a specific wiring configuration for these models.
- Signal Sensor Placement: Fasten the signal sensor to the middle of the phone's loudspeaker. This sensor is crucial for detecting the phone's ring tone, which the EHS adapter uses to signal an incoming call to the headset.
SmartSetup Wizard Configuration (Jabra PRO 94x0 base):
After physical connections, the Jabra PRO 94x0 base requires configuration through its SmartSetup Wizard, accessible via the base's display.
- Access Phone Settings: Navigate to "SETTINGS" > "PHONE SETTINGS" > "Desk phone".
- Connect to Desk Phone: Select "Connect to a desk phone?".
- Manual Setup: Choose "Manual" for the Desk Phone setup. This allows for specific adapter and switch settings.
- Select Adapter Type: From the "SELECT ADAPTER" menu, choose "DHSG". DHSG (Digital Headset/Handset Group) is a common standard for electronic hook switch functionality.
- Set Clear Dial-Tone Switch: In the "MANUAL SETUP" screen, set the phone set-up switch to position "A". This switch typically adjusts the audio signal for optimal clarity and compatibility with the phone system.
- Set Microphone Level: In the "MANUAL SETUP" screen for microphone level, the recommendation is to set the microphone volume to "7 out of 13". This ensures clear outgoing audio without being too loud or too soft.
Guided Setup (Optional):
The document mentions an optional "Guided setup" feature. As part of the installation, users can dial into their local Jabra Setup server. This server can automatically configure the audio path, simplifying the setup process. If the Jabra Setup Server is unavailable, users are advised to contact their local Jabra Support team for assistance.
Maintenance Features:
The document does not explicitly detail maintenance features. However, implicit maintenance aspects include:
- Cable Management: Proper routing and securing of cables can prevent damage and ensure reliable connections.
- Firmware Updates: While not mentioned, Jabra devices often benefit from firmware updates to improve compatibility, performance, and add new features. Users should periodically check the Jabra support website for available updates for their headset and base unit.
- Troubleshooting: The "Guided setup" option and the recommendation to contact Jabra Support for server unavailability suggest a support infrastructure for troubleshooting. Common issues might involve checking cable connections, verifying switch settings, and ensuring the signal sensor is correctly placed.
- Cleaning: Keeping the headset, base, and EHS adapter clean from dust and debris can prolong their lifespan and maintain optimal performance.
In summary, this guide provides a comprehensive, step-by-step approach to integrating Jabra PRO / GO headsets with specific Avaya IP phones, focusing on the physical connections and the necessary software configurations via the Jabra base unit's SmartSetup Wizard. The use of the Jabra Link 14201-20 EHS adapter is central to enabling remote call control, enhancing user mobility and productivity.