EARS
TIGHTEN FIRMLY
25 ft. - lbs.
WITH 8mm
ALLEN WRENCH
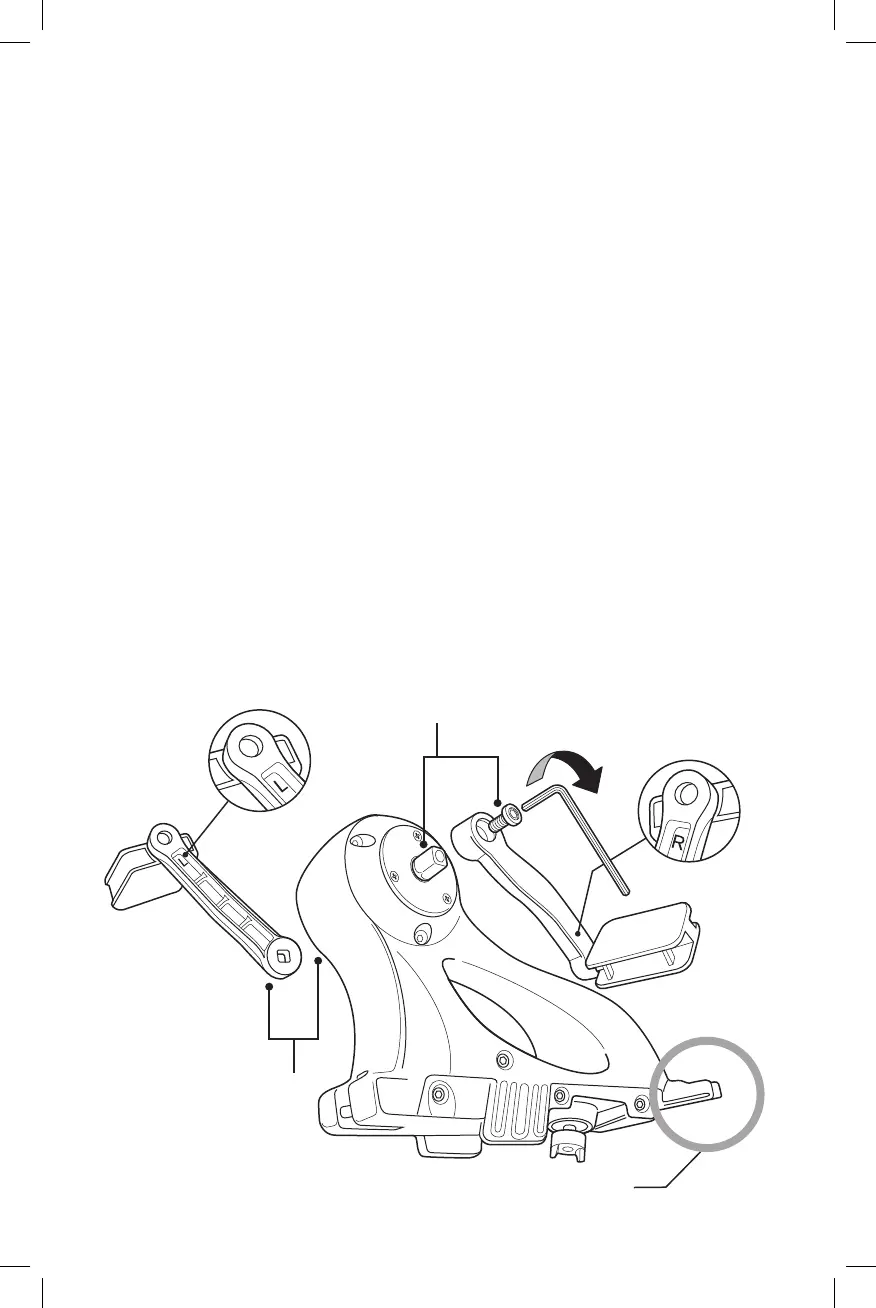
1. Attach Crank Arms To The Drive Unit.
(A) Locate the Crank Arm etched with the letter “L” (for Left) and the Crank
Arm etched with the letter “R” (for Right).
(B) With the Upper Drive Unit facing forward as shown, attach the Left
Crank Arm on the left side and the Right Crank Arm on the right side
using the Crank Arm Bolts. Tap Crank Arms on with palm or hand
before tightening bolts.
Add 2-3 drops of single use Loctite to threads of bolts before
installing.
Tightenrmly(to25ft.-lbs.)usingthe8mmAllenWrench
IMPORTANT: Periodically check Crank Arm Bolts during break-in period
(rst 3 uses) to ensure tightness.
(A) (A)
(B)
(B)
 Loading...