Do you have a question about the Jacuzzi J - 245 and is the answer not in the manual?
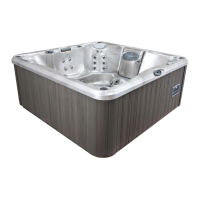
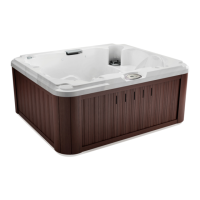
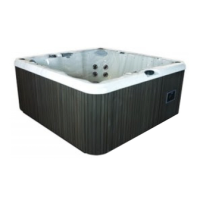
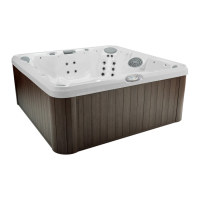
General information about the spa's construction, materials, and warranty.
Compliance information regarding FCC rules for radio frequency emissions.
Dangers of unauthorized access by children and drowning risks.
Risks of hair/clothing entrapment from moving parts and suction fittings.
Electrical safety, grounding, and proximity to metal surfaces.
Risks associated with diving, jumping, or slipping on wet surfaces.
Dangers of excessively hot water and recommended temperature limits.
Precautions for pregnant women, individuals with medical conditions, and medication use.
Risks of prolonged immersion, overheating, and strenuous exercise.
Maintaining water chemistry and ventilation to prevent illness.
Ventilation for indoor installations to prevent waterborne illnesses.
Importance of maintaining water chemistry to prevent damage.
Restrictions for use by persons with reduced capabilities or lack of knowledge.
Spa is for residential use only; check local code restrictions.
Hair entrapment risks and precautions.
Limb entrapment risks and precautions.
Body entrapment risks and precautions.
Evisceration entrapment risks and precautions.
Mechanical entrapment risks for jewelry/accessories.
Causes, symptoms, and effects of hyperthermia (overheating) in spas.
Safety instructions specific to CSA standards for Canadian installations.
General guidelines for safe electrical installation and grounding.
Structural support consultation for elevated or non-standard locations.
Importance of proper ventilation for indoor or enclosed spa installations.
Factors to consider when choosing an ideal outdoor location for the spa.
Key considerations for installing a spa in an indoor environment.
Importance of adequate support and consulting an engineer for elevated locations.
Ensuring adequate drainage and ventilation for indoor spa installations.
Planning for easy access to spa equipment for servicing.
Specific power requirements for convertible 120/240V models.
Instructions for wiring 240 VAC heater operation.
Power requirements for North American 60 Hz models.
Power requirements for Export 50 Hz models.
Power requirements for Export 50 Hz J-210 models.
Wiring instructions for convertible 120/240V models.
Critical warnings about shock, damage, and fire hazards during wiring.
Wiring instructions for dedicated 230V-240V models.
Requirement for a dedicated circuit for the spa's power supply.
Guidance on selecting correct wire size and type for wiring.
Need for a rated switch/breaker for safe disconnection of power.
Requirement for a GFCI for the spa's electrical circuit.
Steps to access the spa's power terminal block for wiring.
Connecting the power cable to the control box.
Instructions for connecting wires to terminal blocks securely.
Reinstalling the control box door and cabinet panels after wiring.
Preparing the spa by clearing debris before filling.
Instructions on how to fill the spa with water, including cautions.
Caution against using softened water to prevent component damage.
Warning about filling with clean tap water to prevent illness.
Importance of filling via the filter bucket to prevent airlocks.
Turning on the spa power to initiate the start-up sequence.
Activating jet pumps for chemical mixing after filling.
Adding recommended chemicals to the spa water.
Warnings about handling and storing spa chemicals safely.
Establishing appropriate sanitizer levels for healthy water.
Adjusting the spa to the desired water temperature.
Details on heater operation, temperature limits, and settings.
Placing the cover to retain heat and minimize operating costs.
Warning to check water temperature before entering to avoid burns.
Procedure for decontaminating the spa if sanitizer levels are unstable.
Adding sodium dichlor for water treatment.
Caution against using chlorine tablets or acid, which can cause damage.
Keeping cover open for ventilation during chemical treatment.
Never leave a hot tub unattended with the cover open.
Turning off power and draining the spa.
Filling the spa to the correct water level, avoiding overfilling.
Caution against using softened water to prevent component damage.
Consulting dealer for chemical recommendations and maintaining levels.
Running jet pumps for chemical mixing and keeping cover open.
Warnings about unattended hot tubs and waterborne illness.
Establishing stable sanitizer readings and repeating procedure if necessary.
Following parameters for systems without CLEARRAY.
Closing air controls to maximize heat retention.
Description of the control panel interface and its buttons.
Function of the LED display for temperature, settings, and errors.
Indicator light showing when the heater is active.
Operation of the Jets 1 button for pump control.
Operation of the Jets 2 button for pump control.
Operation of the LED light system for underwater and accent lights.
Button to increase the water temperature set point.
Button to decrease the water temperature set point.
Details on temperature adjustment range and LED light behavior.
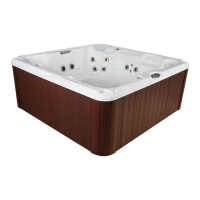
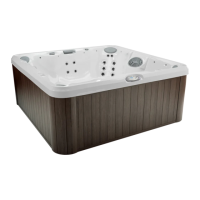
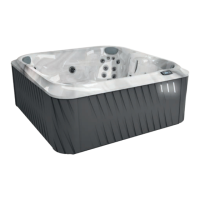
The main control interface for operating the spa.
Description of the headrest pillows.
Controls for adjusting air flow to jets.
Integrated cup holders for convenience.
Valve to divert water to different jet groups.
Underwater and accent LED lighting system.
Suction fittings designed to protect internal components.
Waterfall feature with adjustable flow rate control.
Component for heater return and gravity draining.
Filter lid and cartridge for water filtration.
Integrated speakers for the optional audio system.
The optional spa stereo system.
Description of Classic Direct Jets.
Description of Classic Euro Jets.
Description of Classic Mini Jets.
Description of Classic Luxury Jets.
Description of Classic Whirl Jet.
Specific count for Air Controls on these models.
Specific count for Headrest Pillows on these models.
Specific count for Classic Euro Jets on these models.
Specific count for Classic Luxury Jets on these models.
Identification of Classic Pulsator Jets.
Identification of Classic Turbo Jets.
Specific count for Cup Holders on these models.
Specific count for Suction Fittings on these models.
Specific count for LED Lighting System accents.
Initial display showing the spa's current software release and system check.
Display of actual water temperature after start-up.
Explanation for heater activation upon initial fill due to cold tap water.
How to adjust and set the desired water temperature.
Warning about excessive water temperature and potential harm.
Steps to activate the over-temperature feature for higher heating.
Indicator for the over-temperature feature being active.
How to re-activate the over-temperature feature if needed.
How to turn jet pumps on and off, including speed settings.
Operation of the multi-colored LED spa light system.
Tips for operating the spa light system effectively.
How to adjust water flow for individual jets.
Importance of keeping jets open for proper filtration.
Using the massage selector valve to customize jet massage.
How to use air controls to introduce air into jet lines.
Features of the optional BLUEWAVE spa stereo system.
Description of standard filtration/heating modes (F1-F3).
Description of economy filtration/heating modes (F4-F6).
Using economy modes for energy conservation.
Explanation of lock modes for service or unauthorized use.
How to select filtration/heating or lock modes.
Details on setting filtration cycle times and modes.
Specific hours and cycles for standard filtration modes.
Specific hours and cycles for economy filtration modes.
Functionality of Lock Out (L1) and Lock Mode (L2).
How to exit lock modes.
How to program and manage the CLEARRAY UV purification system.
Steps to program the CLEARRAY system or Ozone system.
Note on disabling the duration timer for O3 option.
Indicator for when CLEARRAY bulb replacement is needed.
Steps to reset the CLEARRAY duration timer after bulb replacement.
General information on maintaining the spa for beauty and performance.
Warnings about entrapment risks related to spa maintenance.
Instructions for cleaning the spa's filter cartridge.
Critical instruction to turn off power before cleaning filters.
Filter system description for J-210, J-235, J-245, J-275 models.
Steps to safely clean the spa filter cartridge.
Removing the filter cartridge for cleaning.
Rinsing filter pleats thoroughly with a hose.
Filter maintenance for J-210 models' footwell suction covers.
Filter system description for J-280 models.
Instructions for filter cleaning and replacement for J-280 models.
Critical instruction to turn off power before filter maintenance.
Lifting the filter skimmer cover.
Removing and cleaning the skimmer bag.
Rotating the filter cartridge handle to unthread it.
Lifting the unthreaded filter cartridge.
Rinsing filter cartridge pleats with a hose.
Submerging the filter cartridge to remove air bubbles.
Installing the filter cartridge by rotating clockwise.
Reinstalling the clean skimmer bag.
Installing the filter cover.
Advice on deep cleaning filter cartridges and their lifespan.
Procedure for draining and refilling the spa water.
Critical caution to turn off power before draining the spa.
Precautions for draining in cold or hot weather conditions.
Step-by-step instructions for draining the spa.
Removing the cabinet door to access draining components.
Pulling out the drain hose from the equipment bay.
Unthreading the drain cap and opening the drain valve.
Reinstalling the drain cap and closing the drain valve.
Coiling and storing the drain hose.
Reinstalling the cabinet door and referring to fill-up procedure.
How to clean and reinstall the spa's headrest pillows.
How to clean the spa interior surface without causing damage.
How to clean, condition, and maintain the spa's vinyl cover.
Steps for cleaning and conditioning the spa cover's vinyl.
Additional tips for spa cover care and maintenance.
How to clean and maintain the spa's synthetic cabinet.
Caution against spraying the cabinet with a hose to avoid electrical shorts.
Instructions and recommendations for winterizing the spa.
Recommending professional winterization by a dealer.
Critical instruction to turn off power before winterizing.
Referencing draining procedure before winterizing.
Removing residual water from seats and footwell.
Setting diverter valves for plumbing line drainage.
Opening waterfall valve for plumbing line drainage.
Removing drain plugs from pumps and heater.
Draining the CLEARRAY system hose.
Reinstalling cabinet panels and covering the spa.
Procedures and precautions for restarting a spa after cold weather.
Importance of maintaining water quality for enjoyment and equipment life.
Consequences of not maintaining water quality.
Caution against storing chemicals in the equipment bay.
Explanation of pH measurement and its importance for spa water.
Information on sanitizers like chlorine and bromine for spa water.
Warnings about leaving hot tubs unattended and chemical exposure.
Caution against using chlorine tablets or acid, which can cause damage.
How the CLEARRAY system uses UV light to purify spa water.
Note on when the CLEARRAY system operates.
Procedures for replacing the UV bulb and cleaning the quartz tube.
Critical instruction to turn off the spa breaker.
Warning to drain the spa before quartz tube maintenance.
Warning to allow the lamp to cool before removal.
Danger of severe eye damage from looking at the lit bulb.
Steps for UV bulb replacement and quartz tube maintenance.
Turning off power and draining the spa.
Critical safety warning before removing covers.
Removing the CLEARRAY enclosure cover and gasket.
Removing the black bulb boot.
Slowly removing the UV bulb from the quartz tube.
Removing the bulb socket from the UV bulb.
Removing the quartz seal compression nut.
Preparing to clean or replace the quartz tube.
Cleaning the quartz tube with a paper towel or cloth.
Warning against using abrasive cleaners on the quartz tube.
Rinsing the quartz tube after cleaning.
Installing the new quartz tube.
Reinstalling the compression washer.
Reinstalling and tightening the quartz seal compression nut.
Refilling the spa after maintenance.
Testing for leaks after reassembly.
Reconnecting and testing the CLEARRAY system.
Reconnecting the bulb socket to the new UV bulb.
Warning about touching the UV lamp with bare hands.
Sliding the new UV bulb back into the quartz tube.
Reinstalling the black bulb boot.
Reinstalling the enclosure cover and gasket.
Reconnecting the CLEARRAY system and turning on power.
Proper disposal of the old UV bulb.
Warning about mercury content in UV bulbs and proper disposal.
Checking the ballast indicator lights for CLEARRAY system status.
Overview of the spa's self-diagnostic system and error messages.
Explanation of the 'COL' display for cool conditions.
Explanation of the 'ICE' display for freeze protection.
Explanation of 'SN1' for open/shorted sensor (heater disabled).
Explanation of 'SN2' for open/shorted sensor (heater disabled).
Explanation of 'FL1/FL2' for pressure switch issues.
Verifying water level to resolve FL1/FL2 errors.
Checking the filter cartridge for clogs.
Purging air locks from the jet pump.
Contacting dealer if the problem persists.
Explanation of 'OH' for high temperature limits.
Warning about high temperatures and not entering the spa.
Explanation of '---' for safety watchdog trigger (spa deactivated).
Warning about safety watchdog activation and spa deactivation.
Explanation of 'BLB' for UV bulb replacement needed.
General procedures for troubleshooting spa operational issues.
Note on replacing damaged accessory cords by authorized personnel.
Troubleshooting steps when no spa components operate.
Troubleshooting when the pump doesn't operate but the light does.
Checking water level and power for pump issues.
Troubleshooting when pump runs but no water flows to jets.
Verifying jet positions for pump flow issues.
Priming the pump after draining and refilling.
Troubleshooting steps for poor jet performance.
Ensuring jets are fully open for good action.
Confirming pump #1 is active.
Opening air controls for maximum jet action.
Checking and cleaning the filter for jet action issues.
Troubleshooting when the water temperature is too high.
Troubleshooting steps when the spa is not heating.
Checking the thermostat setting for heating issues.
Keeping the cover on to aid heating.
Checking filtration mode settings for heating issues.
Advice to contact dealer if troubleshooting steps fail.
Wiring diagram for North American 240V 60 Hz models.
Instructions for operating the optional BLUEWAVE spa stereo system.
Operating the media locker handle.
Power button operation for the stereo system.
Connecting auxiliary devices via a 3.5mm cable.
Connecting devices via USB.
Using the auxiliary device holding base.
Using the 3.5mm cable for connections.
Using the Apple 30-pin to USB cable.
Caution against operating electrical devices with wet hands.
Operating MP3, USB, or Apple devices with the stereo.
Operating a USB drive with the stereo system.
Connecting an auxiliary player using a 3.5mm cable.
Connecting a Bluetooth device to the stereo system.
Operating a Bluetooth device with the stereo remote.
Caution against operating electrical devices with wet hands.
Steps to pair the wireless remote with the stereo unit.
Adjusting various audio settings like bass, treble, balance.
Adjusting the bass level of the stereo system.
Note on DSP disabling bass/treble adjustments.
Adjusting the treble level of the stereo system.
Adjusting the speaker balance (left/right).
Adjusting the speaker fade (front/rear).
Selecting digital sound processor presets (Rock, Classic, Pop).
Selecting the radio area setting (USA or EUR).
Adjusting the loudness setting (ON/OFF).
Adjusting the distant radio setting (DX/LOCAL).
Selecting the stereo output mode (Stereo or Mono).
Functions of the wireless remote control for the stereo system.
Controlling external media devices like iPod/MP3 via remote.
Mapping of remote buttons to USB device functions.
Mapping of remote buttons to radio functions.
Connecting electronic devices and their functions.
Important notes regarding stereo operation and remote control.
Steps for operating the radio function of the stereo.
Connecting Apple devices and MP3 players via USB.
Caution against operating electrical devices with wet hands.
Operating MP3, USB, or Apple devices with the stereo.
Operating a USB drive with the stereo system.
Information displayed during music playback.
Reference to external media playback functions.
Connecting an auxiliary player using a 3.5mm cable.
Connecting a Bluetooth device to the stereo system.
Operating a Bluetooth device with the stereo remote.
Caution against operating electrical devices with wet hands.
Steps for replacing the battery in the wireless remote control.
Locating the battery door on the remote unit.
Rotating the battery door to the open position.
Removing the battery door.
Replacing the battery with a CR2430 or equivalent.
Reinstalling and closing the battery cover.
Note that the remote is water-resistant, not waterproof.
Technical specifications for the Bluewave Spa Stereo System.
| Heater | 4kW |
|---|---|
| Insulation | Full Foam |
| Shell Material | Acrylic |
| Dimensions | 84 in x 84 in x 36 in |
| Electrical Requirements | 240V |
| Cabinet Material | Synthetic |
| Jets | 35 Jets |