deal with electrical wiring, disconnect the incoming wires that attach to the
terminal at the control box, remove the cord from the box, and pull the box up and
out then reverse when installing. The key part if you decide to do yourself is the
note which wire goes where. The key is you have a NEUTRAL which should be
either a white wire or a wire with white tape on it. Then you have two HOTS which
are either red and black wires or sometimes just black. Then you have a
GROUND wire. The terminal identifies the neutral, hots, and ground lines. Failure
to connect the wires back as previously wired can damage the board. Fortunately
the wires tend to stay in the right configuration. Also remember to insert the wires
completely into the terminal block and tighten the screw.
Now lift the control box out enough that you can comfortably reach down and
loosen the 2 other bolts holding the heater in place. Remove bolts or loosen to
end.
Now the only thing holding the assembly in place are the OH sensor and the two
wires connected to the pressure switch.
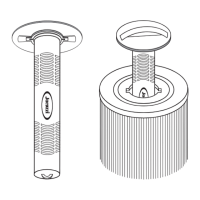
To remove the OH sensor, simply pull out of the clip holding it to the heater. I
have found times that the clip was TOO tight and had to bend the clip apart taking
care not to damage the sensor. But normally the sensor pulls straight out.
Simply pull the 2 wires off the pressure switch. When you reattach, there is no
proper sequence
Now simply remove the heater assembly and install the new.
Reverse.
On Models built 1997-1999 with a DIAL Temperature Control on Topside.
Again, I learn to think outside the box. It seems almost impossible to remove the
heater assembly with the control box in place. It’s not but my way is easier and
quicker.
Turn off main power and drain spa. Disconnect heater from spa plumbing.
Open the metal cover on the control box. You will see 2 copper straps running
 Loading...