Page 6
Section 4. Backwash Mode
1. Turn off the system pump(s).
WARNING
NEVER attempt to assemble,
disassemble or adjust the lter when
there is pressurized air in the system.
Starting the pump while there is
any pressurized air in the system
can cause the lter lid to be blown
off, which can cause death, serious
personal injury or property damage.
2. Open the air release valve on top of the lter tank
to release all pressure from inside the tank and
system. Wait for all the air to evacuate the system.
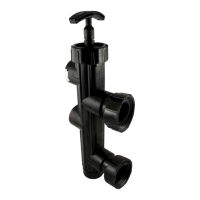
3. (Jandy DEL, DEV, and JS series Filters) Ensure
that the Slide Valve handle is fully extended
(handle pulled all the way up). See Figure 7.
(Other Manufacturers Filters with the lter
top port as the inlet) Ensure that the Slide Valve
handle is fully depressed (handle and piston
pushed all the way down). Turn the handle until
the stainless steel pin on the piston locks into the
position bracket.
4. Turn on the system pump(s) and run the system
until the waste water runs clean.
Figure 7. Handle Positions (SVLV2 shown)
Caution - Handle Positions for
Backwash Only
DE Filter
Handle
Fully
Extended
(pulled up)
Sand Filter
Handle Fully
Depressed
(pushed down)
Lid Union Nut
Figure 8. Loosen Lid Union Nut
4. Grab the Slide Valve handle and pull the shaft
assembly out of the valve. See Figure 9.
5. Inspect the shaft and the o-rings for wear, cuts,
cracks, and debris. If the o-rings show any sign
of wear or damage, replace with Jandy o-ring and
Roll Pin Replacement Kit (P/N R0442100).
IMPORTANT NOTE: Be sure to follow any and all
applicable local codes related to proper discharge/
drainage of water from your pool/spa.
5. Turn off the system pump(s).
6. Return the Slide Valve handle to the normal
operating position. See Section 3.
7. Turn on system pump(s) and check for normal
water ow.
Section 5. Servicing
WARNING
NEVER attempt to assemble,
disassemble or adjust the lter when
there is pressurized air in the system.
Starting the pump while there is
any pressurized air in the system
can cause the lter lid to be blown
off, which can cause death, serious
personal injury or property damage.
1. Turn off the system pump(s).
2. Open the air release valve on top of the lter tank
to release all pressure from inside the tank and
system. Wait for all the air to evacuate the system.
3. Loosen the lid union nut. See Figure 8.
 Loading...