8 9
4. 1 REMOTE
The control is simply clipped onto the handle of the paddle at selected
height. lt must be mounted parallel to the paddle and point towards
the driver.
4. 2 E-FIN
To mount the E-Fin, turn the SUP/board on its back so that the fin
mount is facing up. Depending on the fin mount on your board, choose
the right system and screw the adapter onto the E-Fin with the three
screws and allen key provided. Make sure to tighten the screws only
lightly and without great force so as not to damage the adapter. The
E-Fin then can be attached to your board.
4. 3 US-FINBOX SYSTEM
The US finbox system has a standardized fin box. Here the fin is fixed
in the box with a small washer and a screw. The whole thing works
without tools, as the screw can be screwed in by hand. This system
requires some dexterity to get the plate through the fin. The more often
the fin is installed, the easier it will become.
4. 4 SLIDE-IN SYSTEM
This system is very easy to assemble. The fin is simply pushed into the
box and then secured with the small pin (on the strap).
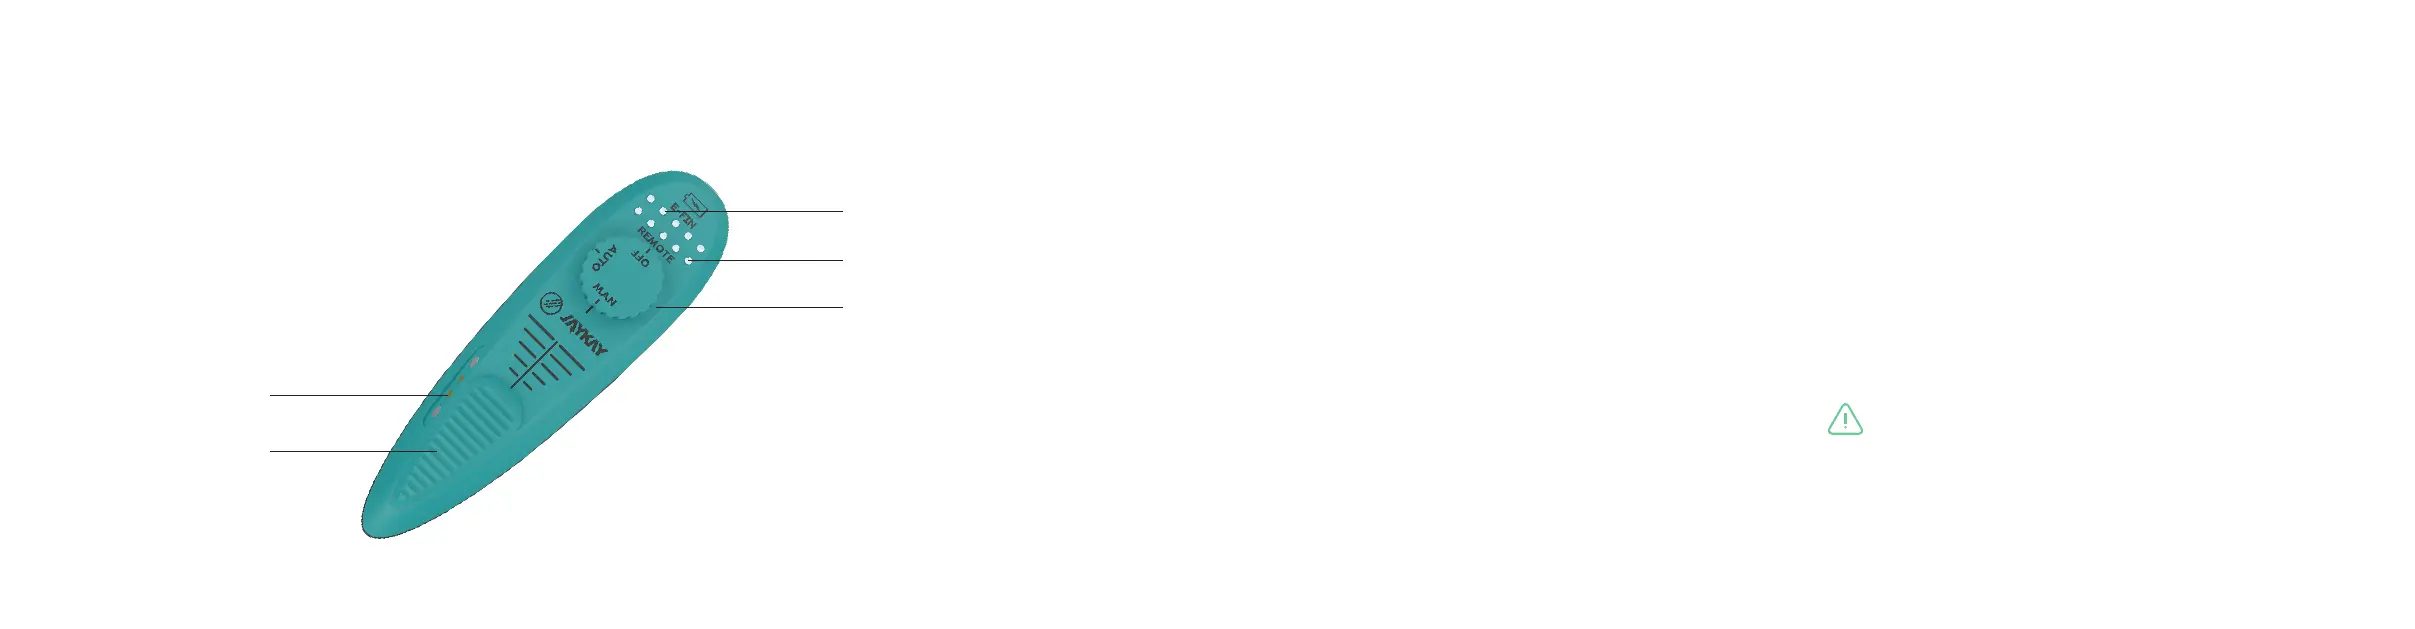
4. ASSEMBLY3. REMOTE GLOSSARY
Power controller
Charging port
Battery level E-Fin
Batter level remote
Rotary knob with OFF /
AUTO / MANUAL function
Note: The E-Fin is not compatible with carbon reinforced
boards and sinkers, as both can cause radio interruptions
between the E-Fin and remote.