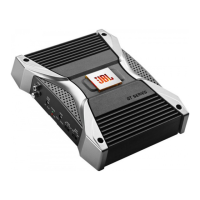
EasyManua.ls Logo

JBL DECADE DA1002 - Page 6

JBL DECADE DA1002
8 pages
Print Icon
To Next Page IconTo Next Page
To Previous Page IconTo Previous Page
Loading...
Applications
For your convenience, weve included
several application diagrams to help you
plan your own system installation.
Figures 1 through 4 show how to config-
ure the Decade Series power amplifiers
for stereo, bridged-mono and tri-mode
operation.
(Note: For simplicity, figures do not
show power, remote and input connec-
tions.)
Figure 1. This wiring diagram shows a
DA4002, DA6502 amplifier set to stereo
to drive a pair of full-range speakers.
Figure 2.This wiring diagram shows a
DA1002 amplifier set to bridge mode
(mono) to drive a single subwoofer.
Figure 3.This wiring diagram shows a
DA4002, DA6502 amplifier set for tri-
mode operation. For a desired crossover
frequency, use the chart on page 4 to
select an inductor for the subwoofer,
and corresponding capacitors for left
and right speakers.
Figure 4.This wiring diagram shows a
DA3504 set to drive a pair of 5-1/4"
2-way speakers with the two front
channels, and the rear channels set
to drive a single subwoofer in bridge
mode.
6
SPEAKER OUTPUT
+
RIGHT
+
LEFT
+
POWER
REM GND(
) BATT(+)
FUSE
BRIDGED
15 AMP
15
+
+
LEFT RIGHT
+
BRIDGED
SPEAKER OUTPUT
POWER
FUSE
20 AMP
REM GND(
) BATT(+)
20
SPEAKER OUTPUT
+
+
+
POWER
REM GND(
) BATT(+)
BRIDGED
RIGHTLEFT
FUSE
20 AMP
20 AMP 20 AMP
20
20
L
L
+
+
+
R
R
R
+
SPEAKER INPUT LINE INPUT
R
L
110
BASS EQ
INPUT LEVEL
L
OFF
6dB
+
LOW PASS
FILTER
OFF 70Hz 100Hz
SPEAKER INPUT
L
L
L
+
+
R
R
R
LINE INPUT
110
BASS EQ
INPUT
LEVEL
CROSS OVER
OFF
6dB
+
LPF HPFFLAT
+
+
+
REAR
LEFT RIGHT
+
+
LEFT RIGHT
BRIDGED
+
BRIDGED
SPEAKER OUTPUT
FRONT
POWER FUSE
30 AMP
REM GND(
) BATT(+)
30
SPEAKER
INPUT
INPUT
MODE
SPEAKER
INPUT
INPUT
MODE
STEREO
MONO
L
+
R
+
LINE INPUT
R
L
110
BASS
EQ
BASS
EQ
INPUT
LEVEL
INPUT
LEVEL
CROSS
OVER
CROSS
OVER
OFF
6dB
+
OFF
6dB
+
LPF HPF
FLAT
LPF HPF
FLAT
110
LINE INPUT
R
L
STEREO
MONO
L
R
+
Figure 1
Figure 2
Figure 3
Figure 4
DA OM 7/14/98 11:38 AM Page 6

Related product manuals