MOUNTING IN JBL
ENCLOSURES
JBL
dividing
networks are normally installed in
the back panel of the loudspeaker enclosure. In
JBL
enclosures, they may be easily installed di-
rectly
into the mounting hole
which
is provided.
Make
sure
that the white tubular
gasket
is in place
around the network flange. Center the network
into
the mounting hole and
secure
by
driving
four
#6 x %" round
head
wood
screws
into the outside
surface of the panel. (To
install
the
LX4-2
net-
work
into the standard cutout, the F2 mounting
flange is required.)
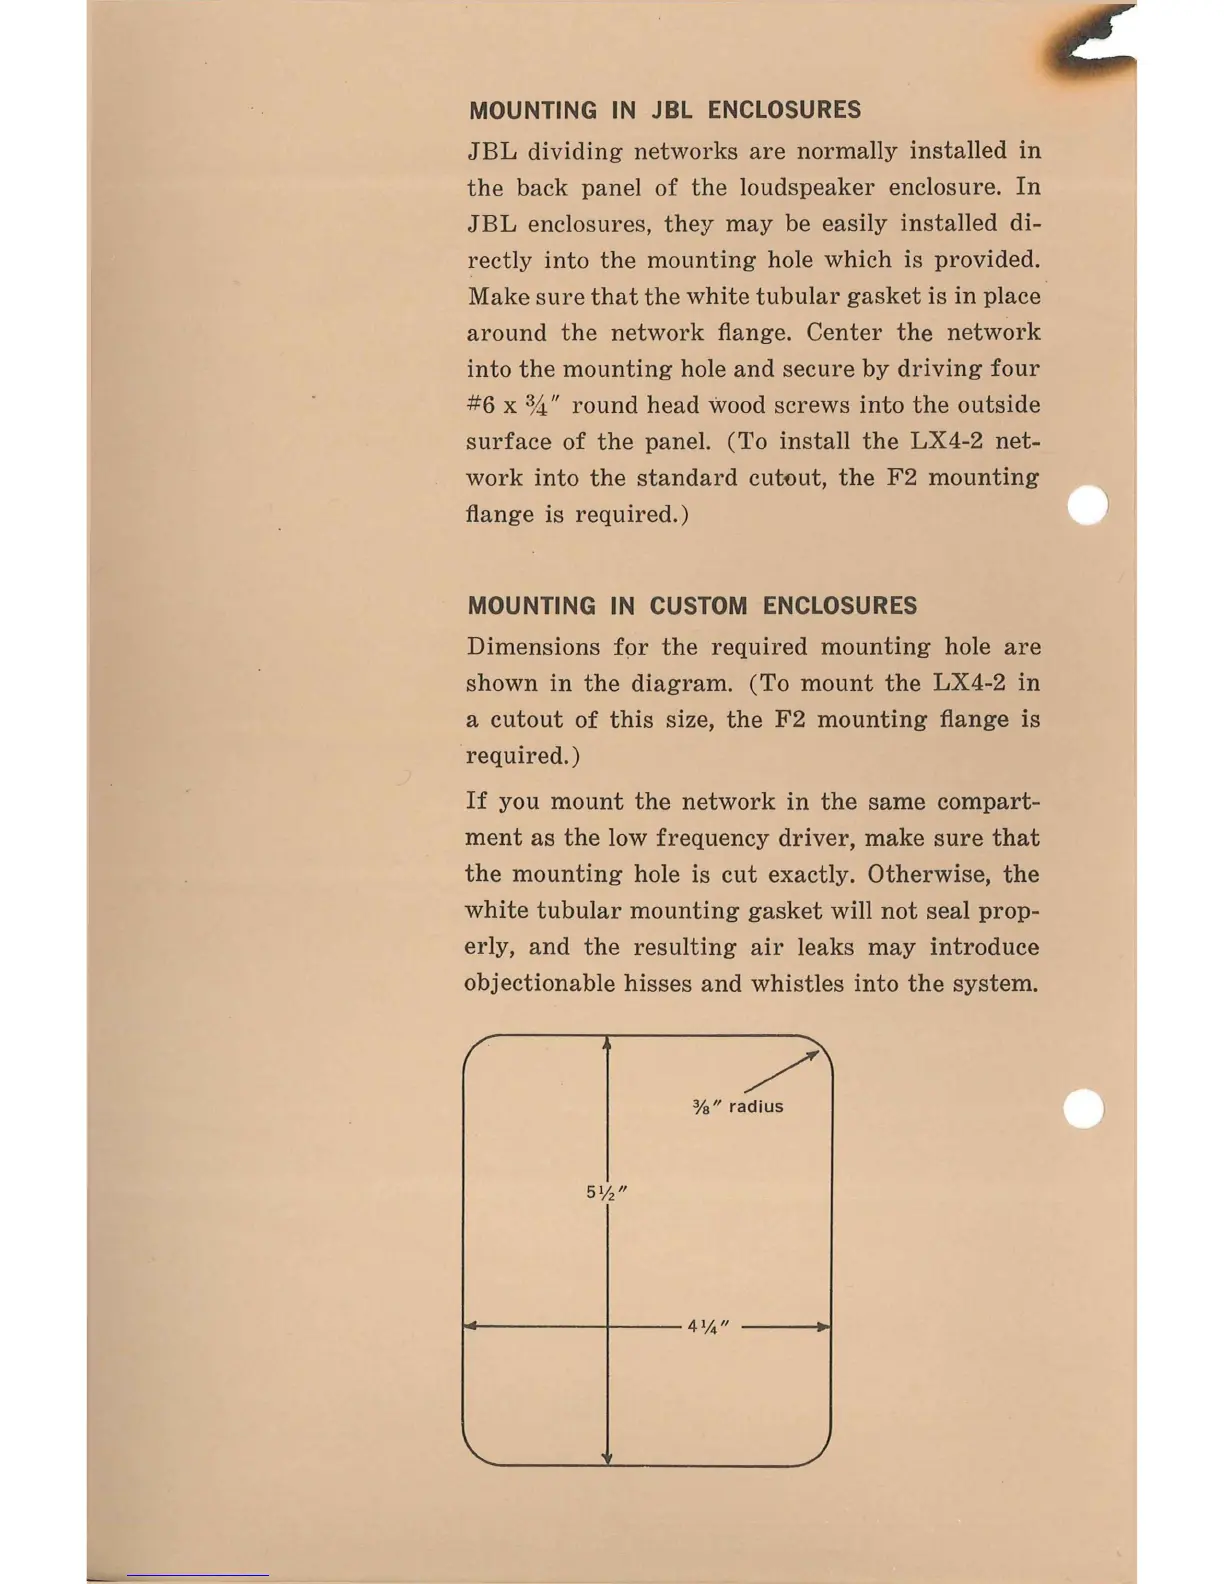
MOUNTING IN
CUSTOM
ENCLOSURES
Dimensions for the required mounting hole are
shown in the diagram. (To mount the
LX4-2
in
a cutout of this size, the F2 mounting flange is
required.)
If
you mount the network in the
same
compart-
ment as the low frequency driver, make
sure
that
the mounting hole is cut exactly. Otherwise, the
white
tubular mounting
gasket
will
not
seal
prop-
erly,
and the resulting air leaks may introduce
objectionable
hisses
and whistles into the system.