48
GB
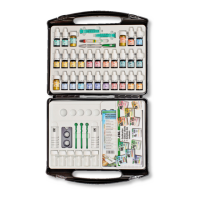
Mg Magnesium Test Set for fresh water
Special features:
The JBL Mg Magnesium Test Set (fresh water) is designed for measuring and doing routine checks of
magnesium content in freshwater aquariums within a range of 0 - 10 mg/l (ppm).
Why test?
Magnesium and calcium together form the total hardness. Like potassium, magnesium is a macroelement which
is required for healthy and strong plant growth. The magnesium levels in mains water (including water with a high
total hardness) are very often too low for aquatic plants, so that deciency symptoms appear after a short time
already. The symptoms of magnesium deciency are similar to those of iron deciency. Yellowing (chlorosis)
occurs between the veins of the leaves. This may be signicantly more pronounced than in iron deciency.
Incurved leaves are another symptom. These symptoms are not just limited to old leaves and instead, also appear
in new fresh leaves. As a result, the available magnesium concentrations may be too low, causing plant growth to
stagnate, even if the aquarium water is fertilised regularly (e.g. weekly). We recommend daily measurements of
the potassium concentration of your tank water initially. This permits determination of the plants’ requirements and
corresponding correct dosing of the fertiliser. Afterwards, you can gradually change over to routine measurements
carried out at longer intervals. The value should be somewhere between 5 and 50 mg/l for good plant growth.
Remedial measures for fresh water:
Magnesium concentration too low (< 5 mg/l): Fertilisation with JBL Ferropol or JBL ProScape Fe +Microelements
and with JBL ProScape Mg Macroelements in particular.
Instructions for the Magnesium Test in fresh water:
1. Rinse both beakers several times with the water to be tested.
2. Rinse the syringe with the water which is to be tested beforehand!
3. Use the enclosed syringe to ll each of the test jars with 10 ml of sample water each.
4a. Add 7 drops of Reagent 1 to one of the two test jars and mix by agitating.
4b. Add 3 drops of Reagent 2 to this test jar and mix by agitating.
4c. Add 2 drops of Reagent 3 to this test jar and mix by agitating.
5. Allow to settle for 1 minute until the colouring develops fully. The solution will remain stable for 15 minutes,
which is why readings taken after 15 minutes may deviate!
6. Place both test jar s into the comparator bloc k: the jar with added reagent into the smooth end of t he comparator
block, the jar with the untreated sample water (blank sample) into the notched end of the comparator block.
7. Move the comparator block with the notched side of the block facing the scale and with both test jars from
side to side over the colour chart until the colour of the sample with added reagent matches the colour
under the blank sample as well as possible.
8. Take a reading of the magnesium concentration in the notch of the comparator.
Please observe the safety instructions!
You will also nd easy-to-follow pictographic instructions on the reverse side of the colour chart.
Our tip for ecologically minded users:
All reagents for the JBL Test Sets are commercially available as reasonably priced rells!
Warning and safety note concerning Reagent 2:
Danger
Contains sodium hydroxide. Causes severe skin burns and eye damage. If medical advice
is needed, have product container or label at hand. Keep out of reach of children. Wear
protective gloves/protective clothing/eye protection/face protection. IF IN EYES: Rinse
cautiously with water for several minutes. Remove contact lenses, if present and easy to
do. Continue rinsing. Immediately call a POISON CENTER or doctor/physician.
 Loading...