TherstthingyouneedtodoistodeterminetheactualstartinglocationofabendproducedbytheBendingDieyouinstalled
inthebender.Thiscanvarybetweendiesetsandmustbecheckedforeverydiesetpurchased.Inthebelowexampleweare
using11/2"O.D.tubingandaBendingDiewithaCenterLineRadiusof61/2".
Here'stheprocedure:
A) Placeapieceoftubing(app.21/2'long)intothebendersothatexactly12"extendsoutfromtheedgeofthedietothe
end of the tubing when the tubing is fully seated in the Bending Die's groove. Place a little bending pressure on the tube
soastoseatthetubingintheBendingDie.Notenoughtostartbendingthetubingjustenoughtoseatitinthegroove.
NOTE: If you lay a small length of tubing in the groove of a Bending Die you will notice the tubing does not seat to the
bottom of the groove. The Bending Dies are deliberately machined this way so that during the bending operation a
side force is developed in the tubing. This helps to reduce at spotting and
wrinkles.
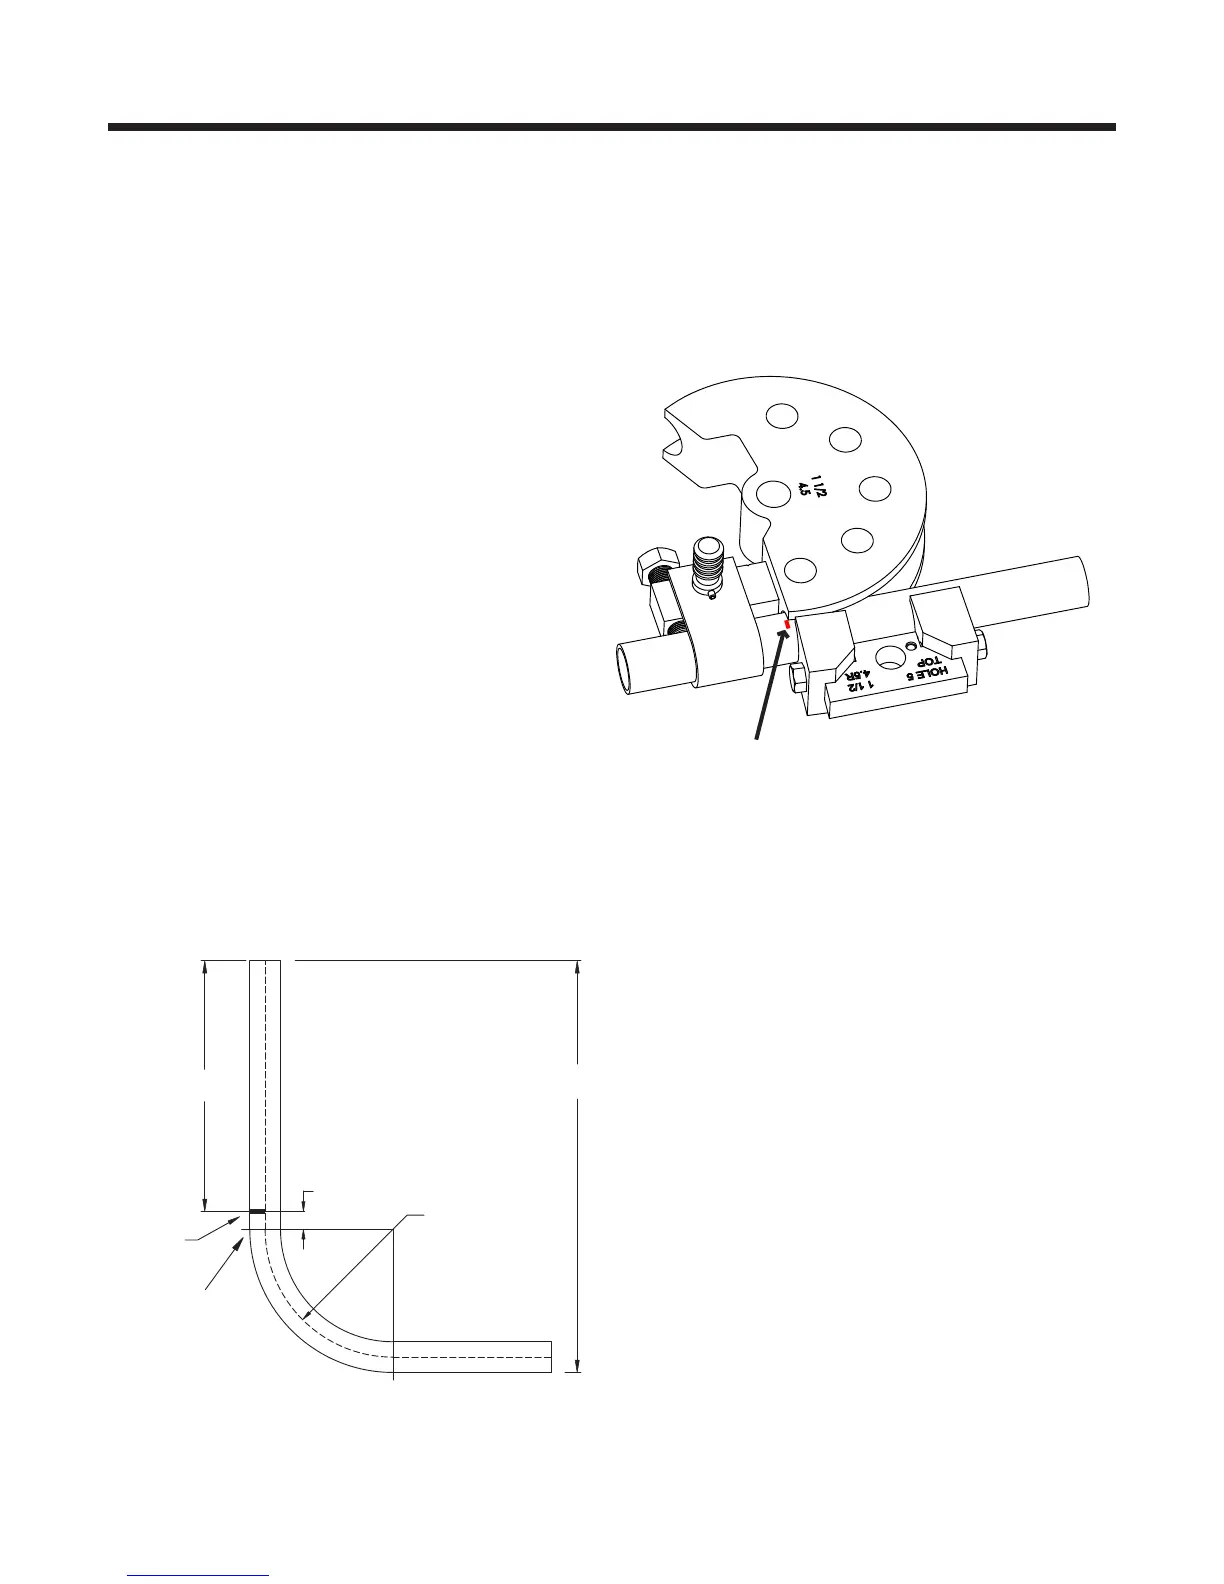
B) Using a Black Magic Marker mark a line on the
tubingpreciselyattheedgeofthedie.Seegure
25.
C) Bend the tube to an exact 90 degrees. Use a
carpenters square to check the angle. You will
have to overbend the tube a little to account for
springback.Howmuchtooverbendwillcomewith
practice. If you overbend the tube a little don't worry.
Becausecoldworkedsteelhasmemory,youcan
place the tube in a vise or anything else that will
retainit,andsimplyunbendit.Obviouslythisonly
works for small amounts of overbend. If the tubing
isunderbent,itwillbenecessarytoputitbackinto
the bender.
D) Withthetubebentcorrectlyto90degreeslocate
theactualstartofthebend.Todothis,measure
fromtheendofthetubetothefarendofthe90
degreebend.Intheexampleingure26thiscame
outat201/4". Subtract 61/2"forthe centerline
radius(CLR)oftheBendingDie,another3/4"for
theradiusofthetubingnotseatedinthedie,and1/8"forspringback.(SubstitutetheCLRandtuberadiustomatchyour
dieset).The1/8"gureforspringbackisanapproximation,notanexactgure.Howeveritisusuallyveryclosetothe
realthingandmaybeusedwithoutworrytodeterminetheactualstartinglocationofthebend.So:
20 1/4" - 6 1/2" - 3/4" - 1/8" = 12 7/8"
Nowsubtractfromthe127/8"theoriginal12"wehad
markedearlierandyoundthatthebendwillactually
start7/8"infromtheedgeofthebendingdie.Nowwe
knowforexample,ifwewant40"fromtheendofthe
tubingtothestartofthebend,wemustsubtract7/8"
from40"andsetthetubing391/8"fromtheedgeof
the Bending Die.
Anotherexample,youwant36"fromthebottomtothe
top of a rollbar. Tube size is 1 3/4" and you have an
actual bend start 1/2" inside of the Bending Die's edge.
TheCLRoftheBendingDieis71/2".So:36"-1/2"
(ActualBendstart)-71/2"(CLRofdie)-7/8"(Half
ofthetubingdiameter)-1/8"(Springback)=27".Set
the tube 27" from the edge of the Bending Die and
make the bend.
Bending Method #2 - Using Math Formulas
Figure 25
Actual start
of bend
6 1/2" CLR
7/8"
20 1/4"
12"
Mark
Figure 26
Mark here at the saw cut edge of
die (not at the followbar's insert)
- 12 -
 Loading...