Chapter
9
Brakes
9
-
15
LINES
TO
WHEEL
BRAKE
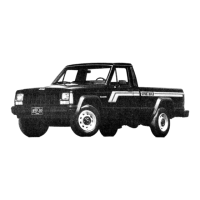
11.8 When bleeding the
UNITS
(BLEED
MODULATOWMASTER
brakes, a hose is connected
to the bleeder valve at the
caliper or wheel cylinder
and then submerged in
brake fluid. Air will be seen
as bubbles in the tube and
container. All air must be
expelled before moving to
the next wheel.
FLUID
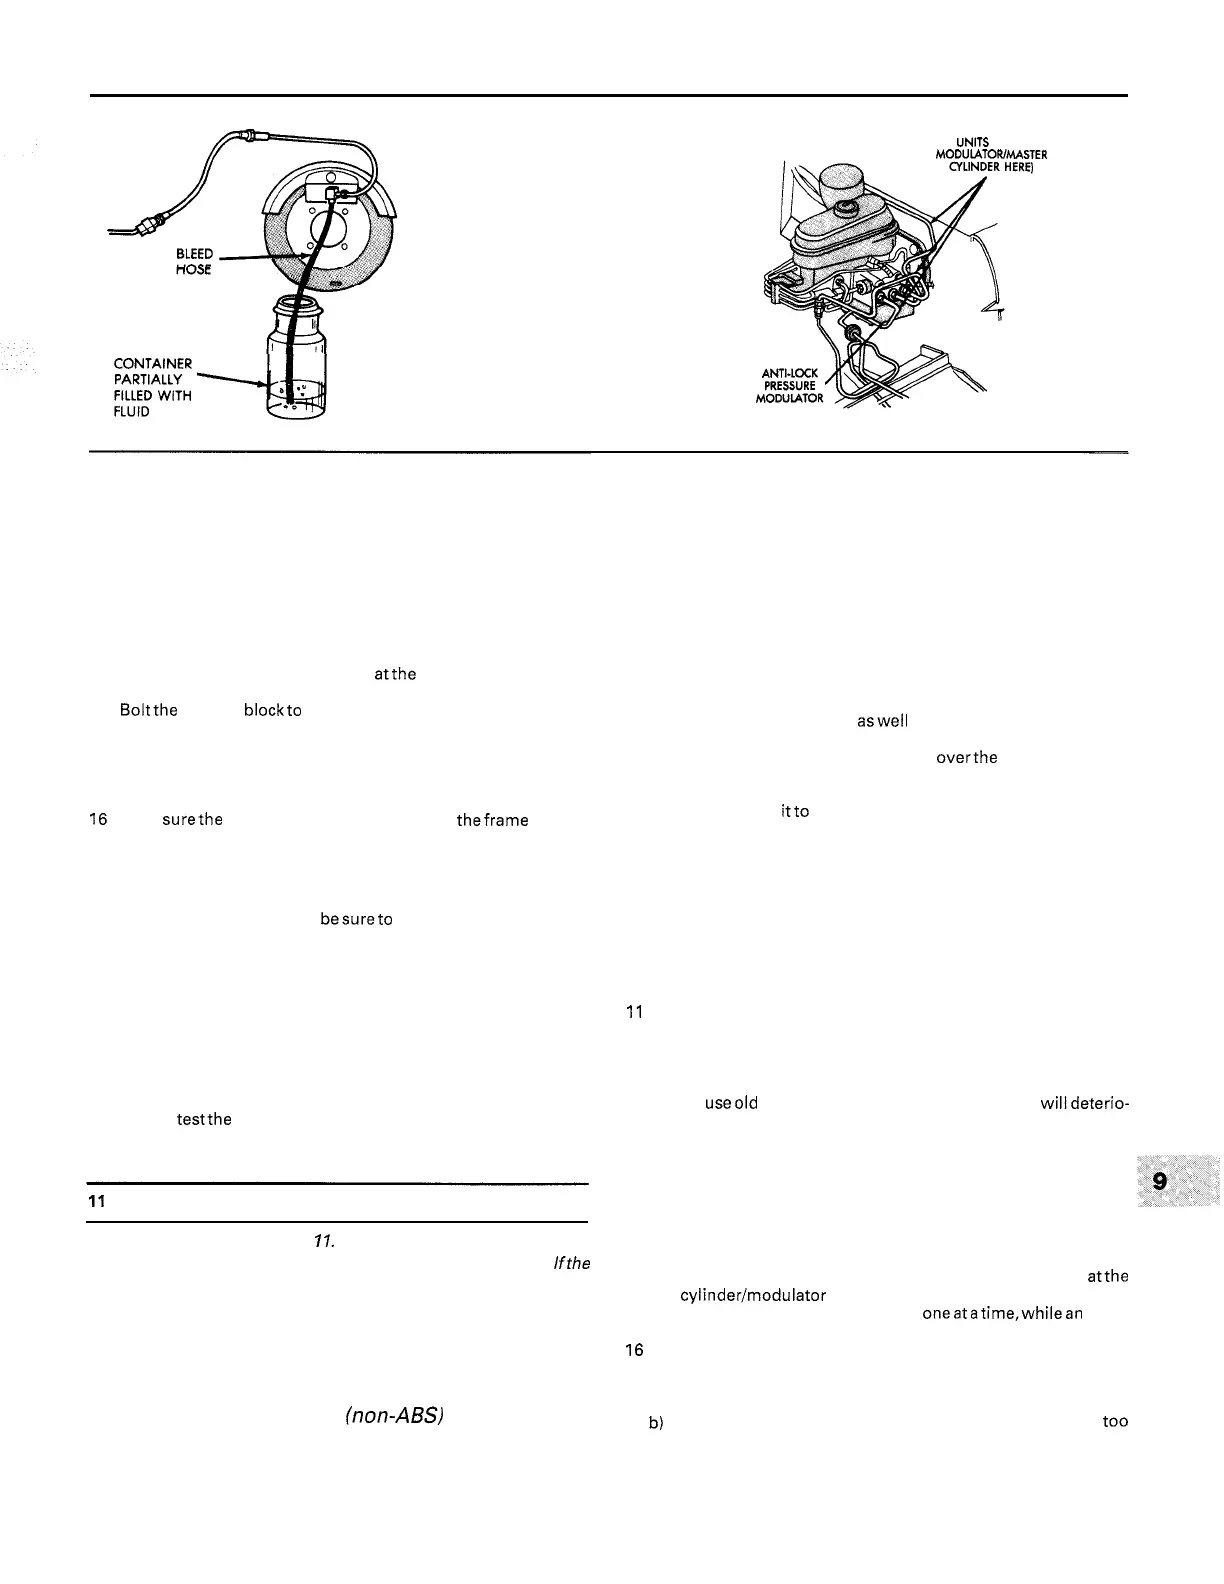
11.15 Master cylinderlmodulator bleeding points
9 When the brake hose installation iscomplete, thereshould be no
kinks in the hose. Make sure the hose doesn't contact any part of the
suspension. Check this by turning the wheels to the extreme left and
right positions. If the hose makes contact, remove it and correct the
installation as necessary. Bleed the system (Section 11).
Rear brake hose
10 Using a back
-
up wrench, disconnect the hose at the frame brack
-
et, being careful not to bend the bracket or steel lines.
11 Remove the U
-
clip with a pair of pliers and separate the female
fitting from the bracket.
12 Disconnectthetwo hydraulic lines
atthe junction block, then un
-
bolt and remove the hose.
13
Boltthe junction blockto the axle housing and connectthe lines,
tightening them securely. Without twisting the hose, install the fe
-
male end of the hose in the frame bracket.
14 Install the U
-
clip retaining the female end to the bracket.
15 Using a back
-
up wrench, attach the steel line fittings to the fe
-
male fittings. Again, be careful not to bend the bracket or steel line.
16 Make surethe hose installation did not loosen theframe bracket.
Tighten the bracket if necessary.
17 Fill the master cylinder reservoir and bleed the system (refer to
Section 11).
Metal brake lines
18 When replacing brake lines besureto usethecorrectparts. Don't
use copper tubing for any brake system components. Purchase steel
brake lines from a dealer or auto parts store.
19 Prefabricated brake line, with the tube ends already flared and
fittings installed, is available at auto parts stores and dealers. These
lines are also bent to the proper shapes.
20 When installing the new line, make sure it's securely supported
in the brackets and has plenty of clearance between moving or hot
components.
21 After installation, check the master cylinder fluid level and add
fluid as necessary. Bleed the brake system as outlined in the next
Section and
testthe brakescarefully beforedrivingthevehicle in traf
-
fic.
11 Brake system bleeding
Refer to illustrations
11.8
and
I
I.
15
Warning:
Weareyeprotection when bleeding the brakesystem. Ifthe
fluid comes in contact with your eyes, immediately rinse them with
water and seek medical attention.
Note:
Bleeding the hydraulic system is necessary to remove any air
that manages to find its way into the system when it's been opened
during removal and installation of a hose, line, caliper or master cyl
-
inder.
Vehicles with conventional fnon-ABS) brakes
1
It will probably be necessary to bleed the system at all four
brakes if air has entered the system due to low fluid level, or if the
brake lines have been disconnected at the master cylinder.
2
If a brake line was disconnected only at a wheel, then only that
caliper or wheel cylinder must be bled.
3
If a brake line is disconnected at a fitting located between the
master cylinder and any of the brakes, that part of the system served
by the disconnected line must be bled.
4 Remove any residual vacuum from the brake power booster by
applying the brake several times with the engine off.
5 Removethe master cylinder reservoir cover and fill the reservoir
with brake fluid. Reinstall the cover.
Note:
Check the fluidleveloften
during the bleeding operation and add fluid as necessary to prevent
the fluid level from falling low enough to allow air bubbles into the
master cylinder.
6 Have an assistant on hand, aswell as a supply of new brake fluid,
a clear container partially filled with clean brake fluid, a length of
3116-inch plastic,
rubberorvinyl hosetofit overthe bleedervalveand
a wrench to open and close the bleeder valve.
7 Beginning at the right rear wheel, loosen the bleeder valve
slightly, then tighten
itto a pointwhere it is snug but can still be loos
-
ened quickly and easily.
8 Place one end of the hose over the bleeder valve and submerge
the other end in brake fluid in the container
(see illustration).
9 Have the assistant pump the brakes slowly a few times to get
pressure in the system, then hold the pedal firmly depressed.
10 While the pedal is held depressed, open the bleeder valve just
enough to allow a flow of fluid to leave the valve. Watch for air
bubbles to exit the submerged end of the tube. When the fluid flow
slows after a couple of seconds, close the valve and have your assis
-
tant release the pedal.
11 Repeat Steps 9 and 10 until no more air is seen leaving the tube,
then tighten the bleeder valve and proceed to the left rearwheel, the
right front wheel and the left front wheel, in that order, and perform
the same procedure. Be sure to check the fluid in the master cylinder
reservoir frequently.
12 Never
useold brakefluid. ltcontainsmoisturewhich willdeterio-
rate the brake system components.
13 Refill the master cylinder with fluid at the end of the operation.
14 Check the operation of the brakes. The pedal should feel solid
when depressed, with no sponginess. If necessary, repeat the entire
process.
Warning:
Do not operate the vehicle if you are in doubt
about the effectiveness of the brake system.
Vehicles with ABS brakes
15 Ifequipped with ABS brakes, begin by bleeding thesystem atthe
master cylinder/modulator
(see illustration).
This is done by loosen
-
ing and tightening the brake linefittings, oneatatime,whilean assis
-
tant operates the brake pedal. The ignition must be on.
16 The remaining bleeding operations are the same as for conven
-
tional brakes. However, note the following:
a) It is imperative that no dirt enter the system with the reservoir
cap off.
b) Insure that the fluid in the master cylinder does not drop too
low during bleeding, since this will lead to severe pump dam
-
age.