ASSEMBLY & INSTALLATION
Letter references in parenthesis (A) refer to the contents.
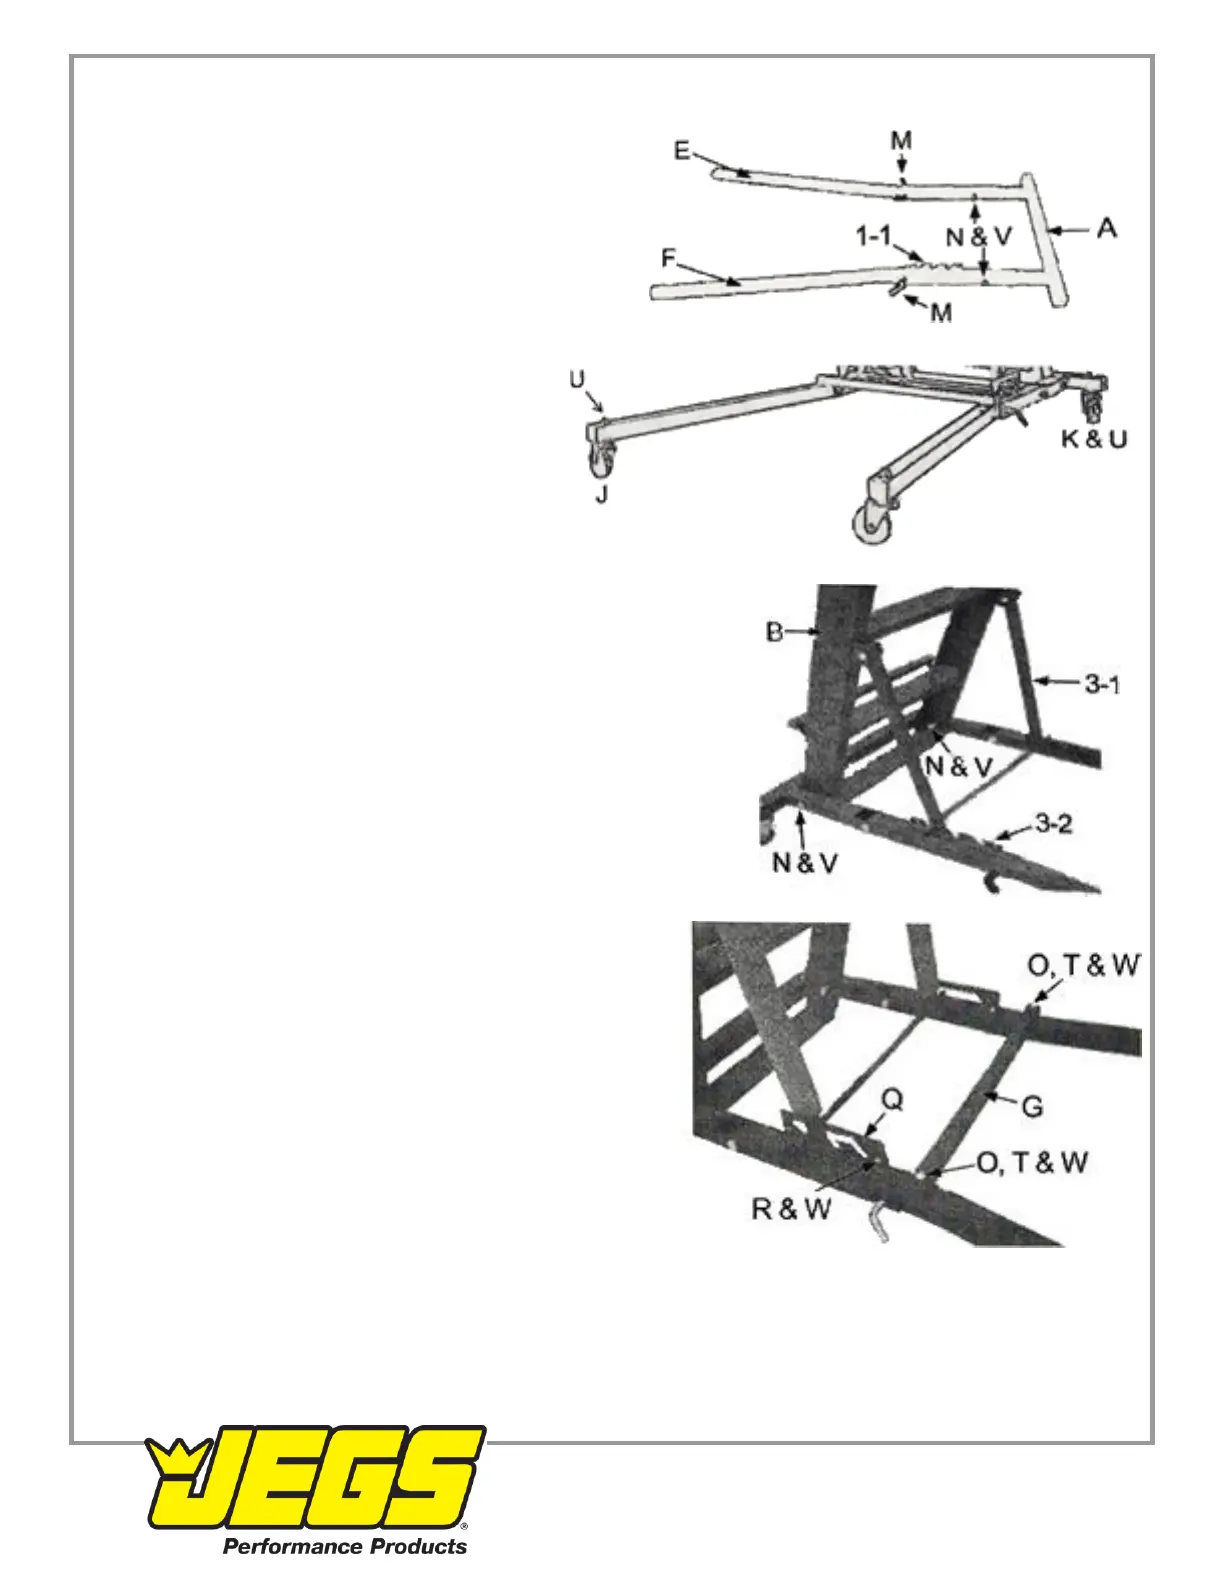
1. Assemble the right and left legs (E & F) to the base frame
(A). Insert the end of each leg into the base frame's openings
and align the bolt holes. The height adjustment notches (1-1)
will be on the inside and the legs must angle outwards.
Secure each leg with a frame bolt (N) and lock nut 1 (V).
Insert the two leg lock pins (M) and push the ends down to
secure the legs.
2. Attach the front casters (J) by inserting the stem
of each caster through the end of each leg and
securing it with a flange nut (U). Install the rear
locking casters (K) to the base frame in the same
manner. Lock the rear wheels in place for the
remainder of the installation.
3. Install the ladder assembly (B) by inserting a frame bolt (N) through
each side of the base frame and lower ladder assembly. Secure ach bolt
with a lock nut 1 (V). Swing the ladder's angle support (3-1) into the height
adjustment notches (3-2). Make sure the crossbar is firmly in place.
4. Place the leg cross support (G) on both legs (E & F),
aligning the bolt holes. Insert a cross support bolt (O) through
the each end of the leg cross support and leg. Slide a washer
(T) over one bolt and secure with a lock nut 2 (W). Repeat
with the other cross support bolt.
5. Attach the height adjustment plate (Q). Match the angled opening with the adjustment notches. Insert a height
adjustment plate bolt (R) through the bolt hole at each end of the plate. Secure each bolt with a lock nut 2 (W). Repeat
on the other side.


 To Next Page
 Loading...
