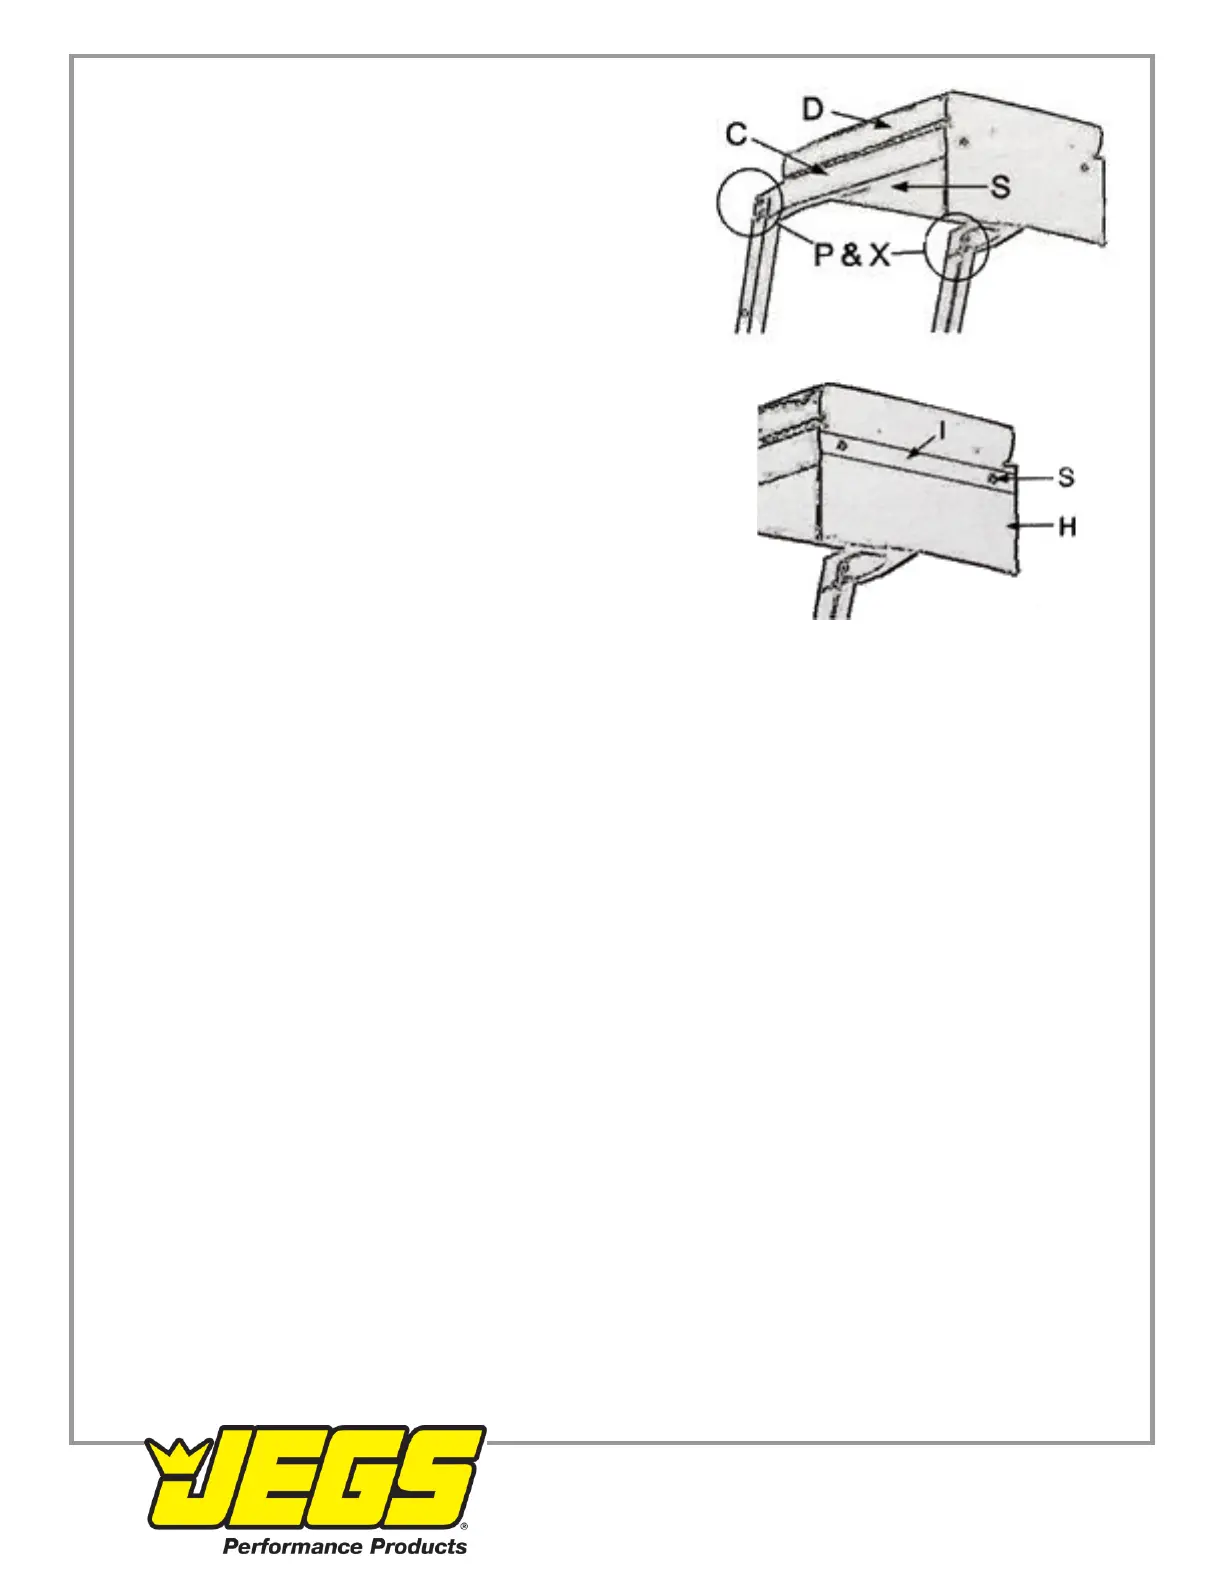
6. Attach the chest deck frame (C) to the top of the ladder assembly
(B) using three chest frame bolts (P) and lock nut 3s (X) on each
side. Attach the chest deck pad (D) using two Phillips screws (S)
from underneath.
7. Place the pouch bracket (l) over the pouch (H) and align the screw
holes. Insert a Phillips screw (S) through the screw holes. Line up the
protruding screws with the holes in the deck frame's front. Secure the
pouch to the deck frame with screws.
8. Place the foam bumper pads (L) over each of the angle support arms and the ladder assembly's crosspiece. This will
prevent the ladder from scuffing the vehicle.
9. Re-check and tighten all bolts and screws as necessary.
CARE & MAINTENANCE
1. Maintain the tool with care. A tool in good condition is efficient, easier to control and will have fewer problems.
2. Inspect the tool components periodically. Repair or replace damaged or worn components. Only use identical
replacement parts when servicing.
3. Maintain the tool's labels and name plates. These carry important information.
WARNING! Only qualified service personnel should repair the tool. An improperly repaired tool may present a
hazard to the user and/or others.
CLEANING
Wipe clean as needed. Use mild upholstery cleaner (not caustic) to clean the chest deck pad as needed.
LUBRICATION
DO NOT lubricate casters. This can damage the mechanism.
STORAGE
1. Remove the leg lock pins from each leg. Hold the ladder when removing the second pin as the base frame will fall to
the floor. Store the pins in the creeper's pouch.
2. Push the ladder's angle support arms back towards the ladder.
3. Lift each leg up until it rests next to the ladder assembly.
4. Store the creeper vertically. Make sure the rear casters are locked once it is in place.


 To Next Page