Do you have a question about the Jenn-Air JMC7000ADB and is the answer not in the manual?
Procedure for measuring microwave leakage from the oven.
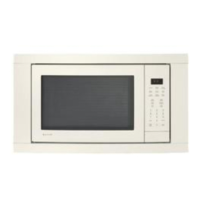
Details on checking the printed circuit board for Model M170.
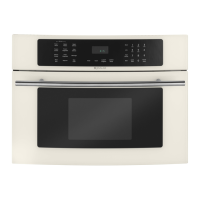
Details on checking the printed circuit board for Models JMC7000 and MMC5000.
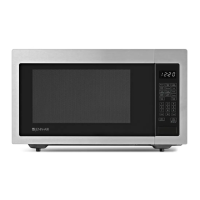
Technical specifications for the Maytag M170 microwave model.
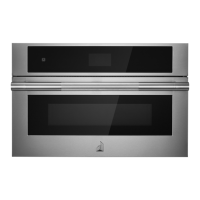
Technical specifications for Maytag JMC7000 and MMC5000 microwave models.
Requirement for placing the microwave on a stable, level surface.
Ensuring adequate ventilation by keeping vents clear.
Positioning the microwave away from interference sources.
Avoiding placement near heat or moisture to prevent damage.
Guidelines for connecting the microwave to the correct power source.
Instruction to plug the microwave into a grounded outlet.
Steps for preparing food and closing the oven door.
How the oven light and operation are affected by door status.
Oven cooks on full power unless a lower level is set.
What the display shows when plugged in.
Time clock returns to present time when cooking ends.
How to stop cooking and clear information.
Troubleshooting if the oven does not start.
How the oven light and operation are affected by door status.
Beep sound confirms pad touch.
Oven cooks on full power unless a lower level is set.
Display shows :0 when plugged in.
Time clock returns to present time when cooking ends.
Stops cooking and retains/erases information.
Checks for door closure if the oven does not start.
Feature to prevent unwanted oven operation by children.
Procedures for stopping and restarting the oven during operation.
Description of the door lock mechanism for safety.
Details on the D.O.M. switch movement and adjustment.
Steps for adjusting the interlock switch assembly.
Guidelines for replacing safety interlock switches.
Conditions and checks for the interlock monitor switch.
Steps for adjusting the interlock mechanism for models JMC7000/MMC5000.
Description of hook and lever action on interlock switches.
Explanation of the oven's electrical circuit during cooking.
Chart showing relay timing for power levels.
Description of the auto defrost cycle operation.
How the oven behaves when the door is opened during cooking.
Warnings and precautions to observe before and during servicing.
Specific warning regarding electric charge in the high voltage capacitor.
Steps to remove the microwave oven cabinet.
Procedure for removing the oven door assembly.
Steps for disassembling parts of the oven door.
Method to reduce door seal gap at the top hinge stopper.
Method to reduce door seal gap at the lower hinge stopper.
Method to reduce door seal gap using interlock switch assembly.
Method to reduce door seal gap using top interlock switch assembly.
Procedure for removing the high voltage capacitor.
Steps to remove the magnetron component.
Procedure for removing the fan motor and air guide.
Steps to remove the high voltage transformer.
Instructions for replacing the tray motor.
Steps to remove the cabinet for JMC7000/MMC5000 models.
Procedure for removing the door assembly for JMC7000/MMC5000 models.
Steps to remove parts from the door for JMC7000/MMC5000 models.
Adjusting hinge screws for door seal contact.
Adjusting upper hinge screws for door seal contact.
Adjusting top interlock switch for hook engagement.
Adjusting bottom interlock switch for hook engagement.
Essential safety and handling procedures before troubleshooting.
Common visual problems indicating touch control or membrane switch issues.
Troubleshooting when the display shows no programming or incorrect input.
Steps to check the continuity of the membrane keyboard.
Identifies keyboard keys and their encoding matrix.
Detailed steps to check key continuity with a multimeter.
Diagnosing issues when the 15A fuse blows.
Troubleshooting if the fuse blows repeatedly.
Diagnosing a dead display when the fuse is intact.
Checks when the outlet has voltage but the oven does not operate.
Diagnosing why the oven fails to start after setting program.
Diagnosing issues when the fan runs but no cooking occurs.
Procedure to check and address low microwave output power.
Diagnosing issues when no inputs are accepted.
Troubleshooting when outlet has voltage but fuse does not blow.
Diagnosing why the display does not show countdown.
Diagnosing why motors and lamp do not activate when start is pressed.
Diagnosing issues when fan motor runs but no microwave oscillation occurs.
Procedure for checking the high voltage transformer continuity.
How to check the high voltage capacitor for continuity.
Procedure for testing the high voltage diode's resistance.
Checks for open filament or shorted magnetron, and leakage.
Checking fuse and interlock switches when fuse blows.
Testing continuity of safety interlock and monitor switches.
Procedure for checking the low voltage transformer on the PCB.
Troubleshooting issues related to the PCB and display.
Diagnosing no cooking issue related to Relay '2' on the PCB.
Checking the status of Relay '2' for oven operation.
Checking the status of Relay '1' for oven operation.
Checking secondary interlock switch function when door is opened.
Procedure for checking terminal voltage on the PCB.
Troubleshooting display issues related to PCB check points.
Diagnosing no cooking issue related to Relay 2 on the PCB.
Checking the status of Relay 2 for oven operation.
Checking the status of Relay 1 for oven operation.
Checking secondary interlock switch stage by resistance.
| Type | Microwave Oven |
|---|---|
| Power | 1000 Watts |
| Control Type | Electronic |
| Color | Black |
| Installation Type | Built-In |
| Convection | Yes |
| Sensor Cooking | Yes |
| Grill Function | No |
| Pre-Programmed Settings | Yes |
| Child Lock | Yes |
| Warranty | 1 Year Limited |