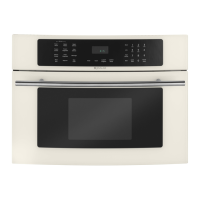
Do you have a question about the Jenn-Air JMV8208AAS and is the answer not in the manual?
Precautions to be observed before and during servicing to avoid possible exposure to excessive microwave energy.
Guidance on preventing exposure to microwave energy from the magnetron or other generating devices.
Important instructions and precautions to follow during the installation process.
Essential instructions for grounding the appliance to prevent electrical shock.
Overview of the control panel, including sensor controls and their functions.
Detailed explanation of each touch pad on the control panel and their specific operations.
The first part of the overall electrical circuit diagram for the microwave oven.
The second part of the overall electrical circuit diagram, including additional components.
Important safety guidelines to follow when operating the microwave oven during service.
Step-by-step guide for testing oven functionality after installation or repair.
Summary of the microwave's safety systems, power level selection, and cooking stage capabilities.
Essential safety warnings and practical tips for service technicians during repairs.
Crucial safety warnings and responsibilities for service personnel regarding microwave leakage.
Detailed procedure and required equipment for measuring microwave energy leakage.
Instructions for measuring leakage with the oven's outer case removed or fully assembled.
Method for calculating microwave power output using a standard water load.
Guidelines for documenting leakage measurements and subsequent notifications.
Step-by-step guide for the safe removal of the power and control circuit board.
Detailed instructions for safely disconnecting, removing, and inserting the FPC connector.
Procedure for disassembling and removing the external casing of the microwave oven.
Guide to safely removing the door interlock switches for inspection or replacement.
Critical steps for carefully removing the magnetron component to prevent damage.
Instructions for safely removing the stirrer fan assembly from the oven.
Steps for removing, disassembling, and reassembling the microwave oven door.
Procedures for removing the ventilation and turntable motor units from the appliance.
Instructions on how to remove the old humidity sensor and install a new one.
Explanation of the door lock mechanism's function in preventing microwave activity.
Steps for adjusting door latches and interlock switches to ensure proper sealing and operation.
Procedure to verify the correct closing and alignment of the door latches and interlock switches.
Testing the operational sequence of primary, secondary, and monitor interlock switches.
Testing the electrical continuity of the primary interlock switch.
Testing the electrical continuity of the secondary interlock switch.
Testing the electrical continuity of the interlock monitor switch.
Detailed testing procedures for key components like transformers and magnetrons.
Troubleshooting steps for common problems related to fuse blowing in the unit.
Diagnostic procedures for issues concerning the fan motor and oven lamp relays.
Identifying symptoms of a faulty circuit board and necessary checks.
Troubleshooting steps for various display errors, including time setting issues.
Diagnosis for when the primary time display message is absent upon power connection.
Troubleshooting steps when the unit fails to start the countdown after pressing START.
Steps to identify the cause of no heating output despite normal oven operation.
Troubleshooting for situations where high power cooking cycles fail to produce heat.
Troubleshooting steps for the absence of buzzing sounds during operation or stage changes.
Diagnosing problems with the ventilation fan not operating when activated.
Exploded diagram illustrating the parts of the microwave oven door.
Exploded diagram illustrating the parts of the microwave oven controller.
Exploded diagram illustrating the parts of the microwave oven cavity.
Exploded diagram illustrating the parts of the latch board assembly.
Exploded diagram illustrating interior parts of the microwave oven, Part I.
Exploded diagram illustrating interior parts of the microwave oven, Part II - I.
Exploded diagram illustrating interior parts of the microwave oven, Part II - II.
Exploded diagram illustrating parts related to the installation of the microwave oven.
| Brand | Jenn-Air |
|---|---|
| Model | JMV8208AAS |
| Category | Microwave Oven |
| Language | English |


