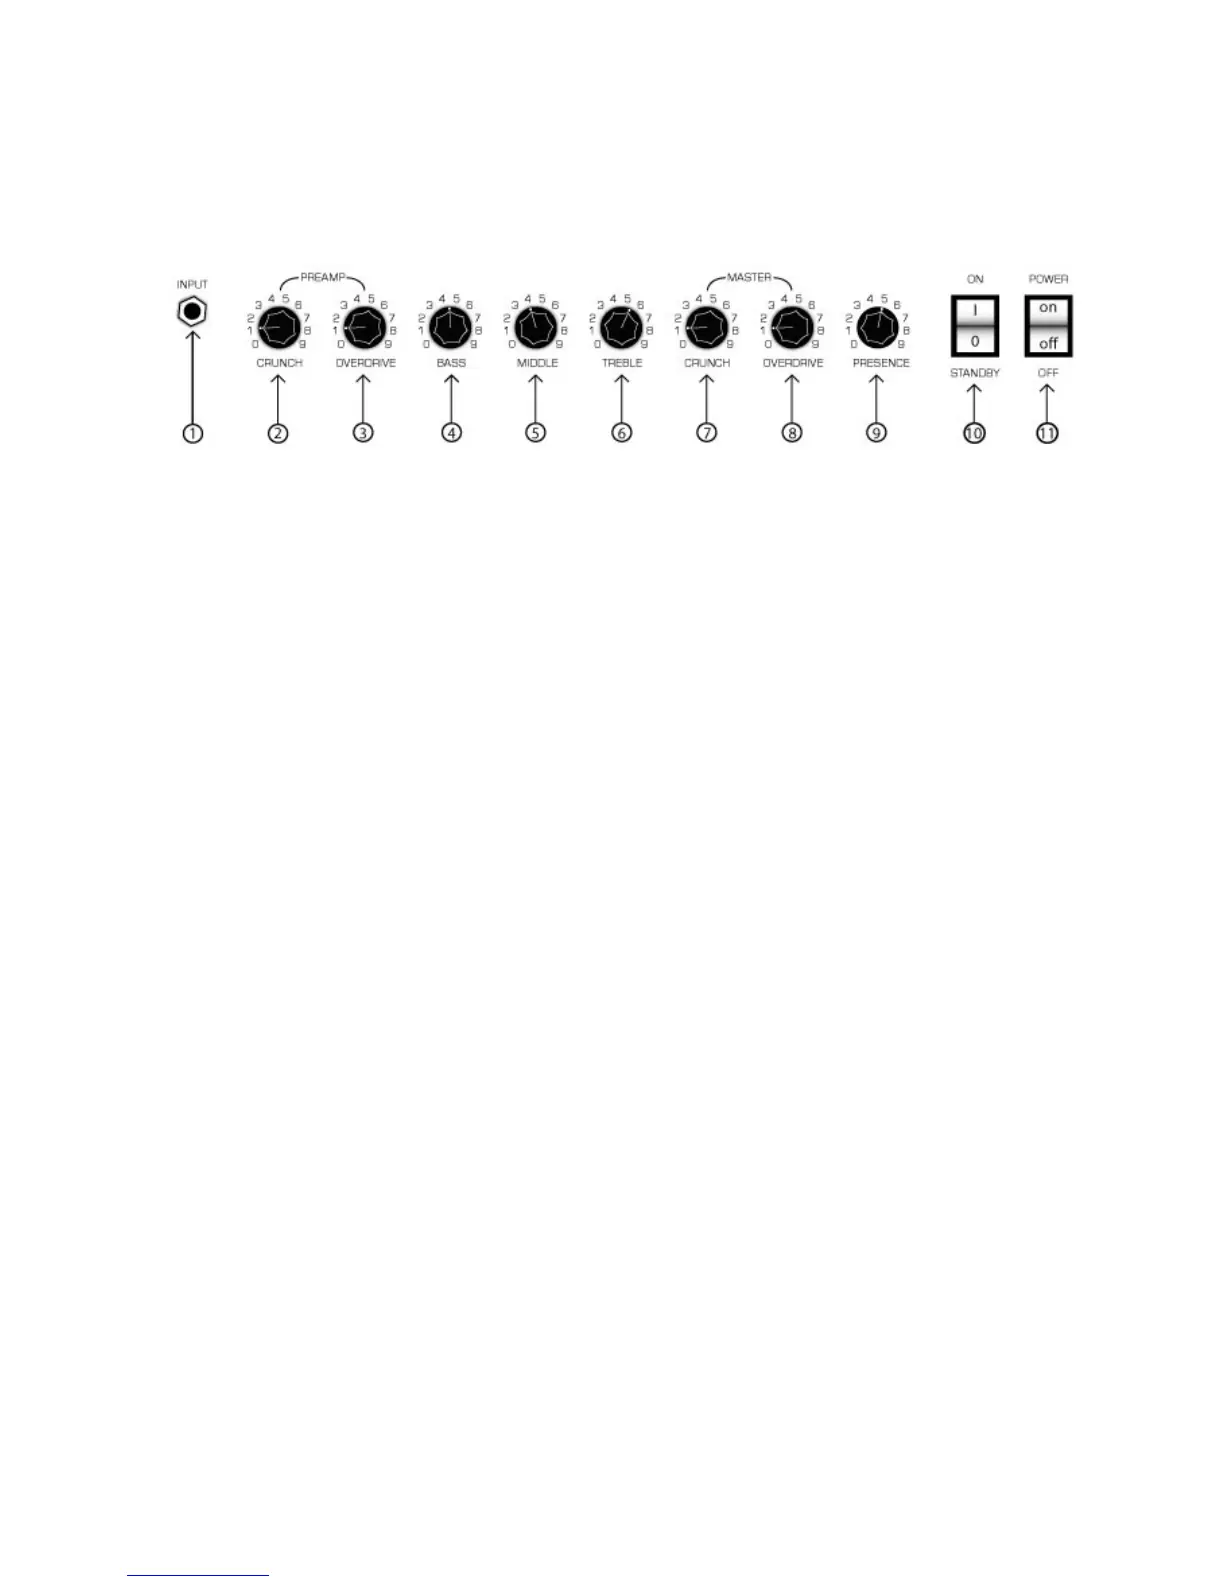
FRONT PANEL CONTROLS
1. Input Jack: Guitar cable goes here (the other end should probably be in the
guitar)
2. CRUNCH Preamp Gain: Adjust the amount of gain (distortion) that the amplifier
produces in the CRUNCH Channel. Keep it low for crystal clear cleans, or dial it up for
some tube grit.
3. OVERDRIVE Preamp Gain: Let’s be honest here--THIS is why you bought the amp
in the first place! Adjust the amount of legendary Soldano gain (distortion) in the
OVERDRIVE Channel. The higher the preamp setting the more overdriven the sound
will be.
4. BASS: Part of the 3-band EQ for adjusting low frequencies
5. MIDDLE: Part of the 3-band EQ for adjusting middle frequencies
6. TREBLE: Part of the 3-band EQ for adjusting high frequencies
7. CRUNCH Master Volume: will let you adjust how loud the CRUNCH Channel’s
output will be.
8. OVERDRIVE Master Volume: will let you adjust how loud the OVERDRIVE
Channel’s output will be, independent of the CRUNCH Master Volume.
9. PRESENCE: adds an overall brightness, which can be handy when trying to cut
through in a ‘dead’ room.
10. STANDBY switch: Used in conjunction with the main POWER switch (item 11).
Use the STANDBY to “warm up” your amp’s tubes before turning on the POWER
switch. Always put the amp in STANDBY before turning the main power switch on or
off!
11. POWER switch: This is the main power switch for the entire amp. Be sure that
your amp is switched off AND unplugged before moving it!