10
7.7 Chain installation: 10T
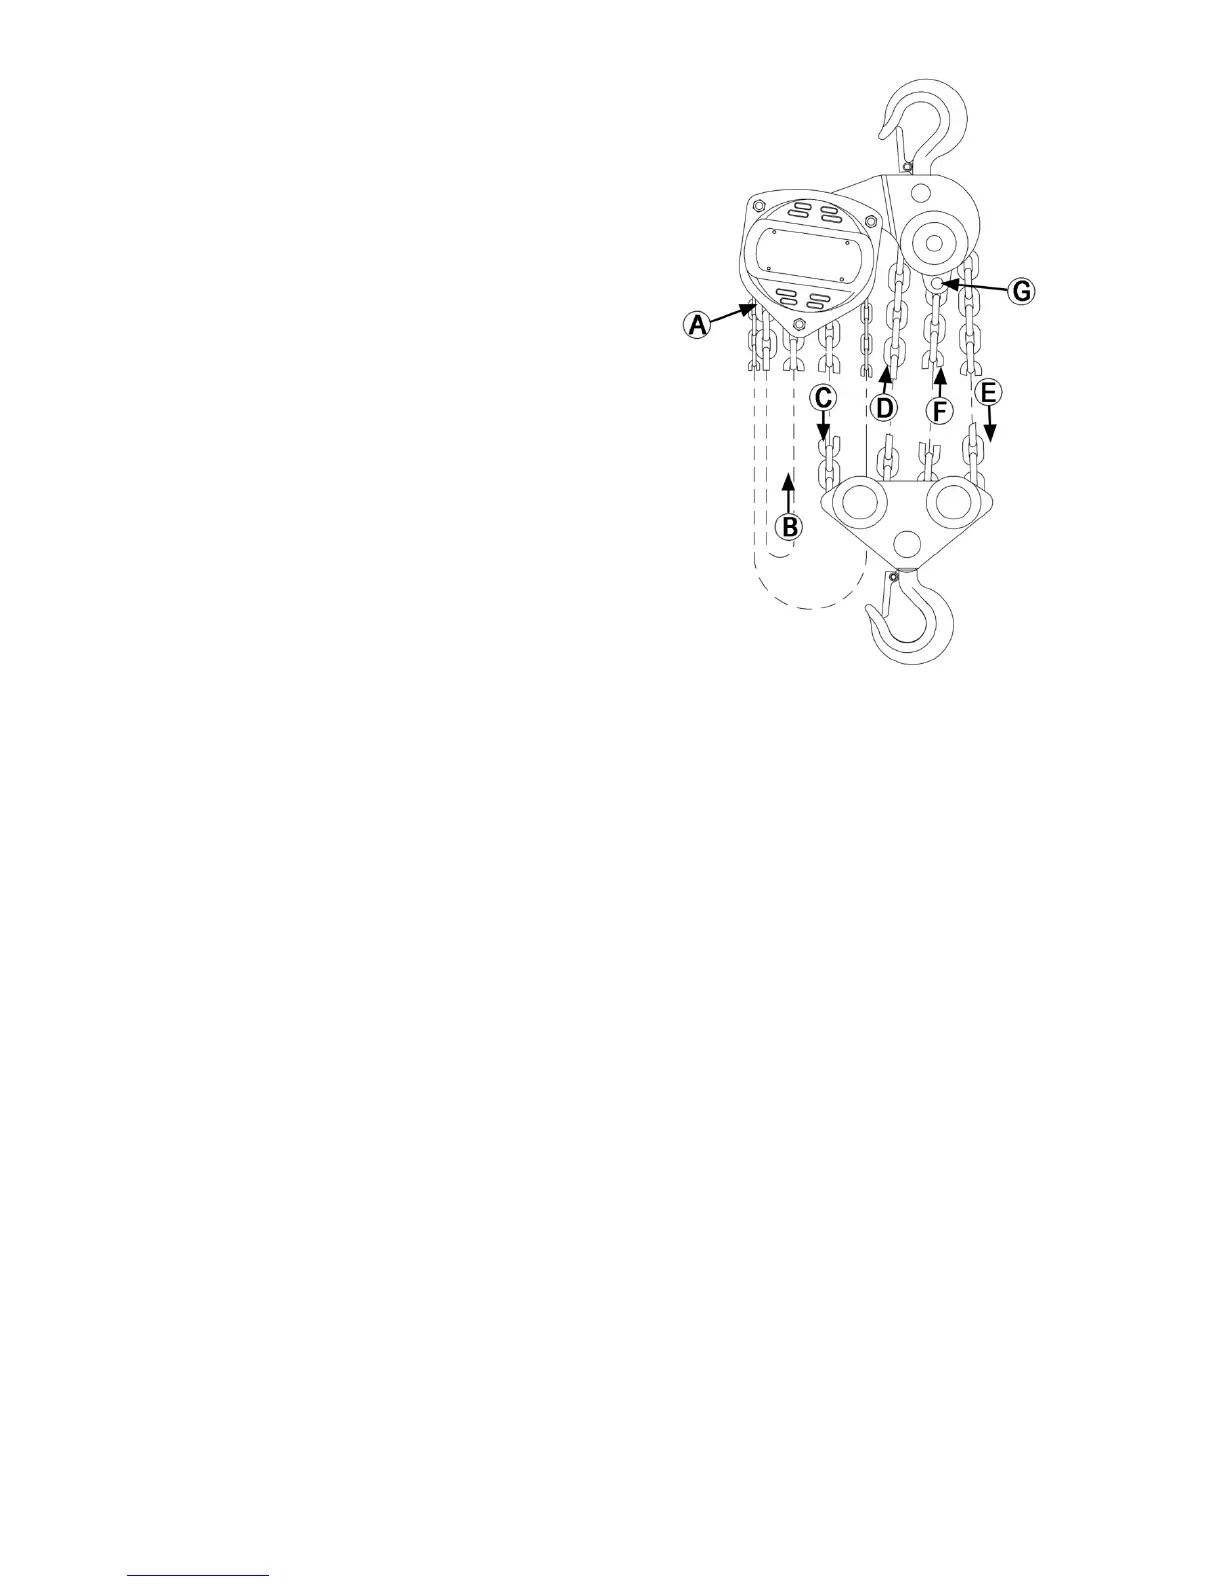
Referring to Figure 14:
1. After installing load chain into load chain
sprocket (B), run the remaining chain through
your hand to remove any twist. The last link of
the chain must be in the same direction as the
first. If not, cut off the last link.
2. Insert the last link into the left pulley of the
lower hook (C).
3. Pull the load chain through and up from
underside of the pulley (C, D).
4. Insert the last link into the pulley of the upper
hook (D), moving the chain up, around, and
then down (E). Check that the load chain is not
twisted and welds face away from the pulley.
5. To prevent the chain from free-wheeling, insert
a screwdriver securely into a link at the base of
the upper pulley (left side).
6. Insert the last link into the right pulley of the
lower hook (E).
7. Pull the load chain through and up from the
underside of the pulley (E, F).
8. Remove the lock nut and chain anchor pin in
upper hook slot (G).
9. Insert the last link into the upper hook slot.
10. Check that load chain is not twisted.
11. Reinstall chain anchor pin through upper hook
slot and last chain link, and secure with lock
nut.
12. Remove screwdriver from link at base of upper
pulley.
Figure 14
(10-ton hoists)
 Loading...