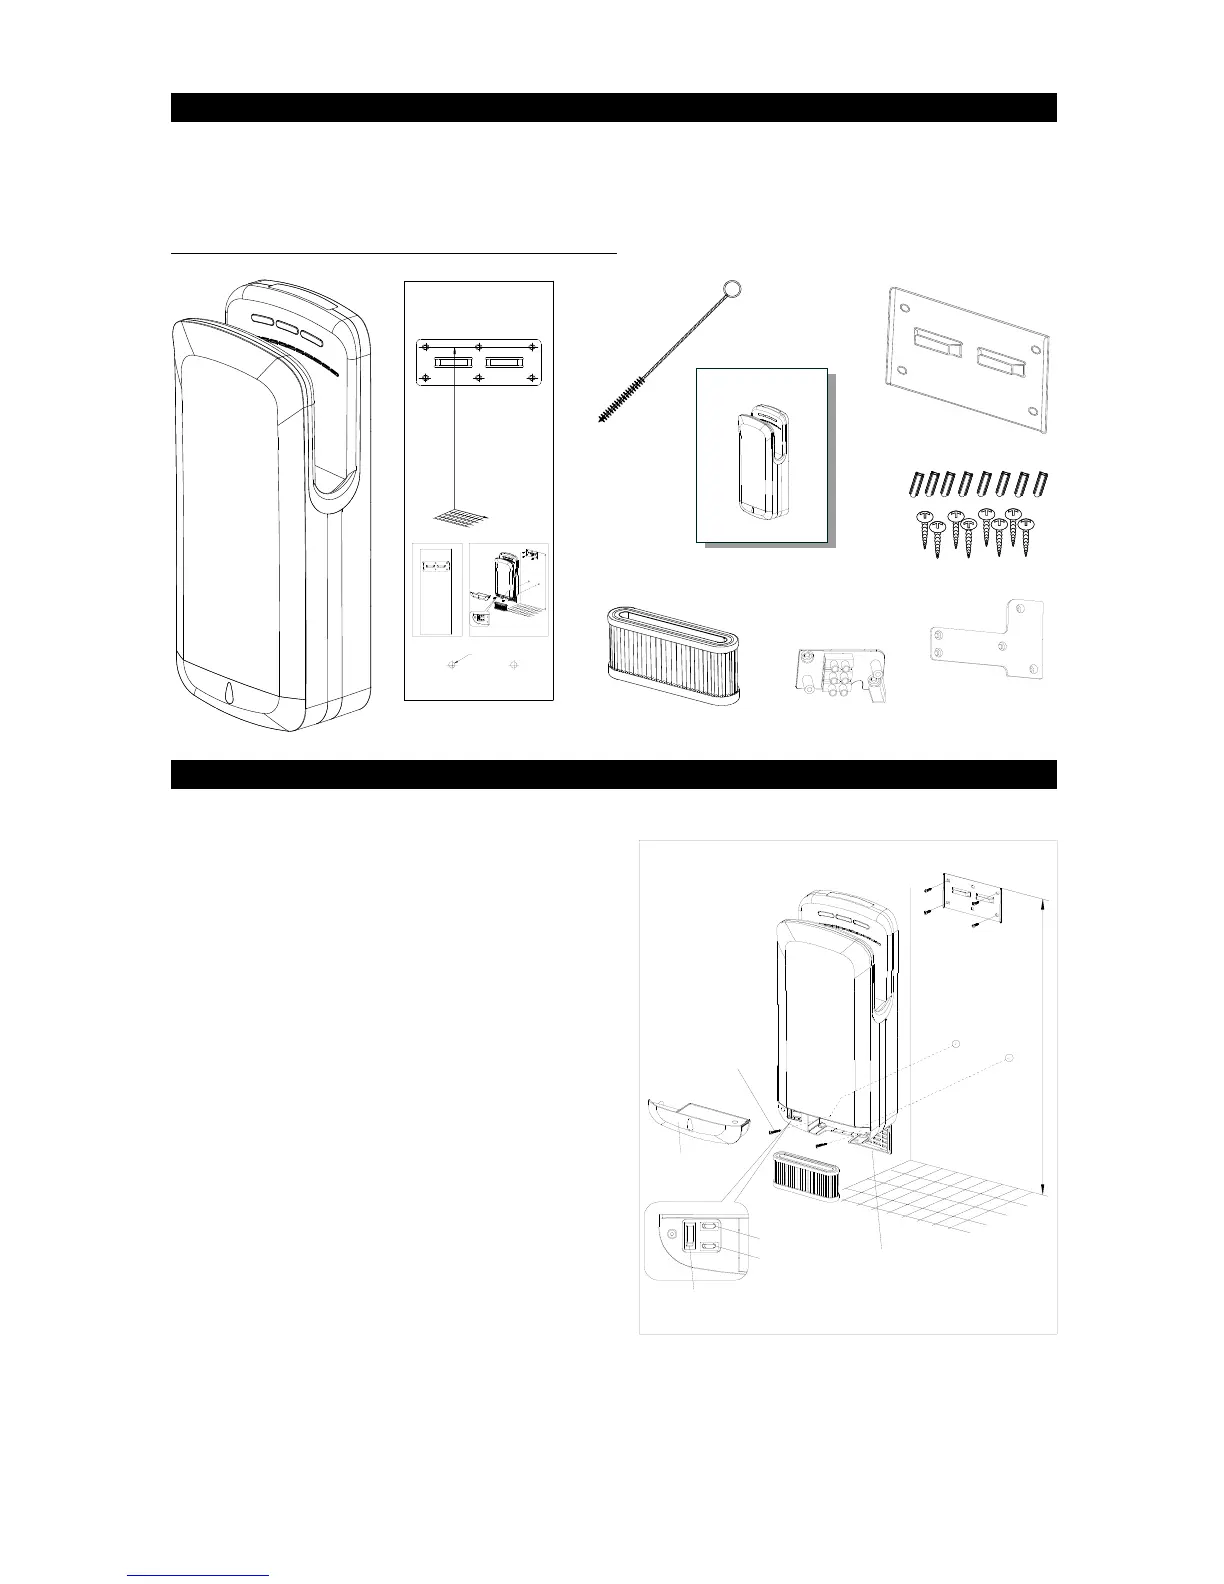
5. UNPACKING / STANDARD ACCESSORIES
6. INSTALLATION
1. Remove all packing material. Recycling is recommended.
2. Carefully remove the hand dryer from the shipping carton, using care not to drop the appliance.
3. Inspect carefully for any damage that may have occurred during transit. Check for any loose, missing or damaged
parts. If the hand dryer is damaged or missing parts, promptly inform the dealer where you purchased it.
Standard items included with the hand dryer are:
Cleaning Brush
Installation Template
Manual
HEPA Filter
HE PA Filter
Water Collection Tray
Air Pre-filter
(Push back then down to open it)
Power Switch
Hot/Cold Switch
Speed Switch
Anti-theft screw
Power Supply Kit
Power Supply
Kit Cover
Mounting anchors
Wall Mounting Bracket
User Manual
11. Connect plug to power supply socket or turn on power.
CAUTION Improper mounting may result in personal injury or property damage.
1. Use the mounting template provided to mark the locations
for the 8 wall mounting anchors to attach the wall mounting
bracket to the wall.
2. It is recommended that at least 2 of the 6 mounting anchors
for the unit be fastened into a wall stud or support.
3. To use the hollow wall anchors included with the wall
mounting kit, pre-drill the wall in the marked locations
using a 6/25"(6mm) drill, in
sert the plastic anchors and tap
flush to the wall.
4. Complete the attachment of the wall mounting bracket to
the wall with the 6 mounting anchors.
5. If the hand dryer supplied with plug then hang it on bracket.
6. If the hand dryer is supplied without plug and please open
the power supply kit cover on hand dryer back then connect
it as follows <Power should be OFF>:
A. Connect the live wire(Coloured Brown, Red, or Black) to
the terminal block marked “L”.
B. Connect the neutr
al wire(Coloured Black, Blue) to the
terminal block marked “N”.
C. Connect the ground wire(Coloured Green&Yellow) to the
terminal block marked “E”.
Replace power supply kit cover then hang dryer on bracket.
7. Remove the water collection tray from the bottom of dryer,
and complete the attachment of the dryer with the remaining
2 anchors.
8. Set the Heater/Air Speed setting switches as required.
9. Replace the water collection tray.
10. Open the pre-filter to install the HEPA filter if necessary with
rubber ring side up.
JETBOX Blade 3
 Loading...