4
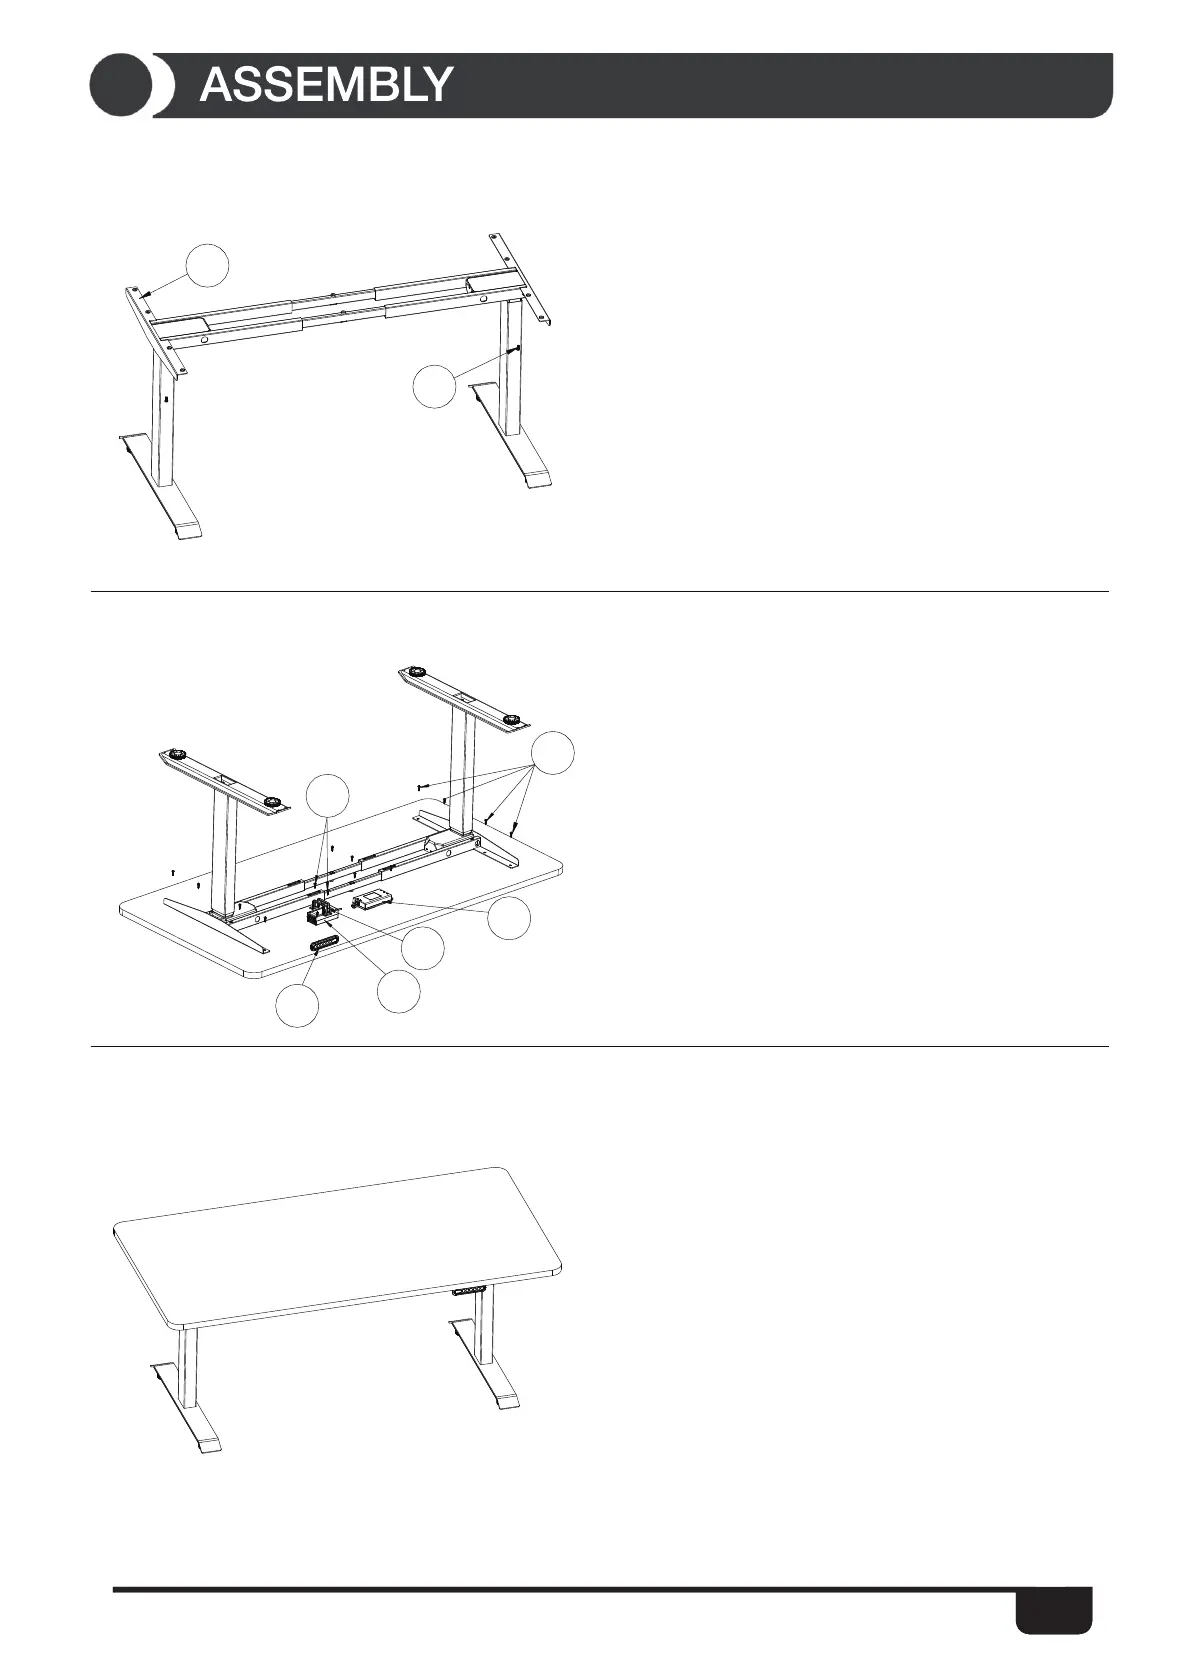
STEP 5: Attach the desk base to the underside of the desktop with ten (10)
ST5*20 wooden screws (part 10).
Install the control box (part 15) underside of the desktop with two (2)
ST5*20 wooden screws (part 10).
Install the power adapter fixing (part 13) and power adapter (part 14) with
two (2) ST5*16 wooden screws (part 11) .
Install the handset (part 12) with two ST5*16 wooden screws (part 11).
Attach the handset (part 12) so the front of the handset is flush with the front
desktop edge (or recessed up to 1/8''). The handset may be placed
anywhere along the front edge of the desktop but we recommend placing it
toward an end so it dose not interfere with your chair when seated.
STEP 6: Turn the assembled desk right-side up. With at least two people,
grab the desk base (not the desktop) and turn the desk right-side up. Adjust
the pre-installed glides on the feet (part 2) needed.
Plug the power cord (part 17) into a 230v outlet.
8
1
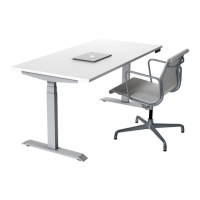
STEP 4: Slide the side bracket (part 1) into the frame end. Insert the two (2)
M6*14 screws (part 8) through the two (2) holes in the bottom of the frame
end going into the inserted side bracket (part 1) . Using the allen wrench
rotate each screw just a few turns. After both M6*14 screws (part 8)
inserted, tighten both screws.
Do the same for the other side bracket (part 1) with two (2) M6*14 screws
(part 8).
11
10
15
12
14
13
 Loading...