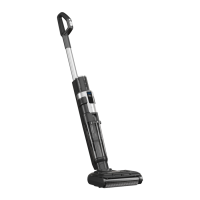
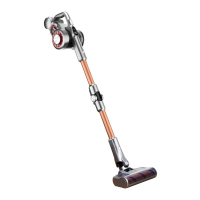
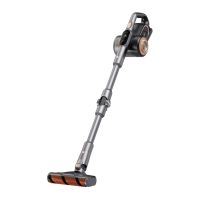
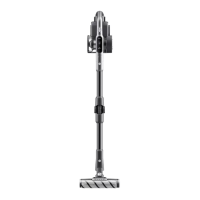
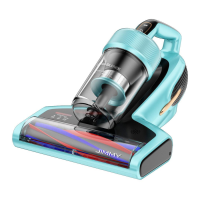
This document describes the JIMMY HW9 Cordless Vacuum & Washer, a versatile cleaning appliance designed for household use on hard floors.
Function Description
The JIMMY HW9 is a cordless vacuum and washer that combines vacuuming and wet cleaning functionalities. It is designed to clean hard floor surfaces such as waxed, rubber, tile, sealed wood, and solid wood floors. The device features a spray trigger for water and cleaning solution, a brushroll for scrubbing, and separate tanks for clean and dirty water. It also includes a self-cleaning mode for the brushroll and a brushroll air-drying function.
Important Technical Specifications
- Model No: HW9
- Adaptor Input: 100-240V ~ 50-60Hz 0.8A
- Adaptor Output: 34.2V 0.6A
- Rated Voltage: 28.8V
- Rated Power: 300W
- Battery Capacity: 3000mAH
- Manufacturer: Kingclean Electric Co., Ltd
- Warranty: Two years from the date of purchase (excludes normal wear, commercial use, alterations, cleaning activities, improper use, or external damage).
Usage Features
Assembly and Disassembly:
The device is designed for easy assembly and disassembly of its main components.
- Handle: Inserts vertically into the main body until a "click" is heard. Disassembly requires a hard tool to press a release hole while pulling the handle upward.
- Floorhead: Inserts vertically into the main body until a "click" is heard. Disassembly involves pressing a release button and pulling the floorhead downward.
- Battery Pack: Slides into a slot in the main body after removing the battery cover. A "click" indicates secure installation. Removal is in the opposite direction.
- Charging Base Holder: Holders 1 and 2 press into the charging base until a "click" is heard, ensuring firm locking.
- Dirty Water Tank: Removed by pressing a release button while holding the machine and the tank. Reassembly involves placing the tank bottom into the main body and pushing until a "click" is heard.
- Clean Water Tank: Removed by holding its handle and pulling it out. Reassembly involves placing it back onto the nozzle, aligning it with the brushroll window.
- Brushroll Cover and Brushroll: The brushroll cover is removed by pulling its latch upward. Reassembly involves aligning clips and pressing down until a "click" is heard. The brushroll itself is removed by pulling its cap outward from the brushroll cover.
Operation:
- First Use: Fully charge the machine before initial use.
- Filling Clean Water Tank: Grasp the handle of the clean water tank, pull out the plug, open the injection plug (rotate 90 degrees), and fill with clean water and cleaning solution. The recommended ratio is one bottle cap of cleaning solution per full tank of clean water. Tighten the plug securely before reassembling the tank into the floorhead.
- Power On/Off and Mode Selection: The on/off button is on top of the handle. Press it to start, with "Auto" mode enabled by default. Press the mode button to switch between "Auto," "Eco," and "Max" modes. Press the on/off button again to stop.
- Water Spray: Press the water spray trigger to release a fan-shaped water flow from the front of the floorhead. Releasing the trigger stops the spray. Note that the water spray button cannot be used simultaneously with the on/off or mode buttons.
- Indicators and Voice Reminders: The LED screen displays various indicators:
- Lights: Blue and rotating during charging, solid blue when fully charged. Half brightness and blue during operation. Red in "Max" mode, blue in "Auto" and "Eco" modes (switches to "Eco" below 20% battery).
- Mode Display: Shows current operating mode.
- Battery Power Percentage: Displays remaining battery.
- Battery Power Icon: Red when battery is below 20% (charging reminder), otherwise white.
- Dirty Water Tank Full: Blinks when water reaches MAX line, with voice reminder. Vacuum and brushroll motors stop.
- Clean Water Tank Empty: Blinks when empty, with voice reminder to add water.
- Self-Cleaning Indicator: Blinks and shows countdown during self-cleaning.
- Brushroll Drying Indicator: Lights up when brushroll is air-drying after self-cleaning.
- Machine Charging: Connect the adapter to the charging stand and a power socket. Place the machine on the charging stand. The display shows battery percentage during charging, reaching 100% when complete. For long-term storage, charge every 3 months. Fully charge before first use and empty the battery before the second charge to prolong battery life.
Self-Cleaning and Brushroll Drying:
- Preparation: Drain the dirty water tank, place the machine on the charging base, insert the charger, and ensure the clean water tank is at least half full.
- Activation: Press and hold the mode button for 5 seconds to enter self-cleaning mode. The self-cleaning indicator will blink. To stop early, press the on/off button.
- Drying: After self-cleaning, the machine automatically enters brushroll drying mode. The brushroll drying indicator lights up, and the device charges. To stop early, press the on/off button.
- Note: Drain the dirty water tank before and after self-cleaning to prevent odors. Self-cleaning cannot be initiated if battery power is below 10%.
Maintenance Features
General Maintenance and Storage:
- Cleaning: Stop the machine before cleaning. Wipe the body with clean water or neutral detergent, wringing the cloth to prevent water from entering electrical parts.
- Recommended Cleaning: Clean the dirty water tank, filter, brushroll, and brushroll window after each use.
- Dirty Water Tank: If the dirty water reaches the MAX line, the machine stops. Drain the tank immediately.
- Filter Replacement: Replace the filter every 30-50 hours of use (depending on filter status) to maintain performance. Filters can be purchased from local distributors.
- Long-Term Storage: Store the machine in a cool, dry place, away from direct sunlight or wet environments.
Dirty Water Tank Cleaning:
- When the dirty water tank is full, the indicator blinks, and the machine stops with a voice reminder.
- After use, remove the dirty water tank, take off the upper cover, empty debris from the filter frame, and pour out dirty water. Wash the tank and filter frame with clean water.
- For stubborn stains, use the cleaning brush.
- Dry all parts after washing, then reassemble the dirty water tank into the machine until a "click" is heard.
Brushroll Cleaning:
- Remove the brushroll window and pull out the brushroll. Wipe the brushroll housing with a dry cloth and remove tangled hair with the mini brush.
- Wash the brushroll window and brushroll with clean water.
- After cleaning, reassemble the brushroll and brushroll window into the machine. The brushroll can also be placed in the accessories holder for drying.
- Note: Do not wash the entire floorhead with water or immerse it, as this can damage components. If the cleaner will not be used soon after cleaning, completely dry all components (dirty water tank, cover, filter, filter frame, brushroll, brushroll window, and machine) before storage to prevent bacterial growth and odor.
Safety Instructions:
- Read all instructions and warnings before use to prevent electric shock, fire, or injury.
- Use only as described in the manual.
- This appliance is for household use only.
- Keep out of reach of children and do not use as a toy.
- Do not touch the plug with wet hands.
- Exercise caution when cleaning stairs.
- Do not use, disassemble, or replace damaged components (power cord, plug, battery, conductive parts). Contact JIMMY or a qualified person for repairs.
- Recharge only with the specified JIMMY adapter and battery pack. Using other batteries may cause explosion or damage.
- If the product is damaged (e.g., dropped, impacted, or fallen into water), do not use it and contact JIMMY.
- Use only JIMMY specified replacement parts or attachments.
- Do not pull or press the cable; keep it away from heated surfaces, sharp edges, and walking areas. Unplug when not in use or before repair.
- Do not leave the rechargeable machine unattended.
- Remove the battery pack when cleaning, repairing, or storing the product for a long time.
- Avoid heating appliances or prolonged sun exposure to prevent housing deformation.
- Keep air inlets and outlets clear to prevent overheating.
- The main body and floorhead contain electrical components and cannot be washed under water.
- Do not clean or disassemble the brushroll cover or brushroll when the machine is powered on or working.
- Do not pick up flammable objects (burning charcoal, cigarettes), sharp objects (broken glass), ultra-fine substances (lime, cement, toner, flour), acid-base cleaning liquids, or flammable/explosive objects (gasoline, alcohol, perfume).
- Do not disassemble the closed machine or attempt to modify its performance. Seek professional help if needed.
- Turn off power and unplug the charger if the product is idle for a long time.
Cleaning Solution:
- Avoid large amounts of cleaning solution entering the motor.
- Mix solution with clean water at a 1:50 ratio. Use provided cleaning solution; avoid acidic, alkaline, alcoholic, or harmful substances.
- Keep out of reach of children. Flush eyes with clean water if contact occurs; seek medical care if swallowed.
- Dispose of dirty water and solution according to local environmental regulations.
Battery Disposal:
- The battery contains environmentally harmful materials. Remove the battery pack before disposal.
- Turn off the product and unplug the adapter before removing the battery pack.
- Dispose of waste battery packs safely and properly; do not put them in fire, water, or soil.
- If battery leakage causes skin or clothing contamination, wash with clean water and seek medical care.