ANSUL Cartridge Dry Chemical Fire Extinguishers
Models 10, 20, 30, Operation, Inspection, Service and
Maintenance, and Recharge Manual (Form No. F-7674)
2018-OCT-15 REV. 10 PAGE 33
RECHARGE
RECHARGE (Continued)
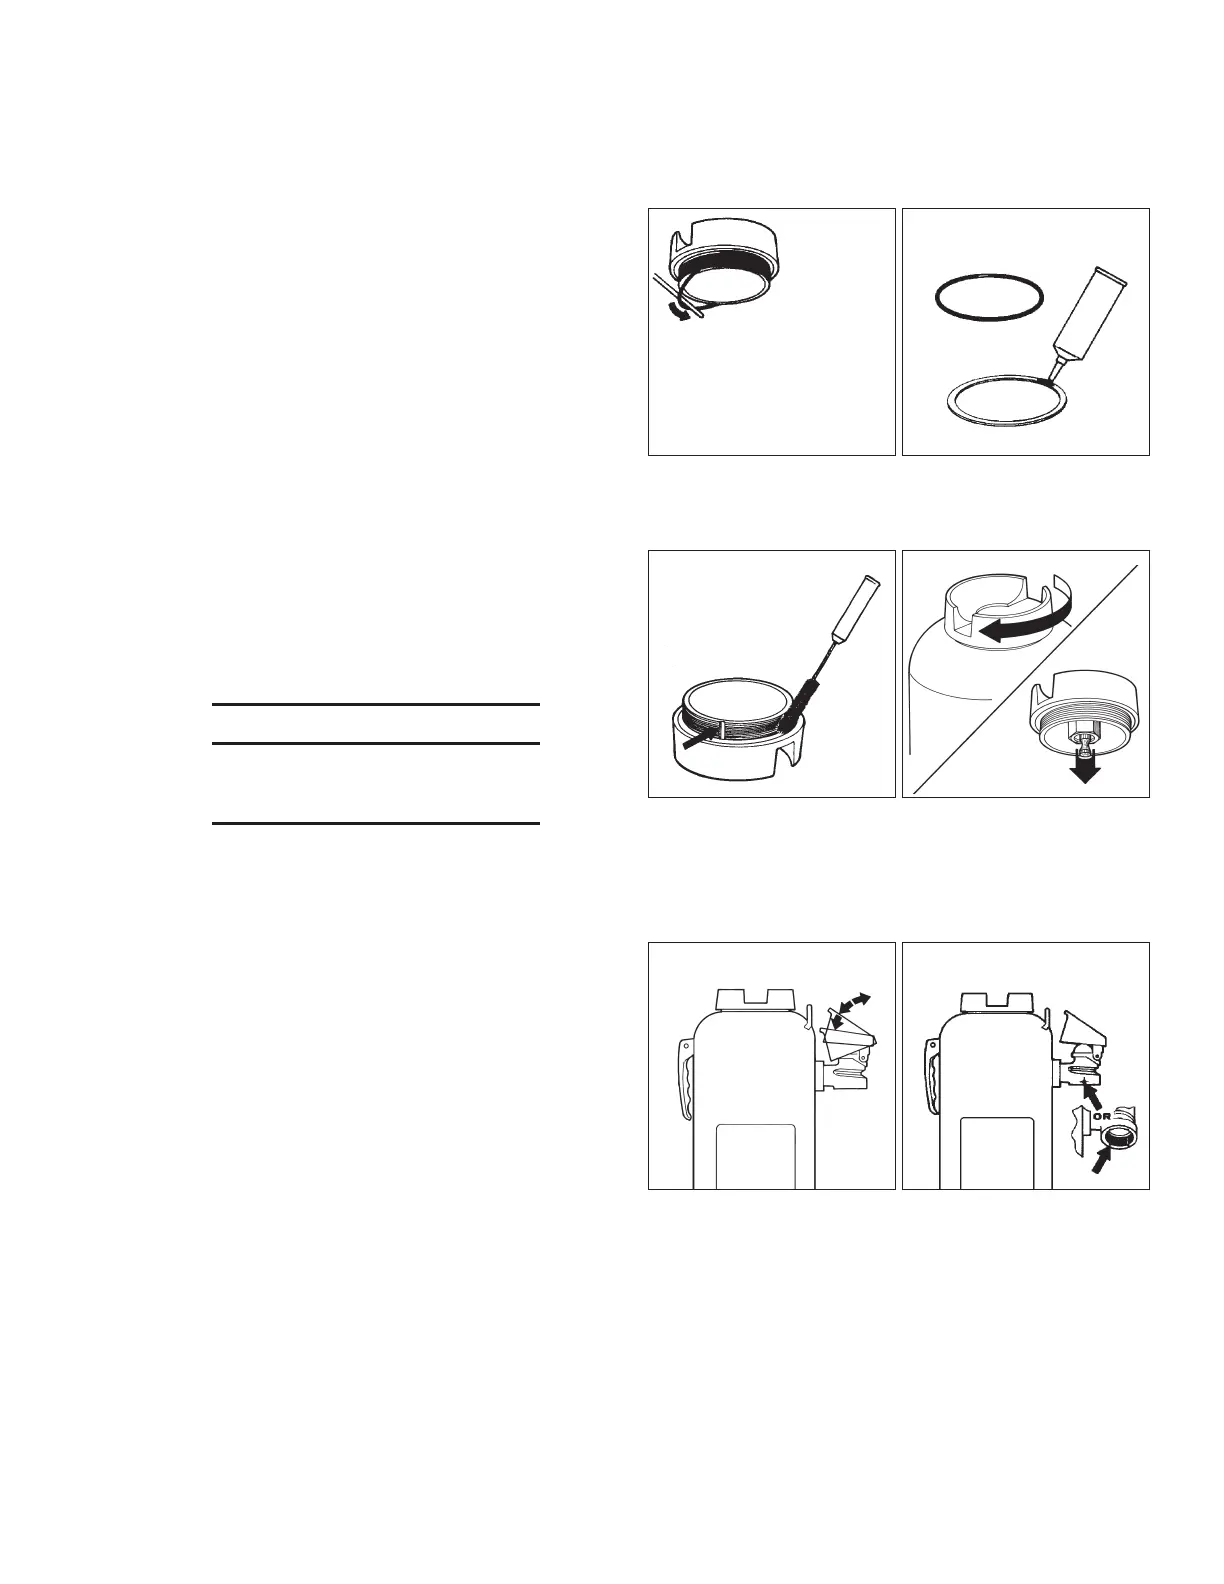
8. Remove the gasket and quad ring from the fill cap and
examine them for elasticity, cuts, cracks, or abrasions.
9. Remove all surface deposits from the gaskets using a
clean, dry rag and lubricate with a good grade of silicone
grease (Part No. 9030) capable of withstanding both low
and high temperature without a change in consistency.
Spread the grease by hand to effect a light coating of all
surfaces.
10. Clean the fill cap threads and gasket seating surface with
a stiff bristle brush before returning the gaskets to the
cap. If pressure vents are cut in the threads, be sure they
are clean and unobstructed. Reinstall the gaskets on the
fill cap, making sure not to twist the quad-ring.
11. Reinstall the fill cap and hand tighten, firmly.
NOTICE
If the fill cap is an indicator model, first
pull the red indicator stem down to reset
the indicator.
12. Operate the puncture lever to make sure the lever works
freely. Inspect the cutting edge for sharpness — a bent
or dull puncture pin may hang up and not puncture the
cartridge seal disc cleanly.
13. Inspect the cartridge receiver to verify that the pressure
relief vent (indicated in the figure) is clear.
8 003179a 9 003180
10 003181 11 000912
12 000910 13 003182