Do you have a question about the Johnson Controls Illustra Flex Gen 4 and is the answer not in the manual?
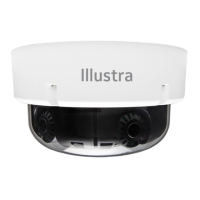
The Illustra IQ Flex Gen 4 Dual Sensor Camera is a versatile surveillance device designed for both indoor and outdoor applications, offering robust features for monitoring and security. It can be mounted on various surfaces, including walls, ceilings, and pendant caps, providing flexibility in deployment.
The camera is equipped with dual sensors, allowing for comprehensive coverage and enhanced image capture. It features digital input/output (DI/DO) ports for integration with external devices such as smoke detectors, sirens, and microphones, enabling a more integrated security system. The "Alarm In" ports allow external devices to trigger alarm input signals, while "Alarm Out" ports enable the camera to trigger external devices. Audio input and output ports facilitate two-way audio communication or recording, with "Audio In" ports connecting to microphones for sound reception and "Audio Out" ports connecting to speakers for audio output. The camera supports Power over Ethernet (PoE) for simplified installation, requiring a single cable for both power and data. Its lens assembly allows for pan, tilt, and zoom adjustments, providing flexibility in setting the field of view. The camera also includes LEDs that, when correctly positioned, prevent IR reflection, ensuring clear night vision.
The camera offers multiple mounting options to suit various installation environments. For surface mounting, a template sticker guides the drilling of holes, and an adaptor plate is securely attached before the camera base is mounted. Cables can be routed either through a hole in the surface or via a side entry hole on the adaptor plate. The camera base securely attaches to the adaptor plate using clips and springs. For ceiling mounting with a recessed mount, a bracket is inserted into a cutout in the ceiling tile, and the adaptor plate is attached to the bracket. Locking arms on the bracket ensure a secure fit to the ceiling tile. When using a pendant cap, an adaptor ring is first attached to a compatible mount (wall mount long, wall mount short, or over the roof mount), and then the pendant cap is secured to the adaptor ring. Cables are routed through a waterproof connector and the pendant cap.
The camera's lens can be adjusted for optimal viewing. "Pan Adjustment" allows rotation of the lens base to achieve the desired field of view. "Tilt Adjustment" enables tilting of the eye-ball assembly, and "Rotate Adjustment" allows rotation of the entire 3D assembly within the camera base. This flexibility ensures that the camera can be precisely aimed to cover specific areas. The camera also supports the attachment of a sunshield cover, which helps protect the device and can be securely fastened to the dome cover.
The camera includes several features for easy maintenance and troubleshooting. A reset button allows users to either reset to factory default while reserving the IP address (by holding for 5 seconds) or perform a full factory reset (by holding for 20 seconds). A short press of the button (approximately 1 second) reboots the camera. The dome cover is designed to be easily removable, secured by captive screws and rubber plugs, providing access to the camera's internal components for servicing. A desiccant bag can be inserted into a slot on the camera dome top cover to help manage moisture and prevent condensation, extending the device's lifespan. The cable side cover can also be easily inserted into a slot on the camera base, protecting cable connections. For advanced configuration and maintenance, the camera is compatible with the Illustra Tools application, which can be accessed via QR codes for both iOS and Android devices, allowing users to install, configure, and maintain cameras efficiently. The device also comes with a Torx 20 Security L-Key for secure fastening of components.
| Video Compression | H.265, H.264, MJPEG |
|---|---|
| On-board Storage | MicroSD card slot (up to 256GB) |
| Model | Illustra Flex Gen4 Series |
| Form Factor | Dome |
| Image Sensor | CMOS |
| Lens Type | Varifocal |
| Focal Length | 2.8-12mm |
| Day/Night | Yes (ICR) |
| IR Distance | 30m (98.4ft) |
| Wide Dynamic Range (WDR) | 120dB |
| Frame Rate | Up to 30fps at all resolutions |
| Connectivity | Ethernet |
| Network Interface | 10/100 Base-T Ethernet |
| Power Supply | PoE (802.3af), 12VDC |
| Ingress Protection | IP66 |
| Vandal Resistance | IK10 |
| Weight | Varies by model |
| Operating Temperature | -30°C to 50°C (-22°F to 122°F) |