Table 2: Camera interior buttons / connections descriptions
Reboots the camera (Press for 1 second)
Reset to factory default (Hold for 5 seconds and then
release)
DI/DO (Digital Input/Output) ports are equipped for external
devices, e.g., smoke detector, siren, microphone.
Alarm In: Via “GND” and “Alarm In” ports, connect to
external device that can trigger alarm input signals.
Alarm Out: Via “COM” and “Alarm Out” ports, connect to
external device to be triggered through alarm output signals.
Audio In: Via “GND” and “Audio In” ports, connect to
external device such as microphone that receives sound for
camera.
Audio Out: Via “GND” and “Audio Out” ports, connect to
device such as speaker to be triggered through alarm
output signals.
Quick Start Guide
(8200-2088-01_A)
Illustra Pro Gen4 20MP &32MP Outdoor Multisensor Dome camera
(P/N IPR20-M12-OI04 & IPR32-M13-OI04)
In the box
• 1 x Camera
• 2 x Rubber grommets
• 4 x Plastic screw anchors
• 1 x T20 Torx Wrench
• 4 x TP4 Self-tapping screws
• 1 x Side Cover
• 1 x RJ45 Insert Tool
• 2 x T20 Screw for side cover
• 1 x Mounting Template
• 1 x 12-pin Terminal connector for I/O function
• 1 x 2-pin Terminal block
• 1 x Printed Quick Start Guide
• 1 x Printed Regulatory Document
Installation tools
• 1 x T20 Torx wrench
• 1 x Drill
• 1 x Wire cutters
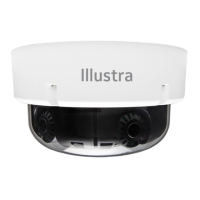
Figure 1: PG4 Multisensor Dome camera parts
Figure 1
Table 1: PG4 Multisensor Dome camera parts descriptions
Camera Top Cover with Bubble
Quick reference
• Default IP: 192.168.1.168 (DHCP enabled)
• Default Username / Password: admin / admin
• Power: PoE BT Class8 (71.3W / 0.96A) or 24V AC (81W / 3.54A)
Figure 2a: Camera interior buttons / connections
Figure 2a
Figure 2b: Camera interior buttons / connections
Figure 2b
Inserting or removing the SD card
1. Disassemble the camera as per steps 1 to 2 in ‘Disassembling the
camera’ procedure and carefully insert or remove the micro-SD card
(Figure 3) into or from the camera.
Note: It is advised that you reboot the camera after inserting the micro-SD
card.
Figure 3