www.johnsonhardware.com
à
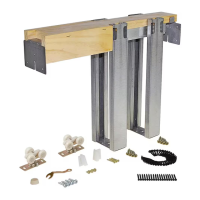
1560 SERIES
POCKET DOOR FRAME
L.E. JOHNSON PRODUCTS, INC.
-
-
-
-
R
1560 SERIES SET NUMBERS AND SIZES
**15602668 FOR 1- 30" (761mm) X 80" (2.03m) Door, Puerta, Porte
**15603068 FOR 1- 36" (913mm) X 80" (2.03m) Door, Puerta, Porte
1560 MADE FOR 2" X 6" STUD WALLS
**All purpose frames, marked to cut to shorter lengths.
**Marcos universales, marcados para ser cortados a longitudes menores.
**Montants à usage multiple, marqués pour être coupés plus court.
NOTE: Instructions are for a 80" (2,03m) door, if door is shorter, lower header and cut bottom ends of Split Studs,
if door is taller than 80" (2m), order longer Split Studs and raise header.
NOTA: Las instrucciones son para una puerta de 2,03m. Si la puerta es mas corta, baja la cabecera y corte los extremos
de abajo de las jambas divididas. Si la puerta es más alta que 2,03m, ordene piezas verticales más largas y suba la cabecera.
NOTE: Les instructions se réferrent à la porte de 2,03m, Si la porte est plus petite, abaissez le guide et coupez les extrémités
des montants de séparation. Si la porte est haute que 2,03m, commandez des montants plus longs et rehaussez le guide.
CONSTRUCT ROUGH OPENING Header must be
SQUARE and PLUMB with studs and LEVEL. Minimum
Height is 85" (2,6m) width is 2X Door width plus 1" (25mm).
1
2
3
Snap a chalk line on floor even with side jambs.
CONSTRUYA LA ABERTURA PRELIMINAR. La cabecera
debe de estar en ESCUADRA y A PLOMO con los montantes
y a NIVEL. La Altura Minima es de 2,16m, el Ancho es de
2X Ancho de Puerta mas 25mm.
CONSTRUISEZ L'OUVERTURE BRUTE. Le guide doit être
perpendiculaire et d'aplomb avec les montants ainsi qu'à
niveau.
La hauteur minimale est de 2,16m. La largeur correspond à
2X porte plus 25mm.
Marque una linea con un cordel entizado en el piso
que concuerde con las jambas laterales.
Tracez à craie une ligne au sol parallèle aux montants latéraux .
CONVERGING DOORS REQUIRE TWO FRAMES AND THE 1555 CONVERGING DOOR KIT.
NAIL
CLAVO
CLOU
NAIL
CLAVO
CLOU
CHALK LINE
LINEA DE TIZA
LIGNE A LA CRAIE
Frames for Doors up to 60" (1.27m) wide and 108" (2.74m) high are available.
Hay marcos disponibles para Puertas de hasta 1,27m de ancho 2,74m de alto.
Des montants pour Portes jusqu
'a 1,27m en largeur et 2,74m en hauteur sont disponibles.
NAIL ON CENTER
CLAVO EN EL CENTRO
CLOU AU CENTRE
1/8" [3.2mm]
Measure up from finished floor 80-3/4" (2.05m) or from
sub-floor to 81-1/2" (2.07m). This will give 3/4" (19mm) to
1-1/2" (38mm) clearance under door. Mark each rough
stud and drive a flat head nail on center, leaving 1/8" (3mm)
protuding. (Frame header end brackets will rest on these nails).
Mida 2.05m desde el piso terminado ó 2.07m desde el sub-piso.
Esto dará una separación de 19mm hasta 38mm debajo
de la puerta. Marque cada montante y clave un clavo de
cabeza plana en el centro de cada una, dejando 3mm afuera,
(Los soportes de los extremos de la cabecera del marco
se apoyaran en estos clavos).
Mesurez 2,05m à partir du sol fini ou bien 2,07m à partir du sous
plancher. Ce qui va donner un jeu de 19mm à 38mm sous la porte.
Marquez chaque montant et enfoncez un clou à tête plate au centre,
en laissant dépasser 3mm. (Les crochets du linteau reposeront
sur ces clous).