Do you have a question about the Johnson Outdoors Bass Tender 10.2 and is the answer not in the manual?
| Brand | Johnson Outdoors |
|---|---|
| Model | Bass Tender 10.2 |
| Category | Boat |
| Language | English |
Custom designed boat covers are made from a long lasting vinyl.
Trailers designed for JOW-Sport & Leisure fishing boats can be purchased through a local marine or trailer dealer.
Accessories for rowing include oar locking horn kits, oar lock socket kits, and oars.
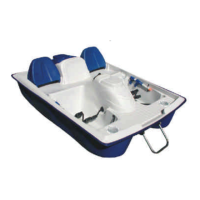
JOW-Sport & Leisure also offers electric deck boats, pedal boats, canoes, and kayaks.
Apply registration decals by wiping surface, letting it dry, peeling, and applying carefully.
Make a permanent record of serial number, date of purchase, and purchased from.
Remove the boat from the water to prevent algae growth on the hull.
Store on trailer or supports along hull length, not across. Loosen straps on trailers.
Wash with mild detergent and water. Avoid plastic conditioners and abrasive cleaners.
Scrape hull for marine life. Consider antifouling preservative for barnacle/algae buildup.
Check and clean pump intake slots. Twist pump counterclockwise to remove and flush.
Tie boat snugly with straps, but do not over-tighten to avoid distorting hull.
Rest boat on support bunks (3½" wide, 5' long). Do not rest on keel rollers. Tie down snugly.
Learn how to plane the 10.6 model by adjusting trim, load, and motor size.
Hull flexing is normal for polyethylene boats and absorbs minor bumps.
Boats not designed to plane will travel smoothly if loaded and trimmed properly.
Boats use thermoformed High Density Polyethylene for impact resistance, durability, and colorfastness.
Capacity is on the tag; flotation provided by foam blocks between deck and hull.
Be conscious of shore conditions like sharp rocks to avoid chafing the hull.
Avoid shallow water to prevent hull contact with bottom. Use fenders for protection.
Fill livewell 2/3 full with cool water. Periodically cycle aerator pump on 10.2, 10.6, 11.3 models.
Use lights in dusk, dawn, fog, or poor lighting conditions.
Enlist help to carry boat to water, tilt motor, remove tie-downs, install drain plugs, step center.
Follow recommended steps to prepare boat, referring to hull decal for model.
Attach swivel mounting bases to seats using fasteners, ensuring snugness.
Ensure transom, livewell, and bow drain plugs are installed. Note additional drain plug.
Use a 12V Deep Cycle Marine battery, connect RED to POSITIVE, BLACK to NEGATIVE.
Oar lock kits are available for purchase; follow included installation instructions.
Check weather conditions and ensure everyone wears proper Personal Flotation Device.
Ensure transom, livewell, and bow drain plugs are installed.
Drain accumulated water between deck and hull before storage. Do not store with water.
Check capacity plate for weight and motor limits. Distribute load evenly.
Connect trolling motor power wires to plug wires using connectors or soldering. Match colors.
Switch on control panel operates 10.6/11.3 lights. 10.2 lights installed into sockets.
Hook up power for fish finder. Two options: bow accessory circuit or control panel access.
Aerator pump controlled by switch on control panel. Has a 2 amp fuse.
Some models have a separate 7.5 amp accessory circuit for fish finders or other accessories.
Three steps: hook up power, mount main unit, mount transducer.
Connect positive wire to orange wire at motor plug. Connect negative wire to black wire.
Mount main unit on horizontal surfaces at front of boat near anchor well.
Mount transducer on trolling motor or raised transom block. Avoid mounting directly to plastic.
Hook up power directly to battery. Follow fish finder installation instructions.
Place the main unit of the fish finder or other accessory on the deck in any convenient location.
Mount on motor or transom mounting block as described previously.