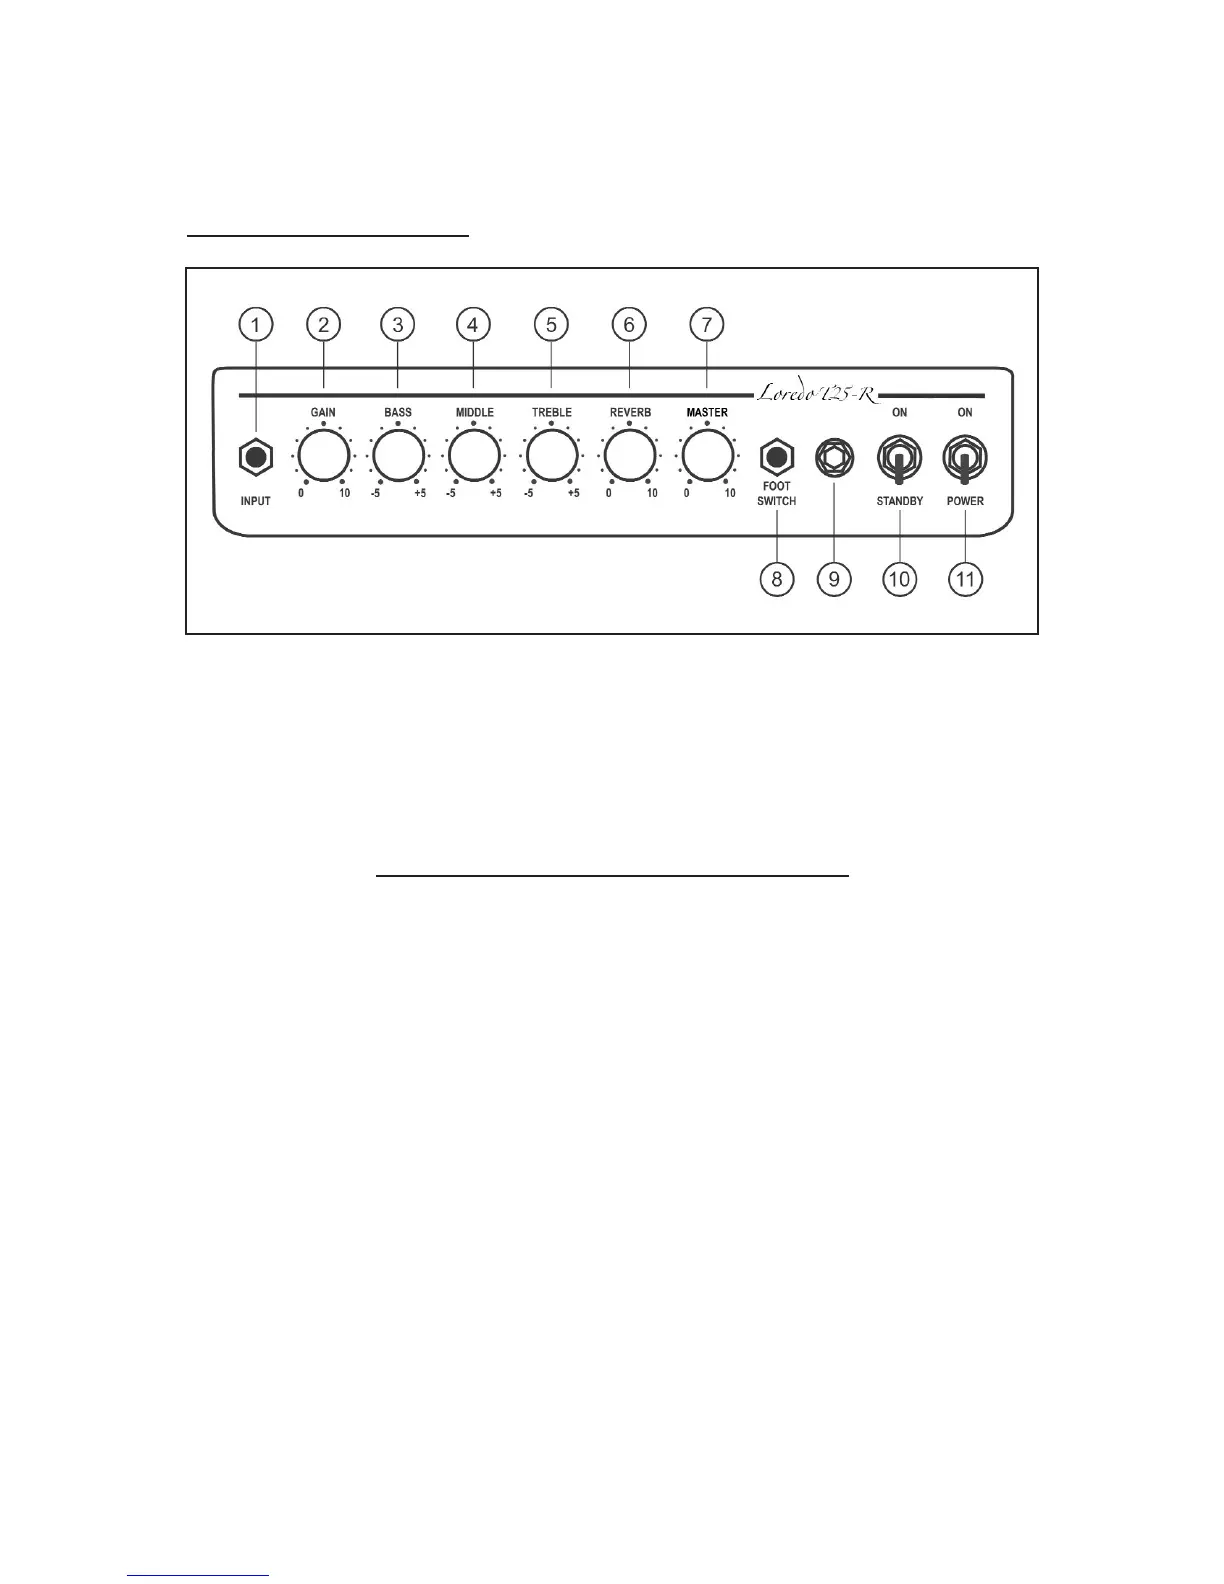
PANEL FUNCTIONS AND OPERATING INSTRUCTIONS
(Please refer to Fig.1 and Fig. 2 for details)
1. Input: Use to connect the signal output from an electric guitar. (Use a shielded cable with
1/4” mono plug).
2. Gain: Use this control to adjust the preamp level. Higher Gain settings allow more overdrive
into the sound.
Equalizer/T
one controls (Bass, Middle and Treble)
3. Bass: Use this control to adjust the low frequency level. Turning this knob clockwise to
boost the bass tone, counter clockwise to cut the bass tone accordingly. Center position
(straight up) provides no cut or boost.
4. Middle: Use this control to adjust the middle frequency level. Turning this knob clockwise
to boost the mid tone, counter clockwise to cut the mid tone accordingly. Center position
(straight up) provides no cut or boost.
5. Treble: Adjusts the high frequency level. Turning this knob clockwise to boost the treble
tone, counter clockwise to cut the treble tone accordingly. Center position (straight up) provides
no cut or boost.
6. Reverb: Adjusts the amount of sound reverberation/reflection effect to the guitar’s signal.
7. Master/Volume: Overall volume adjustment. Turning this knob clockwise (0-10) increases
the overall sound level.
8. Foot Switch: Controls the Reverb on/off with single button footswitch. (Optional)
9. LED: LED will be lit when the switch is in the upward position (Power On); LED will be
off when the switch is in the downward position (Power Off).
10. Standby Toggle Switch: When this Switch is in the upward position (On), this mode
keeps tubes powered-up and avoids delay times (Time it takes for tubes to warm up) for guitar
players between practice sessions. It also lengthens tube lifetime performance.
A. THE FRONT PANEL
Fig. 1
 Loading...