1918
JOHNSON BIKE C8000 / R8000 JOHNSON BIKE C8000 / R8000
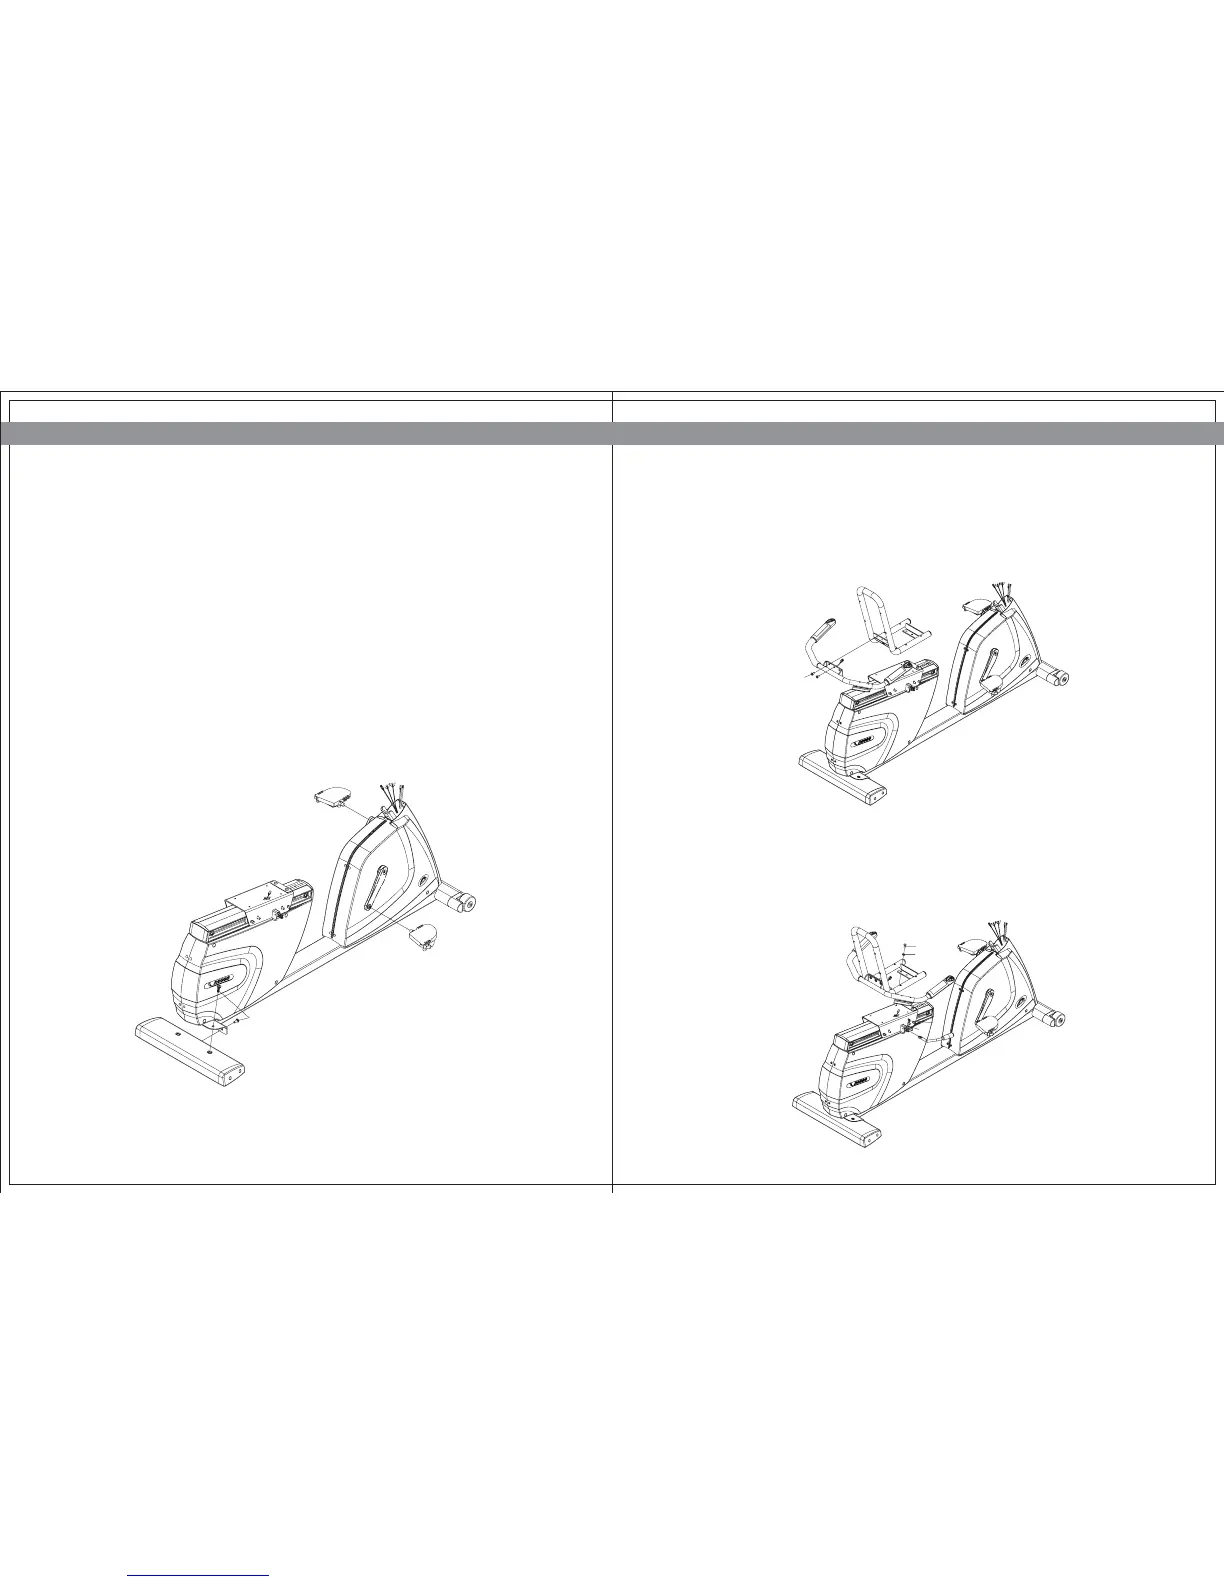
STEP 1
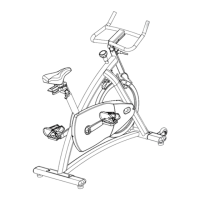
ASSEMBLY STEPS
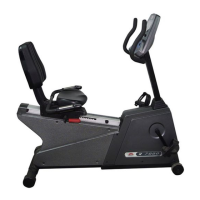
STEP 2
ëREAR FOOT
Install the rear foot in position at the rear of the bike with the mating holes in the frame
bracket. Insert the four screws (Z04) through the frame bracket and rear foot. Using the #5
Allen Wrench (Z32) tightens the screws securely.
ëPEDALS
Install the pedals on the pedal cranks using the Open Wrench (Z31). The JOHNSON logo
on the pedal strap must point upward.
NOTE: Be careful to align the threads correctly to avoid damage. A little grease on the threads
should help the pedals to screw in easily and correctly. Turn the left pedal spindle counter
clockwise when threading into the crank arm, and turn the right pedal spindle clockwise
when threading into the crank arm.
Pull the heart rate wire through the hole in the bottom of the seat frame, and make sure the
wire get through the tunnel of the plate. Mount the seat handlebars to the seat frame by
using three socket-flat-head screws (Z05).
STEP 3
ëInstall the seat rail on the seat adjustment bracket using the four washers (Z10) and screws
(Z09). Tighten them with the #5 Allen Wrench (Z32).
ëConnect the wire harness from the seat handlebar to the wire harness coming from the
seat frame.
ëSlide the seat adjustment handle between the teeth of the seat adjustment bracket. Insert
two spring washers (Z12) and socket head screws (Z11), and tighten with the #4 AllenWrench.
Z04