16
ENGLISH
7.0 Service
Any unauthorised modifi cations to the product are prohibited!
Only original spare parts may be used!
Use tools with great care.
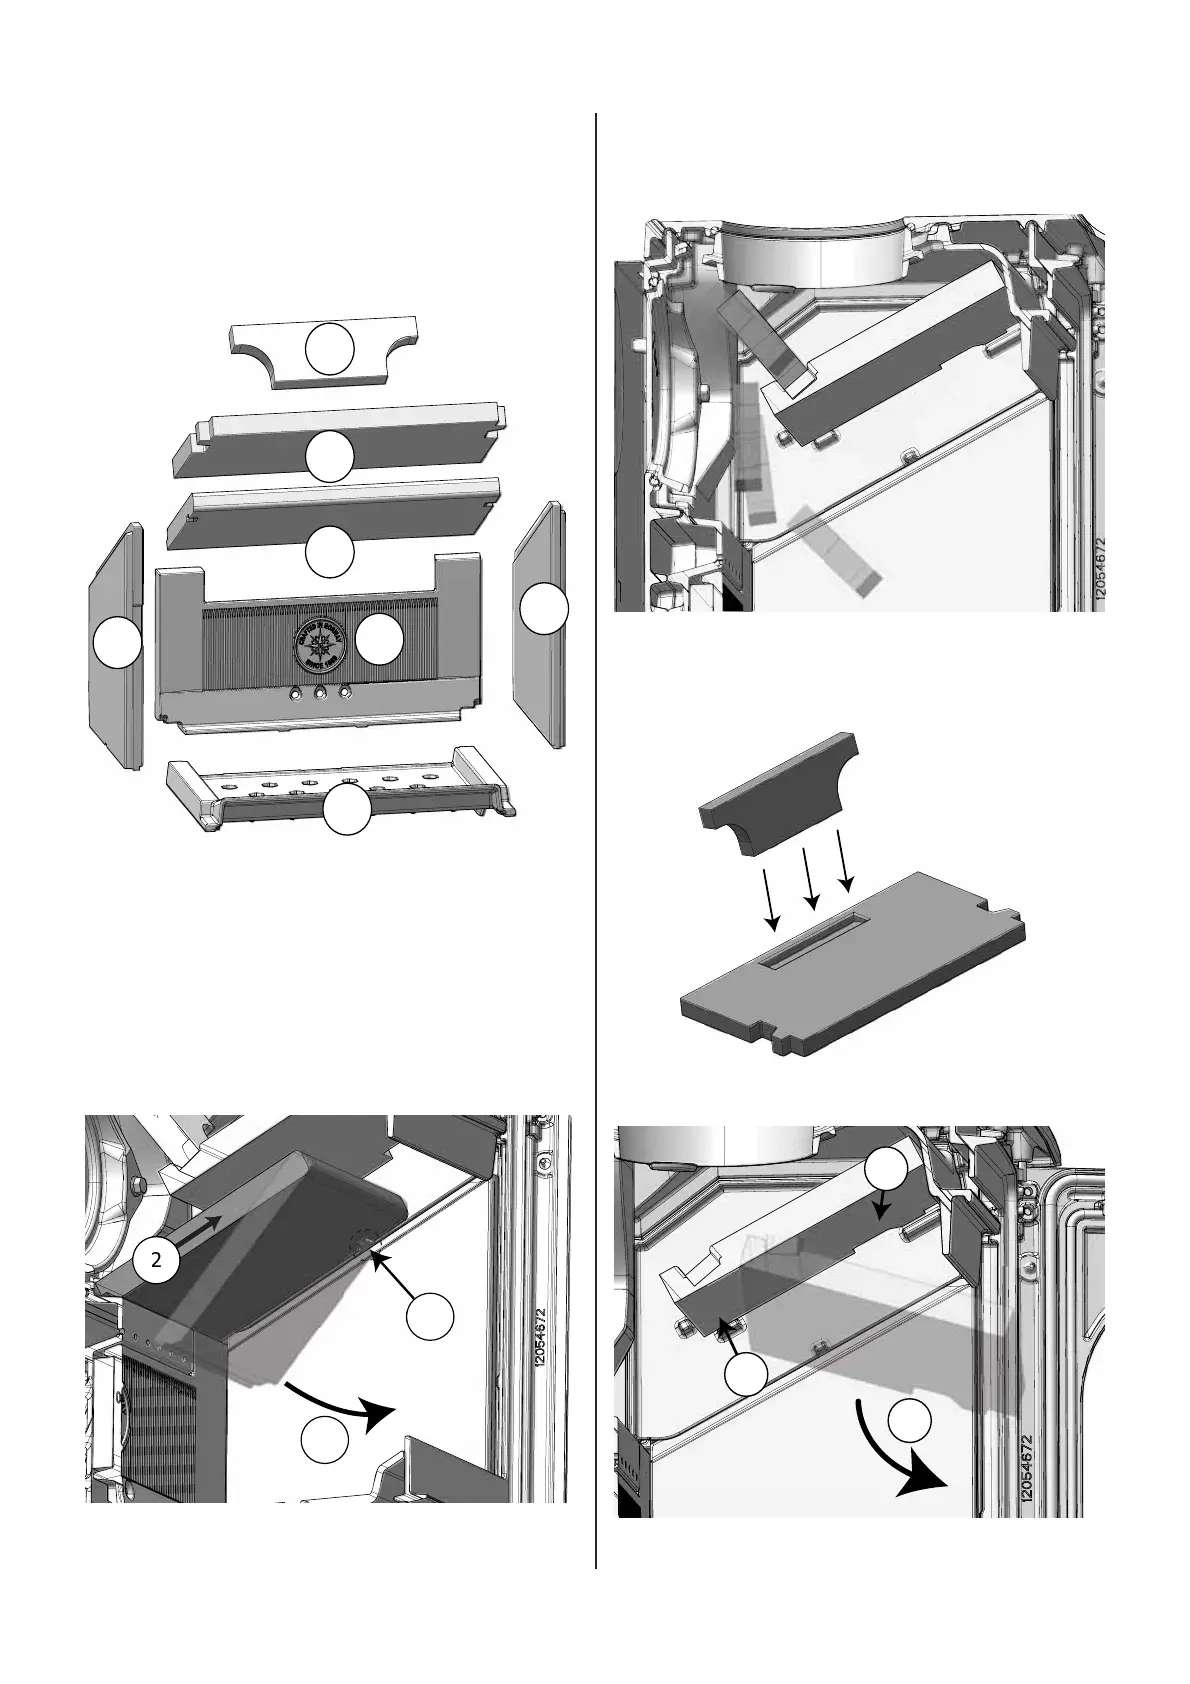
Fig. 14
1
2
3
5
5
4
6
1. Upper exhaust defl ector
2. Lower exhaust defl ector
3. Baffl e plate
4. Rear burn plates
5. Side burn plates (2 pieces)
6. Ash grate
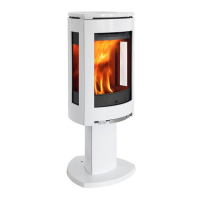
7.1 Replacing the baffl e plate
Fig. 15
1
2
3
1. Lift up the front edge from the cam it rests on.
2. Push the baffl e plate forward so that it is released at the
rear edge.
3. The baffl e plate can now be edged out of the oven.
4. When refi tting, follow the same procedure in reverse order.
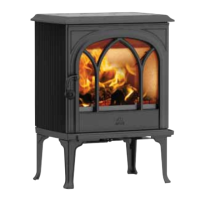
7.2 Replacing the exhaust defl ectors
Fig. 16
1. Lift the upper defl ector up to the rear edge. This is located
on a groove in the lower defl ector, see fi g. 17.
2. When refi tting, follow the same procedure in reverse order.
Fig. 17 Placement of the upper exhaust defelctor
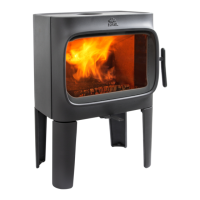
Fig. 18
2
1
3
1. Lift the lower exhaust defelctor up to the rear edge.
2. The exhaust defelctor is released from the lugs in front.
3. The exhaust defl ector can now be lifted out.
4. When refi tting, follow the same procedure in reverse order.