EasyManua.ls Logo

Joy CAT TREE User Manual

Joy CAT TREE
2 pages
To Next Page IconTo Next Page
Page #1 background imageLoading...
Page #1 background image
f
f
f
f
----- 1 -----
----- 2 -----
48x48cm*1
1
1
48x48cm*1
2
48x20cm*1
3
48x20cm*1


40x40cm*1
4
*An extra spare is provided for each kind of screw
( M8*20, M8*40, M8*80)
CAT HOUSE



within 24 hours!
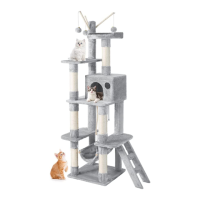
Overall Dimensions: 18.9” L x 18.9” W x 58” H (48 x 48 x 147 cm)


Materials:
Frame Structure: Material: MDF Board
, 


Loose components will result in damage to the cat tree. Ensure

Check that screws are secure once a month to ensure

support@oudort.com
ASSEMBLY INSTRUCTIONS
JOYO CAT TREE SPECIFICATIONS
NEED HELP?
• Step1:
pencil.
• Step2: Please drill a hole in the wall for each anchor. (When using


• Step3:
the wall surface.
• Step4: Place a screw in the center of the wall anchor.
• Step5: -
driver.

manual
avoid personal injury to pet or property damage.

away to avoid accidents.




product against wall or corner.

necessary.
• Always supervise your pet when using this item.


worn, loose or detached.
• As with most furniture, do not place in direct
sunlight and/or

rust on metal surfaces

recommended for outdoor use.
• Spot clean only with gentle liquid detergent mixed
with water.

future reference.

PARTS LIST ANTI-TOPPING FITTINGS


Hole for
installing the ladder
STEP1
STEP3
58inch
18.9inch
18.9inch
STEP2
STEP4
HOW TO USE THE ANTI-TOPPLING FITTINGS?

5
35x30x25cm*1
6
40cm*2
7
7x42cm*1
8
Top Perch
Diameter: 11.81”
Condo Dimension:
13.78” L x 11.81” W x 9.84” H
f
f
f
6
2
f
f
f
f
f
f
10
10
5
A
A
A
A
f
a
D
B
b
f
f
b
C
E
11
INSTALLATION STEPS
4
7
7
3-23-1


Question and Answer IconNeed help?

Do you have a question about the Joy CAT TREE and is the answer not in the manual?

Joy CAT TREE Specifications

General IconGeneral
BrandJoy
ModelCAT TREE
CategoryPet Care Product
LanguageEnglish

Summary

Cat Tree Assembly and Specifications

Joyo Cat Tree Specifications

Details product dimensions, weight, and materials for the cat tree.

Parts List

Lists all components and hardware required for assembling the cat tree.

Installation Steps

Step-by-Step Installation Visuals

Visual guide for assembling the cat tree through numbered steps (STEP 1-4).

Anti-Topping Fittings Usage

Instructions on how to properly install anti-topping fittings for stability.

General Safety Warnings

Crucial safety precautions and warnings for assembly and product use.

Detailed Installation Procedure

Base and Lower Structure Assembly

Instructions for attaching posts and plates to the base plate.

Mid-Section and Condo Assembly

Steps for connecting the condo, hanging rope, and additional posts.

Top Perch and Final Touches

Instructions for installing the top perch and decorative sticks with balls.