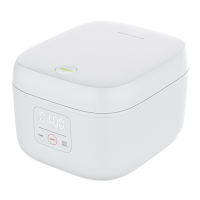
The Joyami Smart Rice Cooker L1 is a household appliance designed for cooking rice and other food items, featuring smart connectivity and various cooking modes.
Function Description
The primary function of the Joyami Smart Rice Cooker L1 is to cook rice. It offers multiple cooking modes including "REGULAR," "QUICK," "CONGEE," and "WARM," with an additional "APP" mode for custom functions via the Mijia app. The device automatically adjusts cooking times based on the selected mode and quantity of rice. After cooking, it can automatically switch to a "WARM" mode to maintain food temperature. The rice cooker is equipped with temperature sensors (top and bottom) to ensure precise cooking. It also features a steam valve and a detachable inner lid for easy cleaning.
Important Technical Specifications
- Product Name: Rice Cooker
- Product Model: JFB02M
- Heating Way: Electric Heating Plate
- Material of Inner Pot: Aluminium Alloy
- Rated Voltage: 220-240V~
- Rated Power: 890-1060W
- Rated Frequency: 50-60Hz
- Capacity: 1.6L
- Dimensions: 328×222×281mm
- Working Altitude: 0 m to 2,000 m
Usage Features
-
Connectivity:
- Mijia App Integration: The rice cooker connects to the Mijia app, allowing users to control the device, select cooking modes, and access custom functions. The Wi-Fi icon blinks when powered on for the first time, indicating readiness for connection. Once connected, the Wi-Fi icon remains on and goes off when the screen turns off.
- Wi-Fi Reset: To reset Wi-Fi settings, simultaneously press the "TIMER" and "SELECT/CANCEL" buttons for 3 seconds. The screen will display a marquee tool, and upon successful reset, the Wi-Fi icon will blink.
-
Cooking Process:
- Opening the Lid: Press the lid opening button. When taking out the inner pot, gently push the lid to open it fully and avoid touching the inner lid.
- Initial Use Preparation: Before first use, it is recommended to boil water 2 to 3 times using the "QUICK" mode for 40 minutes each time to reduce any bad smell.
- Adding Ingredients: Place rice and water into the inner pot, ensuring the water level does not exceed the corresponding mark to prevent overflow, short circuit, or other faults.
- Menu Selection: After powering on, press the "SELECT/CANCEL" button to cycle through modes: "REGULAR," "QUICK," "CONGEE," "WARM," and "APP."
- Starting Cooking: Press the "START" button to begin cooking. "REGULAR" and "QUICK" modes are specifically for rice; using them for other raw materials may cause burns or damage.
-
Cooking Modes:
- REGULAR: Default mode, automatically adjusts cooking time based on rice quantity (approx. 1 hour).
- QUICK: Automatically adjusts cooking time based on rice quantity (approx. 40 minutes).
- CONGEE: Default cooking time is 1.5 hours, adjustable from 40 minutes to 4 hours via the Mijia app.
- WARM: Automatically activates after cooking to maintain temperature at about 73°C. Can also be selected manually. Holding time should be limited to 12 hours; beyond 24 hours, the mode is canceled. Some Mijia app modes (e.g., Baking Cake) are not suitable for "WARM" mode.
- APP: Offers various custom cooking modes (e.g., stewing, baking cake) selected via the Mijia app.
-
TIMER Function:
- Allows users to set a reservation time for cooking completion. For example, to have a meal ready in 2 hours, set the reservation time to 02:00.
- The reservation time extends by 15 minutes each time the "TIMER" button is pressed. Press "START" to begin reserved cooking.
- A reservation is successful only if the reserved completion time is longer than the cooking cycle of the selected mode; otherwise, cooking starts immediately.
Maintenance Features
-
Dismantling the Inner Lid:
- Push upwards on the inner lid latch until it pops out.
- Hold and remove the inner lid.
- The steam valve can then be seen. Hold both sides of the steam valve and pull it out.
- Unlock the upper latch of the steam valve and remove the sealing strip.
- Wash the inner lid and steam valve after use.
-
Installing the Inner Lid:
- Insert the sealing strip into the slot on the lower cover of the steam valve, then press the upper latch into the buckle after aligning the bottom of the inner lid.
- Align the steam valve port with the installation position of the steam outlet and press it slowly.
- Insert the inner lid support ring into the slot, then slowly press the inner lid inwards along its bottom as the axis.
- Fasten the inner lid with the upper latch.
- Note: The steam valve and inner lid must be installed correctly for the lid to close.
-
Cleaning:
- Do not immerse any part of the rice cooker in water or spray water on it.
- Do not use steel wool or other hard items to clean or scrub the inner pot.
- Use a soft cloth to clean the product.
- Regularly check the steam discharge pipe to ensure it is not clogged.
-
Troubleshooting:
- The manual provides a detailed troubleshooting guide for common issues such as the lid not closing, buttons not working, steam leaks, undercooked/overcooked rice, overflows, bad smells, and Wi-Fi connection problems.
- Fault codes (E-09, E-10, E-11) indicate sensor damage or communication faults, requiring contact with after-sales service.
-
Power Cord:
- Only use the provided AC power cord.
- Disconnect the power cord before maintenance or moving.
- If the power cord is damaged, replace it with a specific power cord from the manufacturer or maintenance department.
- Do not over-pinch, bend, or twist the AC power cord.
- Do not use the supplied AC power cord on any other device.
- Always hold the plug firmly when disconnecting to avoid electric shock or short circuit.
- Use an independent power socket with a ground wire and a rated current above 10A.