5 Joyberri | Upsurge Pro 12ft Trampoline
4 Joyberri | Upsurge Pro 12ft Trampoline
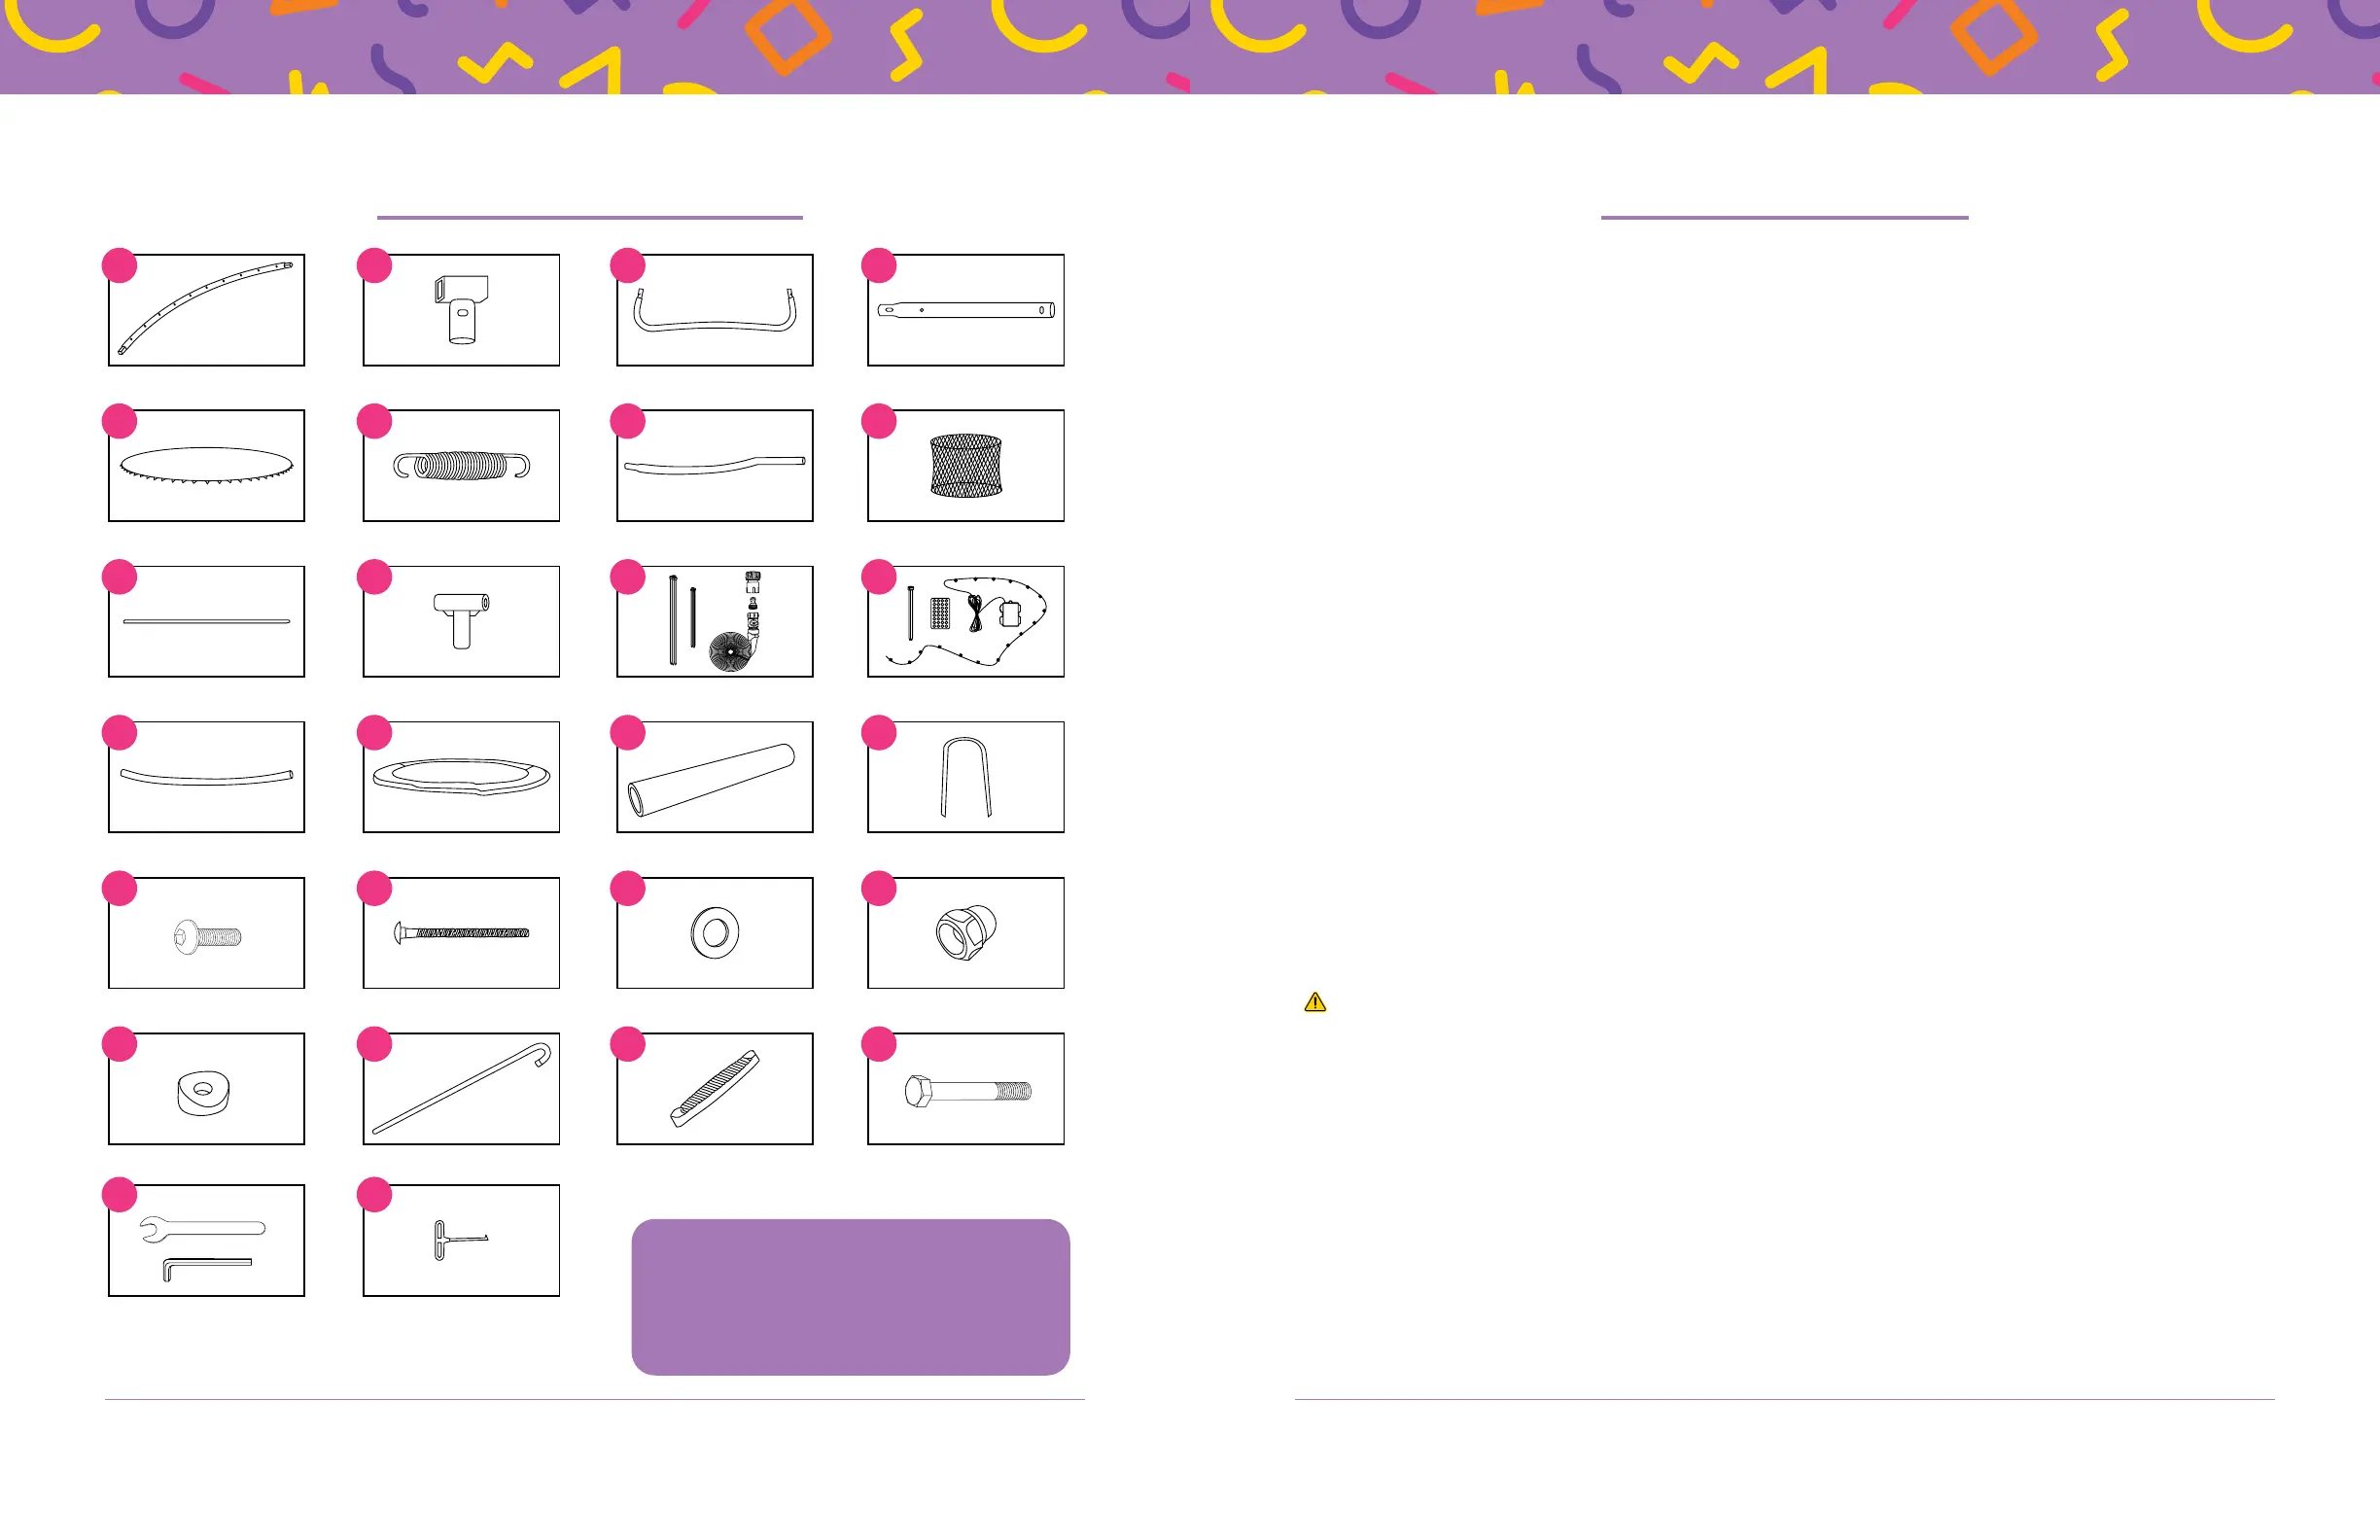
WHAT’S IN THE BOX? ASSEMBLY NOTES
Important Assembly Notes
• Two adults are required to assemble this trampoline.
• We recommend wearing safety glasses during assembly.
• We recommend wearing the included gloves to protect your hands and keep them clean. There
is a thin layer of protective oil on the metal parts which could transfer to your hands.
• You will also need a hammer or rubber mallet.
• Be careful not to pinch your fingers during assembly.
• Many of the assembly instructions and diagrams include a reference letter, for example, “Locate
the trampoline mat (E)”. The reference letter corresponds to the letters identifying each part in
WHAT’S IN THE BOX? on page 4.
Where to Set Up the Trampoline
• Set up the trampoline outdoors only, on level, well-drained grass or dirt, clear of any obstructions
such as large rocks, bricks, plants, and other yard features. Setting up the trampoline on uneven
ground surfaces may cause the trampoline frame to warp. Do not set up over concrete, asphalt,
or other hard surfaces. This trampoline is not intended to be buried in the ground.
• Set up the trampoline in an open location, at least 7 feet away from any structures or
obstructions such as fences, garages/buildings/structures/houses, walls, overhanging branches,
laundry lines, or electrical wires, and other play areas, such as swimming pools, sports courts,
swings, slides, or climbing gyms.
• Set up the trampoline with plenty of overhead clearance. A minimum of 24 feet from ground level
is recommended. Provide clearance for wires, tree limbs, and other potential hazards.
Moving the Trampoline
WARNING! Moving the trampoline requires a minimum of two people. Three or more people
are recommended. Serious injury or damage to the trampoline can occur if a single person
attempts to move the trampoline.
To move the trampoline a short distance, such as from one side of your yard to the other:
1. Wrap all connection points with a weather-resistant tape, such as duct tape, before moving.
This will keep the frame intact and prevent the connection points from dislocating or separating.
2. Remove the ground stakes.
3. Lift the trampoline slightly off the ground and slowly move it from one area to another. Make
sure to keep it horizontal to the ground.
NOTE
:
To move the trampoline longer distances, particularly if moving it from one location to
another, we highly recommend disassembling the trampoline. To disassemble, follow the assembly
steps on pages 6–20 in reverse order.
I
E
U
A
Q
Y
M
J
F
V
B
R
Z
N
K
G
W
C
S
O
L
H
X
D
T
P
Frame Rails ×8 Metal T-Connectors ×8 Legs ×4 Leg Extensions ×8
Trampoline Mat ×1 Springs ×72 (+ A Few Extra) Lower Poles* ×8 Safety Net ×1
Fiberglass Poles ×8 Plastic T-Connectors ×8 Sprinkler Hose Kit ×1 LED Light Kit ×1
Upper Poles* ×8 Padded Frame Cover ×1 Foam Pole Covers ×16 Ground Stakes ×4
M6×12mm Hex Bolts ×8 M6×75mm Carriage Bolts ×16
M6 Washers ×16 M6 Cap Nuts ×20
Plastic Pads ×16
Ladder Legs ×2
Ladder Steps ×2 M6x40mm Bolts ×4
M6 Wrenches (Hex & Open) x2
Spring Installation Tools ×2
* Please do not remove or throw away the foam pole
covers (O) on poles (G) and (M).
NOTE: Hardware comes packaged together to help
prevent lost items.
 Loading...