6 Joyberri | Upsurge Pro 12ft Trampoline
7 Joyberri | Upsurge Pro 12ft Trampoline
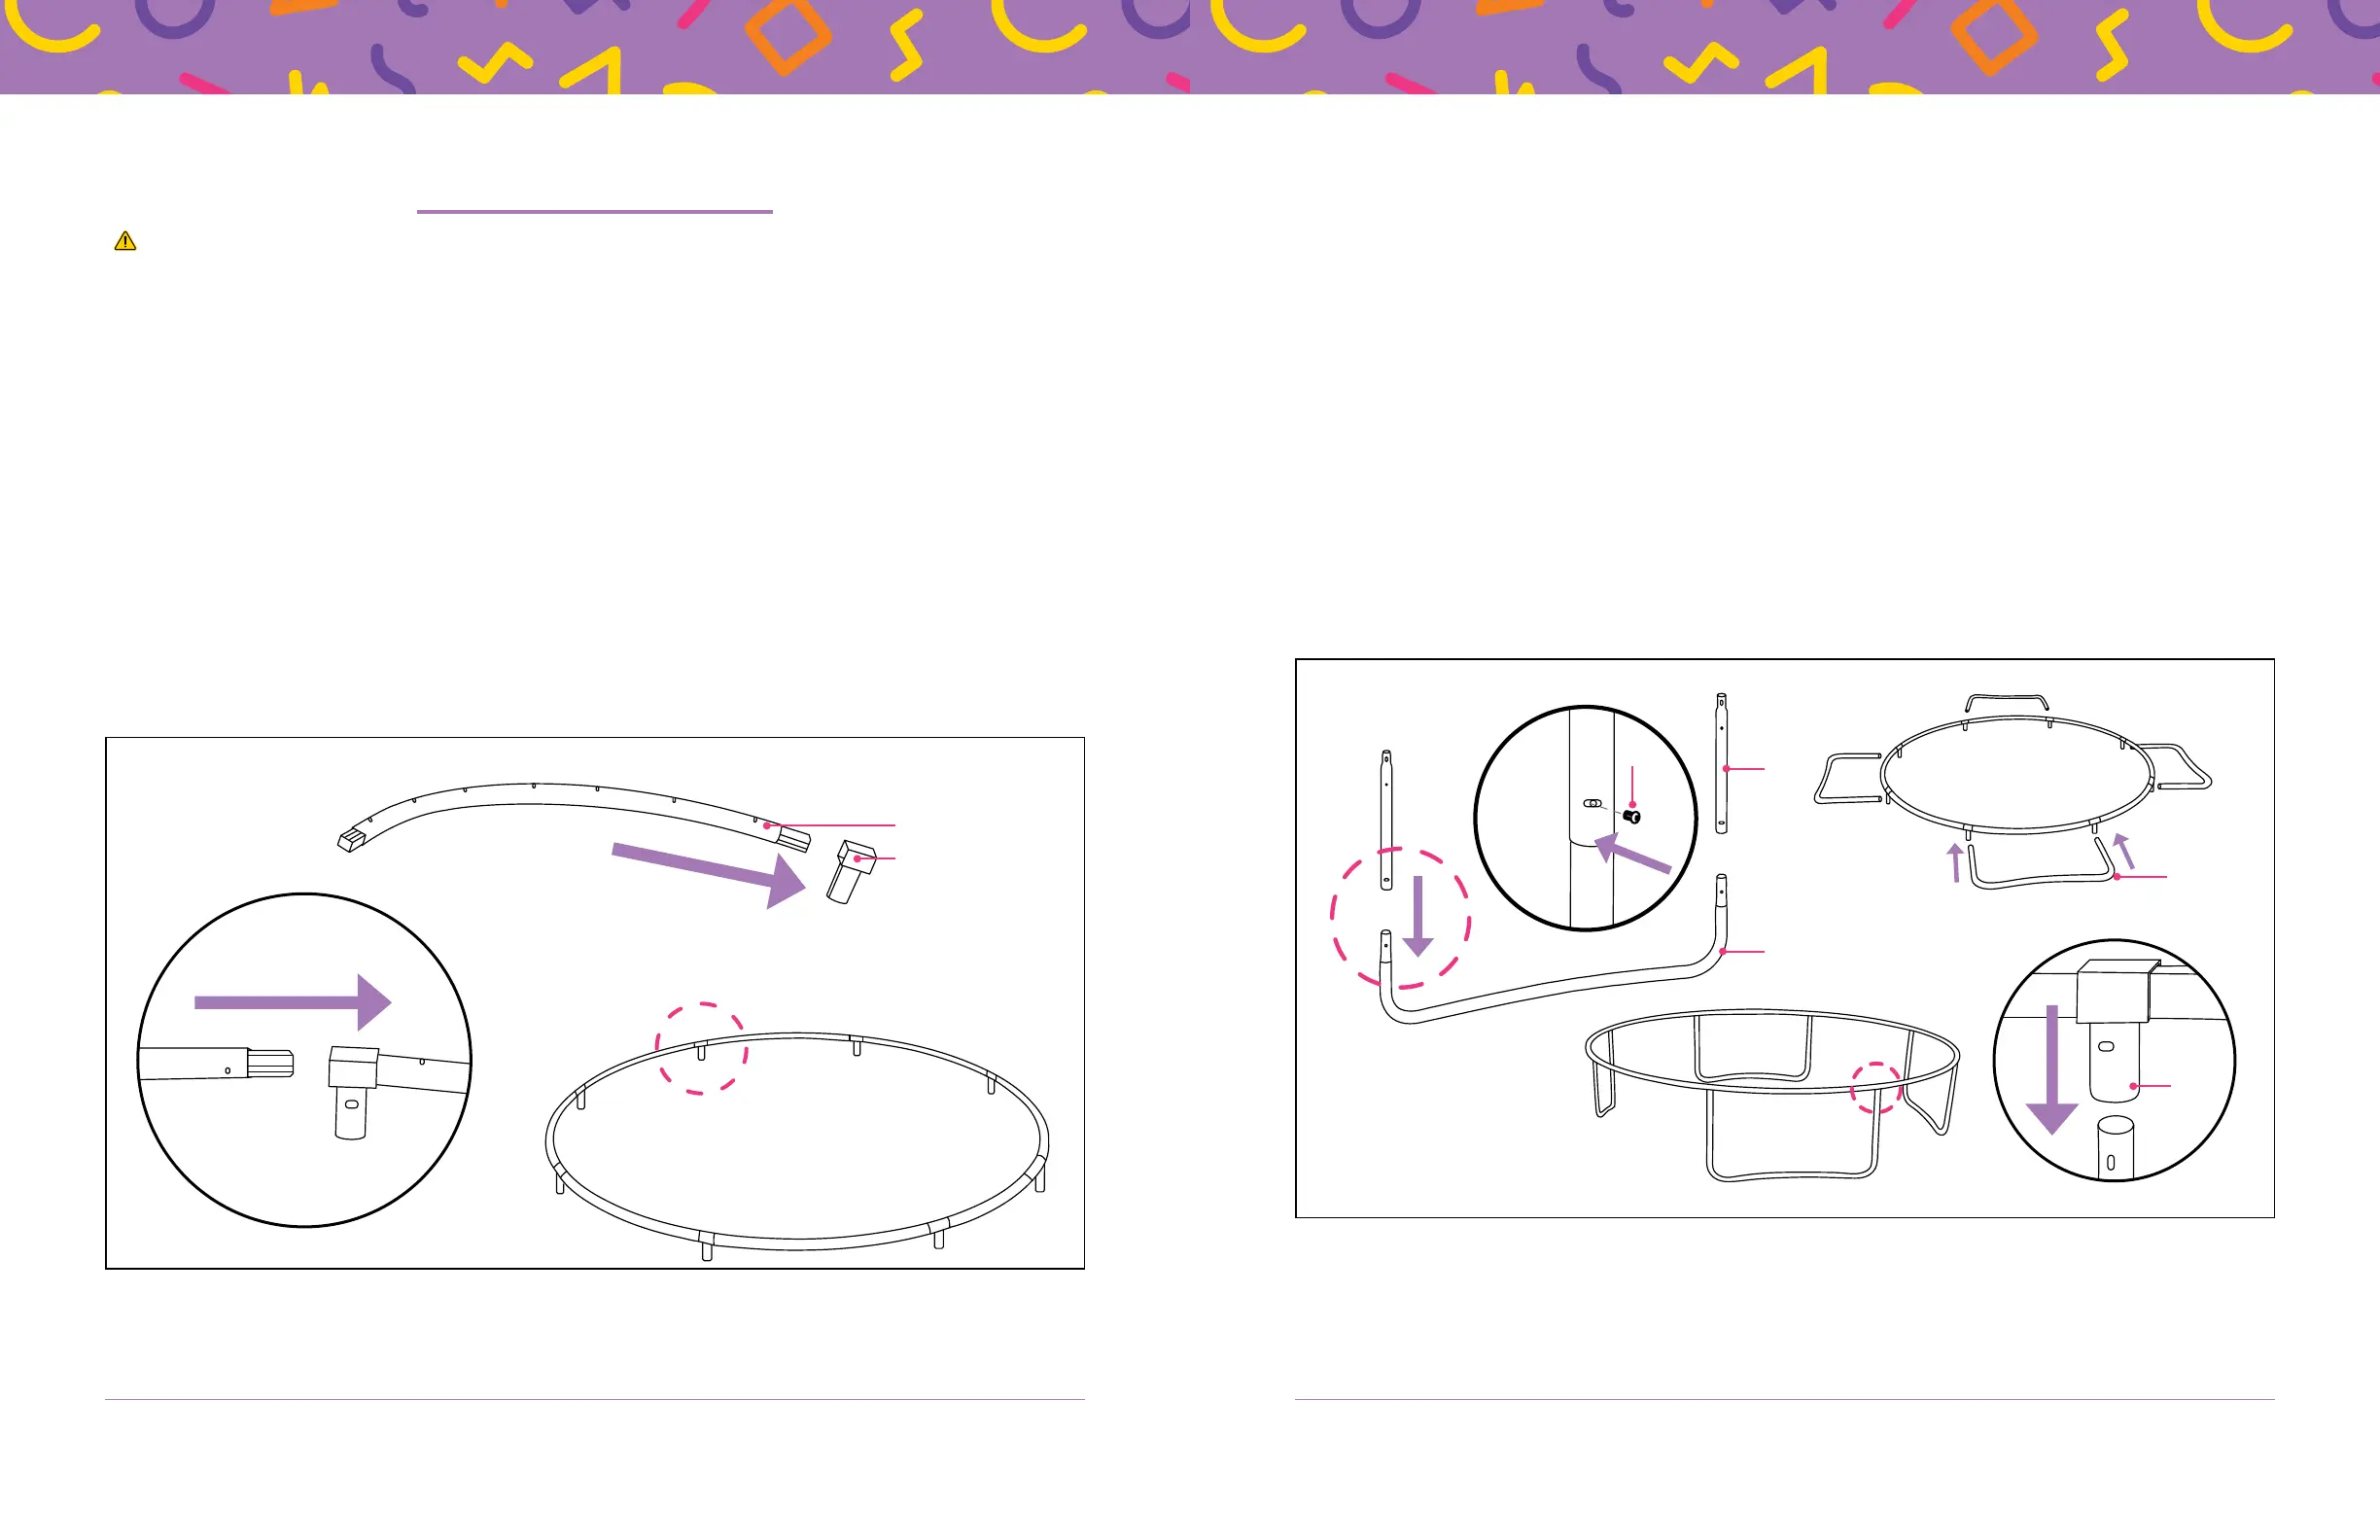
STEP 2
:
Assemble and Attach the Legs
1. Locate the four legs (C), eight leg extensions (D), eight M6 × 12mm (shorter) hex bolts (Q), and
the hex wrench (Y).
2. Insert two leg extensions onto a leg. Ensure the side with the holes is on the inside of the
trampoline. See Figure 2.
3. Insert an M6 × 12mm hex bolt through the screw holes in each extension and the leg.
4. Turn the hex bolt by hand, then use a hex wrench to fully tighten it.
5. Repeat steps 2–4 until all four legs have been assembled.
NOTE
:
Two adults are required to complete the following steps:
6. Adult 1: Lift one side of the trampoline frame.
7. Adult 2: Insert an assembled leg into the bottom of two T-connectors (B). See Figure 2.
IMPORTANT
:
If the holes in the T-connectors and holes in the leg don’t line up, flip the leg around.
8. Repeat steps 6–7 to attach the three remaining legs.
D
C
B
Q
Figure 2
ASSEMBLY GUIDE
WARNING!
• Adult assembly is required. Keep children away during assembly. This product contains small
parts that may present a choking hazard to children under 3 years old.
• Before assembly, properly dispose of all packaging, especially plastic bags which may present a
suffocation hazard to small children.
STEP 1
:
Build the Trampoline Frame
NOTE
:
We recommend wearing the included gloves to protect your hands and keep them clean.
There is a layer of protective oil on the metal parts which could transfer to your hands.
1. Locate the eight frame rails (A) and eight metal T-connectors (B).
2. Insert a rail into a T-connector. See Figure 1.
3. Insert a second rail into the other end of the T-connector.
4. Continue connecting T-connectors and rails until you’ve built the round trampoline frame. Each
T-connector will connect two rails. See Figure 1.
A
B
Figure 1
C/D
 Loading...