9 Joyberri | Upsurge Pro 12ft Trampoline
8 Joyberri | Upsurge Pro 12ft Trampoline
STEP 3
:
Attach the Springs and the Trampoline Mat
CAUTION! Springs are under high tension during assembly. Be careful not to pinch your fingers.
IMPORTANT NOTES
:
• Two adults are required to complete the following steps.
• Ensure all bolts are fully tightened before installing the springs. Failure to do so will cause the frame to
warp.
• Do NOT install springs only on one side of the frame at a time. Uneven distribution of the spring tension
will cause the frame to warp. Install springs as instructed to ensure tension is spread out evenly.
• Do not use your leg to push on the trampoline frame or legs when installing the springs as this will cause
the trampoline to warp.
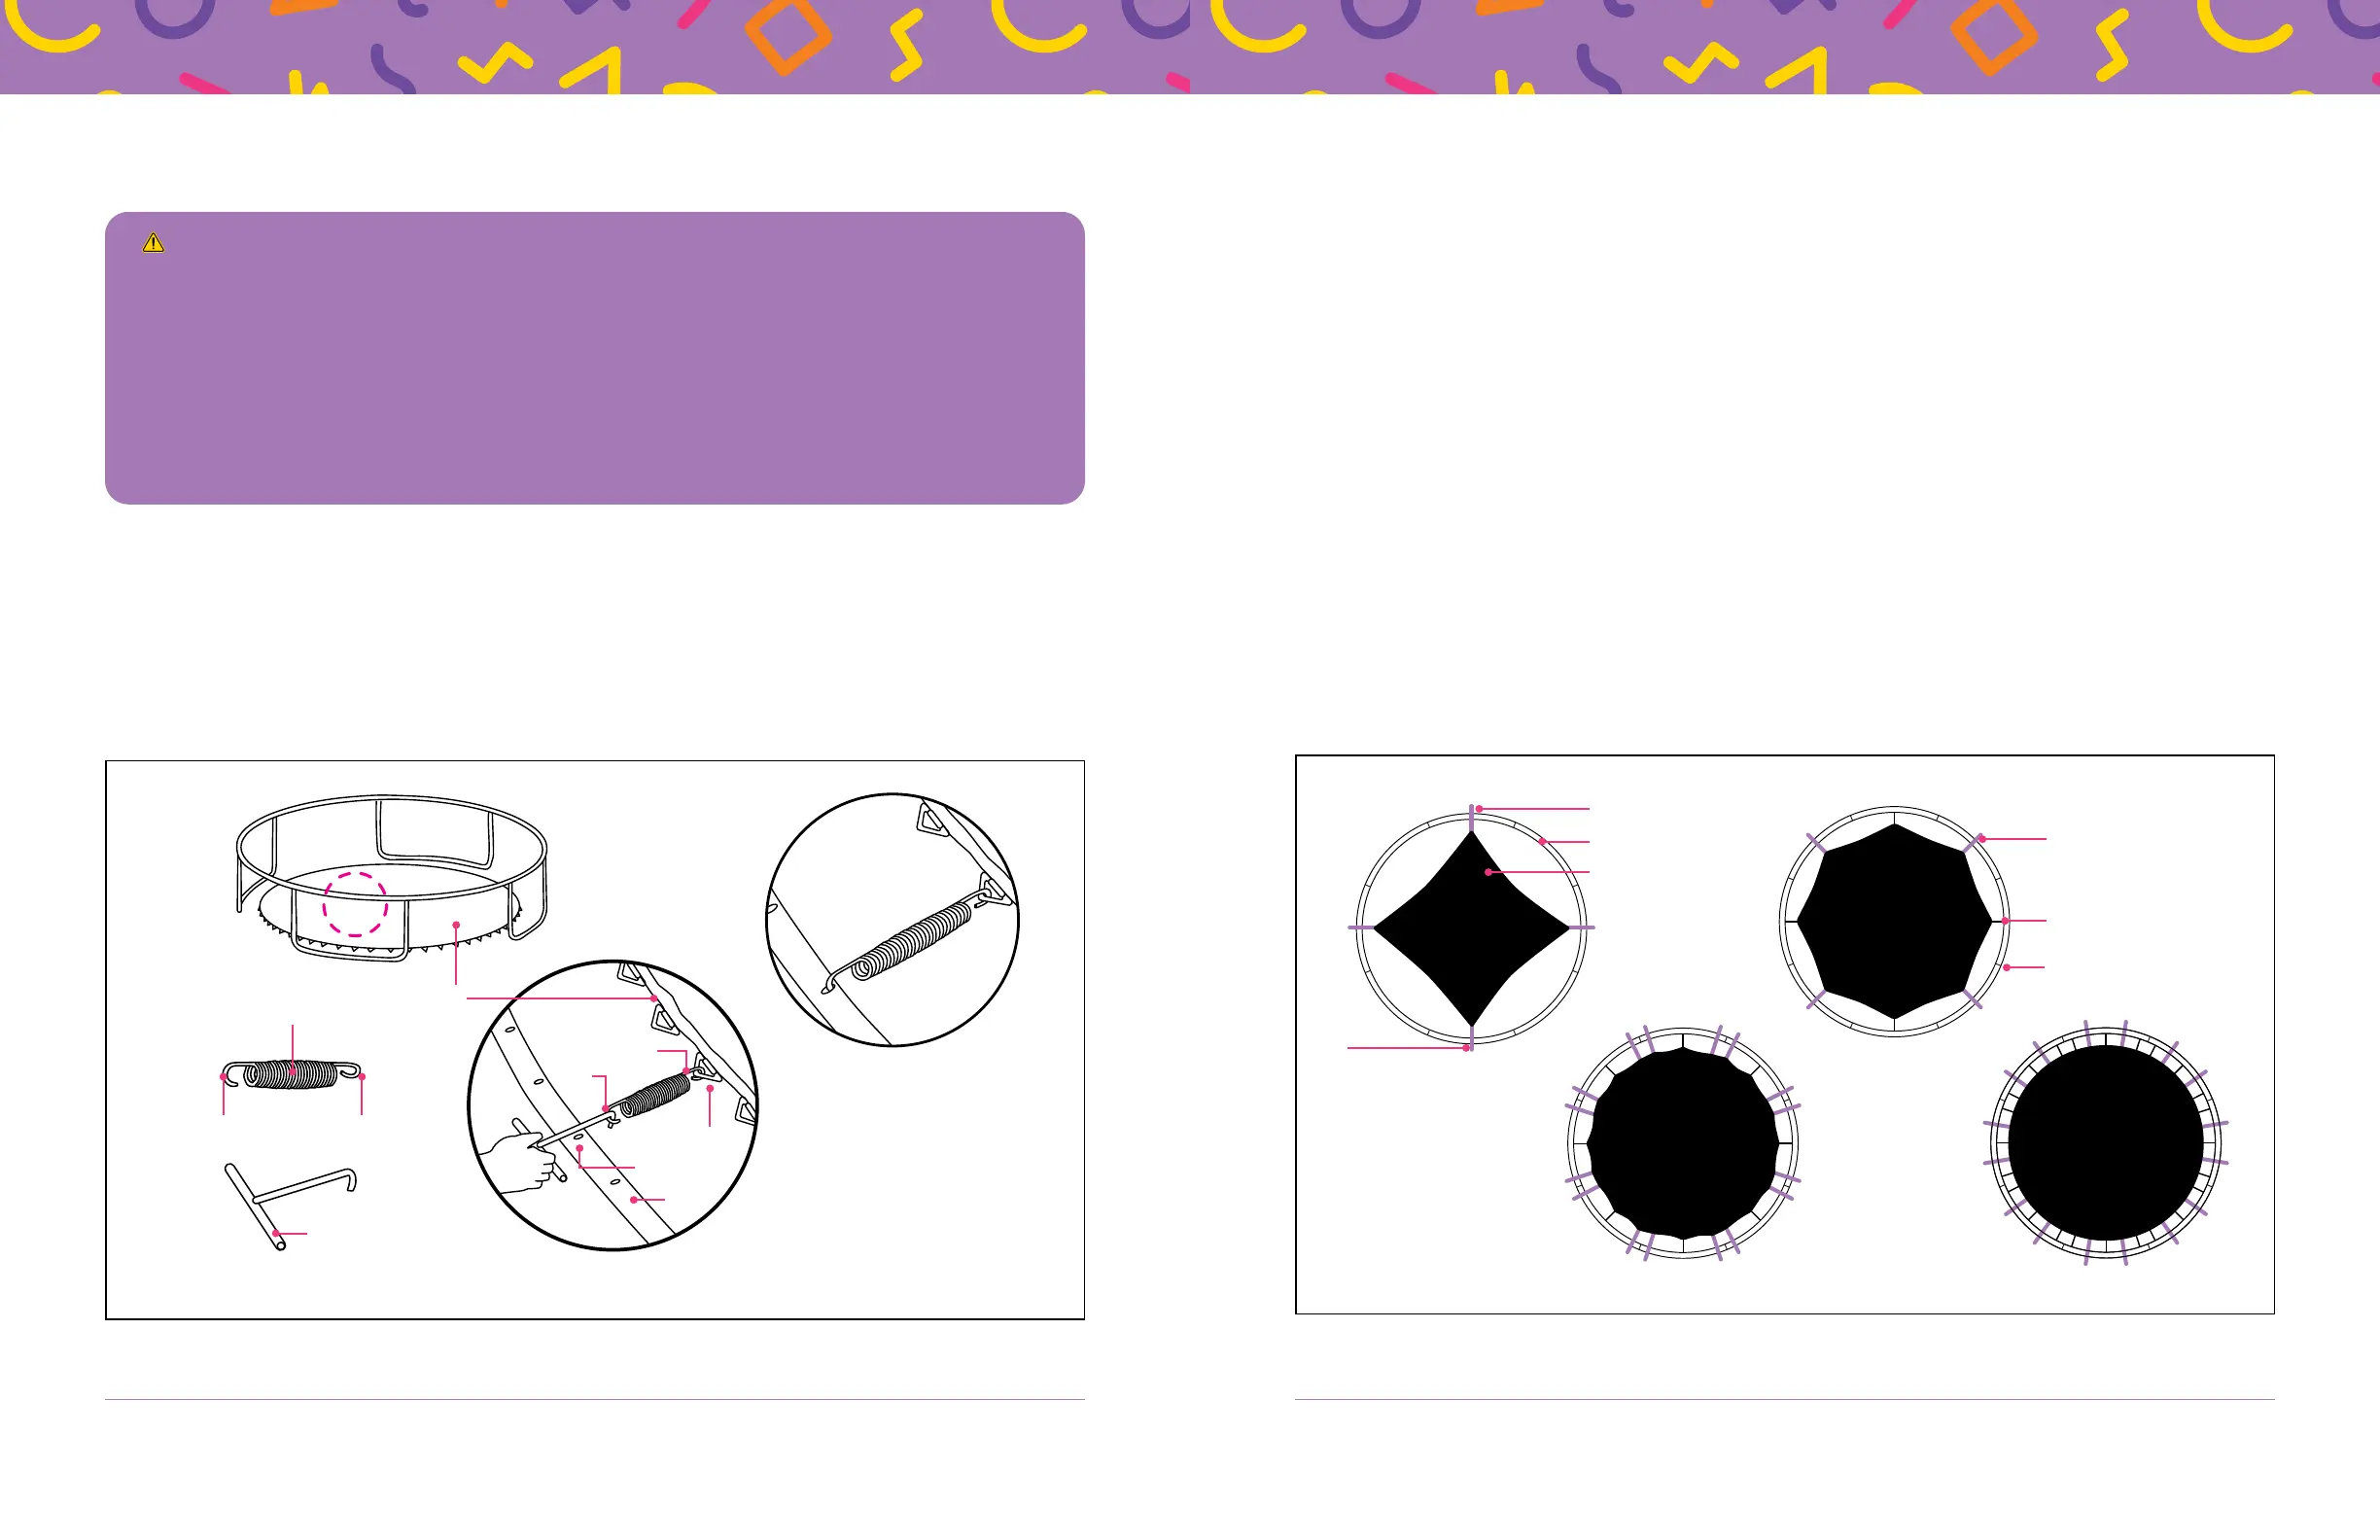
1. Locate the trampoline mat (E), two boxes of springs (F), and two spring installation tools (Z).
2. Unfold the trampoline mat and lay it inside the trampoline frame. See Figure 3.
3. Each spring has a hook at either end. Side 1 has a tapered P-shaped hook. Side 2 has an oval
J-shaped hook. See Figure 3.
4. Adult 1: Stand at the center of a leg. Grab a spring and hook Side 1 through a V-ring on the edge
of the trampoline mat. See Figure 3.
Side 2 Side 1
V-ring
F
Side 1
Side 2
Z
A
Slot
E
Figure 3
5. Adult 1: Hook the spring installation tool (Z) through Side 2, stretch the spring, and hook Side 2
into the center slot in the frame rail (A). See Figure 3 and Figure 4a.
a. Each rail (A) has 9 slots. Counting from either end of the rail, the center slot is the FIFTH.
b. Make sure the spring latches securely into the slot.
6. Adult 2: Stand directly across from Adult 1. Install spring 2 to the center (fifth) slot in the rail.
7. Adults 1 & 2, moving to the RIGHT and working on opposite sides of the trampoline:
a. Move two rails to the right and install springs 3 and 4 to the center slots. You should now have
springs at 1, 2, 3, and 4 (see Figure 4a), or at 90°, 180°, 270°, and 360° around the trampoline.
b. Install springs 5–8 to the center slots in the remaining four rails. See Figure 4b.
c. Install springs in the far-left and far-right slots in each rail. See Figure 4c.
d. Install a spring in the CENTER slot in each set of 3 empty slots. See Figure 4d.
e. Install the remaining springs. A few extra springs are included in case you need them.
NOTE
:
If at the end of installation some of the remaining V-rings and slots do not line up, you may
need to remove and re-install some springs.
a
b
c
d
1
7
2
6
4
8
3
5
F
A
F
E
Spring (F) installed in a
previous step
Marks one end of the
frame rail (A)
Spring (F) to be installed
in the current step
Figure 4
 Loading...