10 Joyberri | Upsurge Pro 12ft Trampoline
11 Joyberri | Upsurge Pro 12ft Trampoline
STEP 4
:
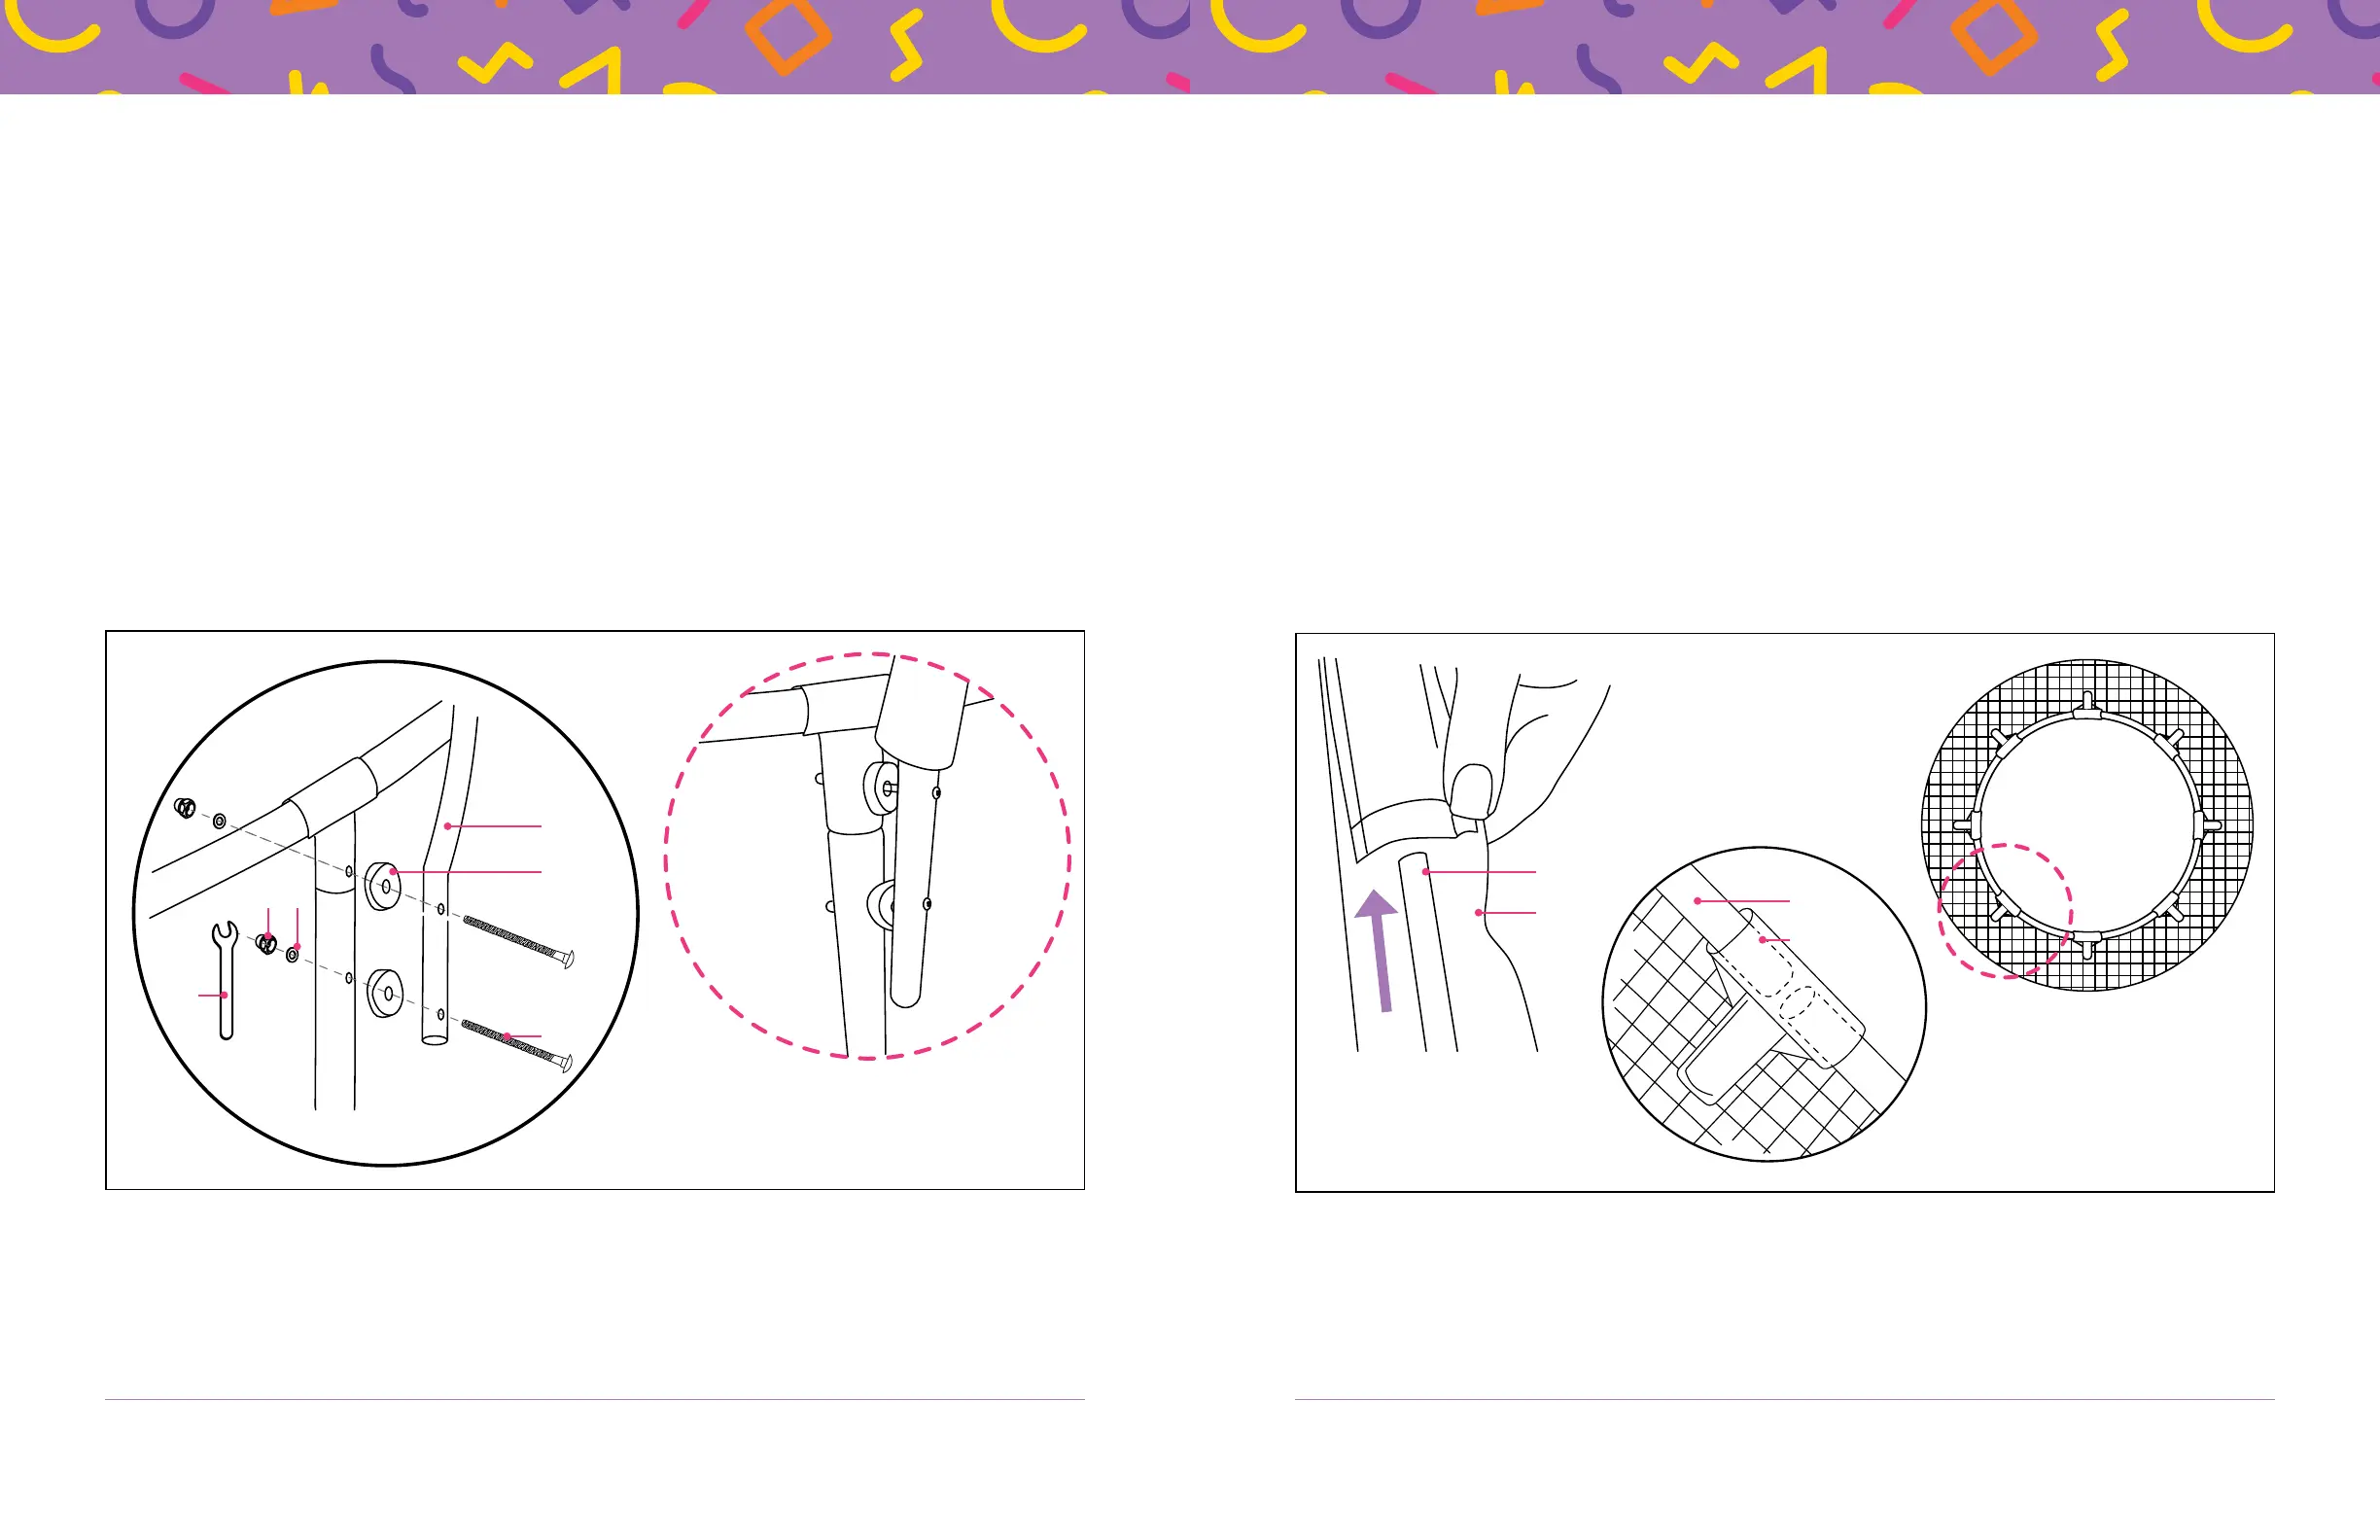
Attach the Lower Poles to the Legs
1. Locate the eight lower poles (G); two wrenches (Y); 16 sets of hardware, each of which
contains: one M6 × 75mm (longer) carriage bolt (R), one washer (S), one nut (T), and one
plastic pad (U).
2. Lay the eight lower poles on the trampoline, with the bottom ends pointing OUTWARD.
IMPORTANT
:
Lower poles have a black cap at the bottom and a spring button at the top.
Do not mix up the lower and upper poles.
3. Line up each pole with a T-connector.
4. Insert carriage bolts through the screw holes in the lower pole. Place a plastic pad on the end of
each bolt and insert the bolts through the screw holes in the leg. See Figure 5.
5. Place a washer and nut onto the bolts.
6. Use the included wrench to fully tighten both nuts.
7. Repeat steps 3–6 to attach the remaining lower poles.
U
G
Y
T S
R
STEP 5
:
Install the Fiberglass Poles
1. Locate the safety net (H), eight fiberglass poles (I), and eight plastic T-connectors (J).
2. Lay the net on top of the trampoline. Make sure the zippered doorway is centered between two
of the lower poles.
3. Slide each fiberglass pole into a sleeve at the top of the net. See Figure 6.
4. Ensure the end of the fiberglass pole exits the end of the sleeve. See Figure 6.
5. Slide a second fiberglass pole into the next (adjacent) sleeve in the net.
6. Place a plastic T-connector in the gap between the two sleeves and insert the two fiberglass
poles into either end of the T-connector. See Figure 6.
7. Insert the remaining fiberglass poles into the sleeves.
8. Use the remaining T-connectors to connect the poles in the gaps between the sleeves.
9. You will form a perfect circle at the top of the net when all poles and T-connectors have been
inserted. See Figure 6.
I
I
H
J
Figure 6
Figure 5


 To Next Page
 Loading...
