12 Joyberri | Upsurge Pro 12ft Trampoline
13 Joyberri | Upsurge Pro 12ft Trampoline
STEP 6
:
Install an Accessory Kit (Sprinkler Hose and/or LED Lights)
CAUTION! Using the sprinkler hose while the LED lights are on the trampoline can cause water
damage to the lights and batteries. We recommend removing the LED lights from the trampoline
before turning on the sprinklers.
Option A: Install the Sprinkler Hose Kit
WARNING! When wet, the trampoline can be very slippery which may result in falling or injury.
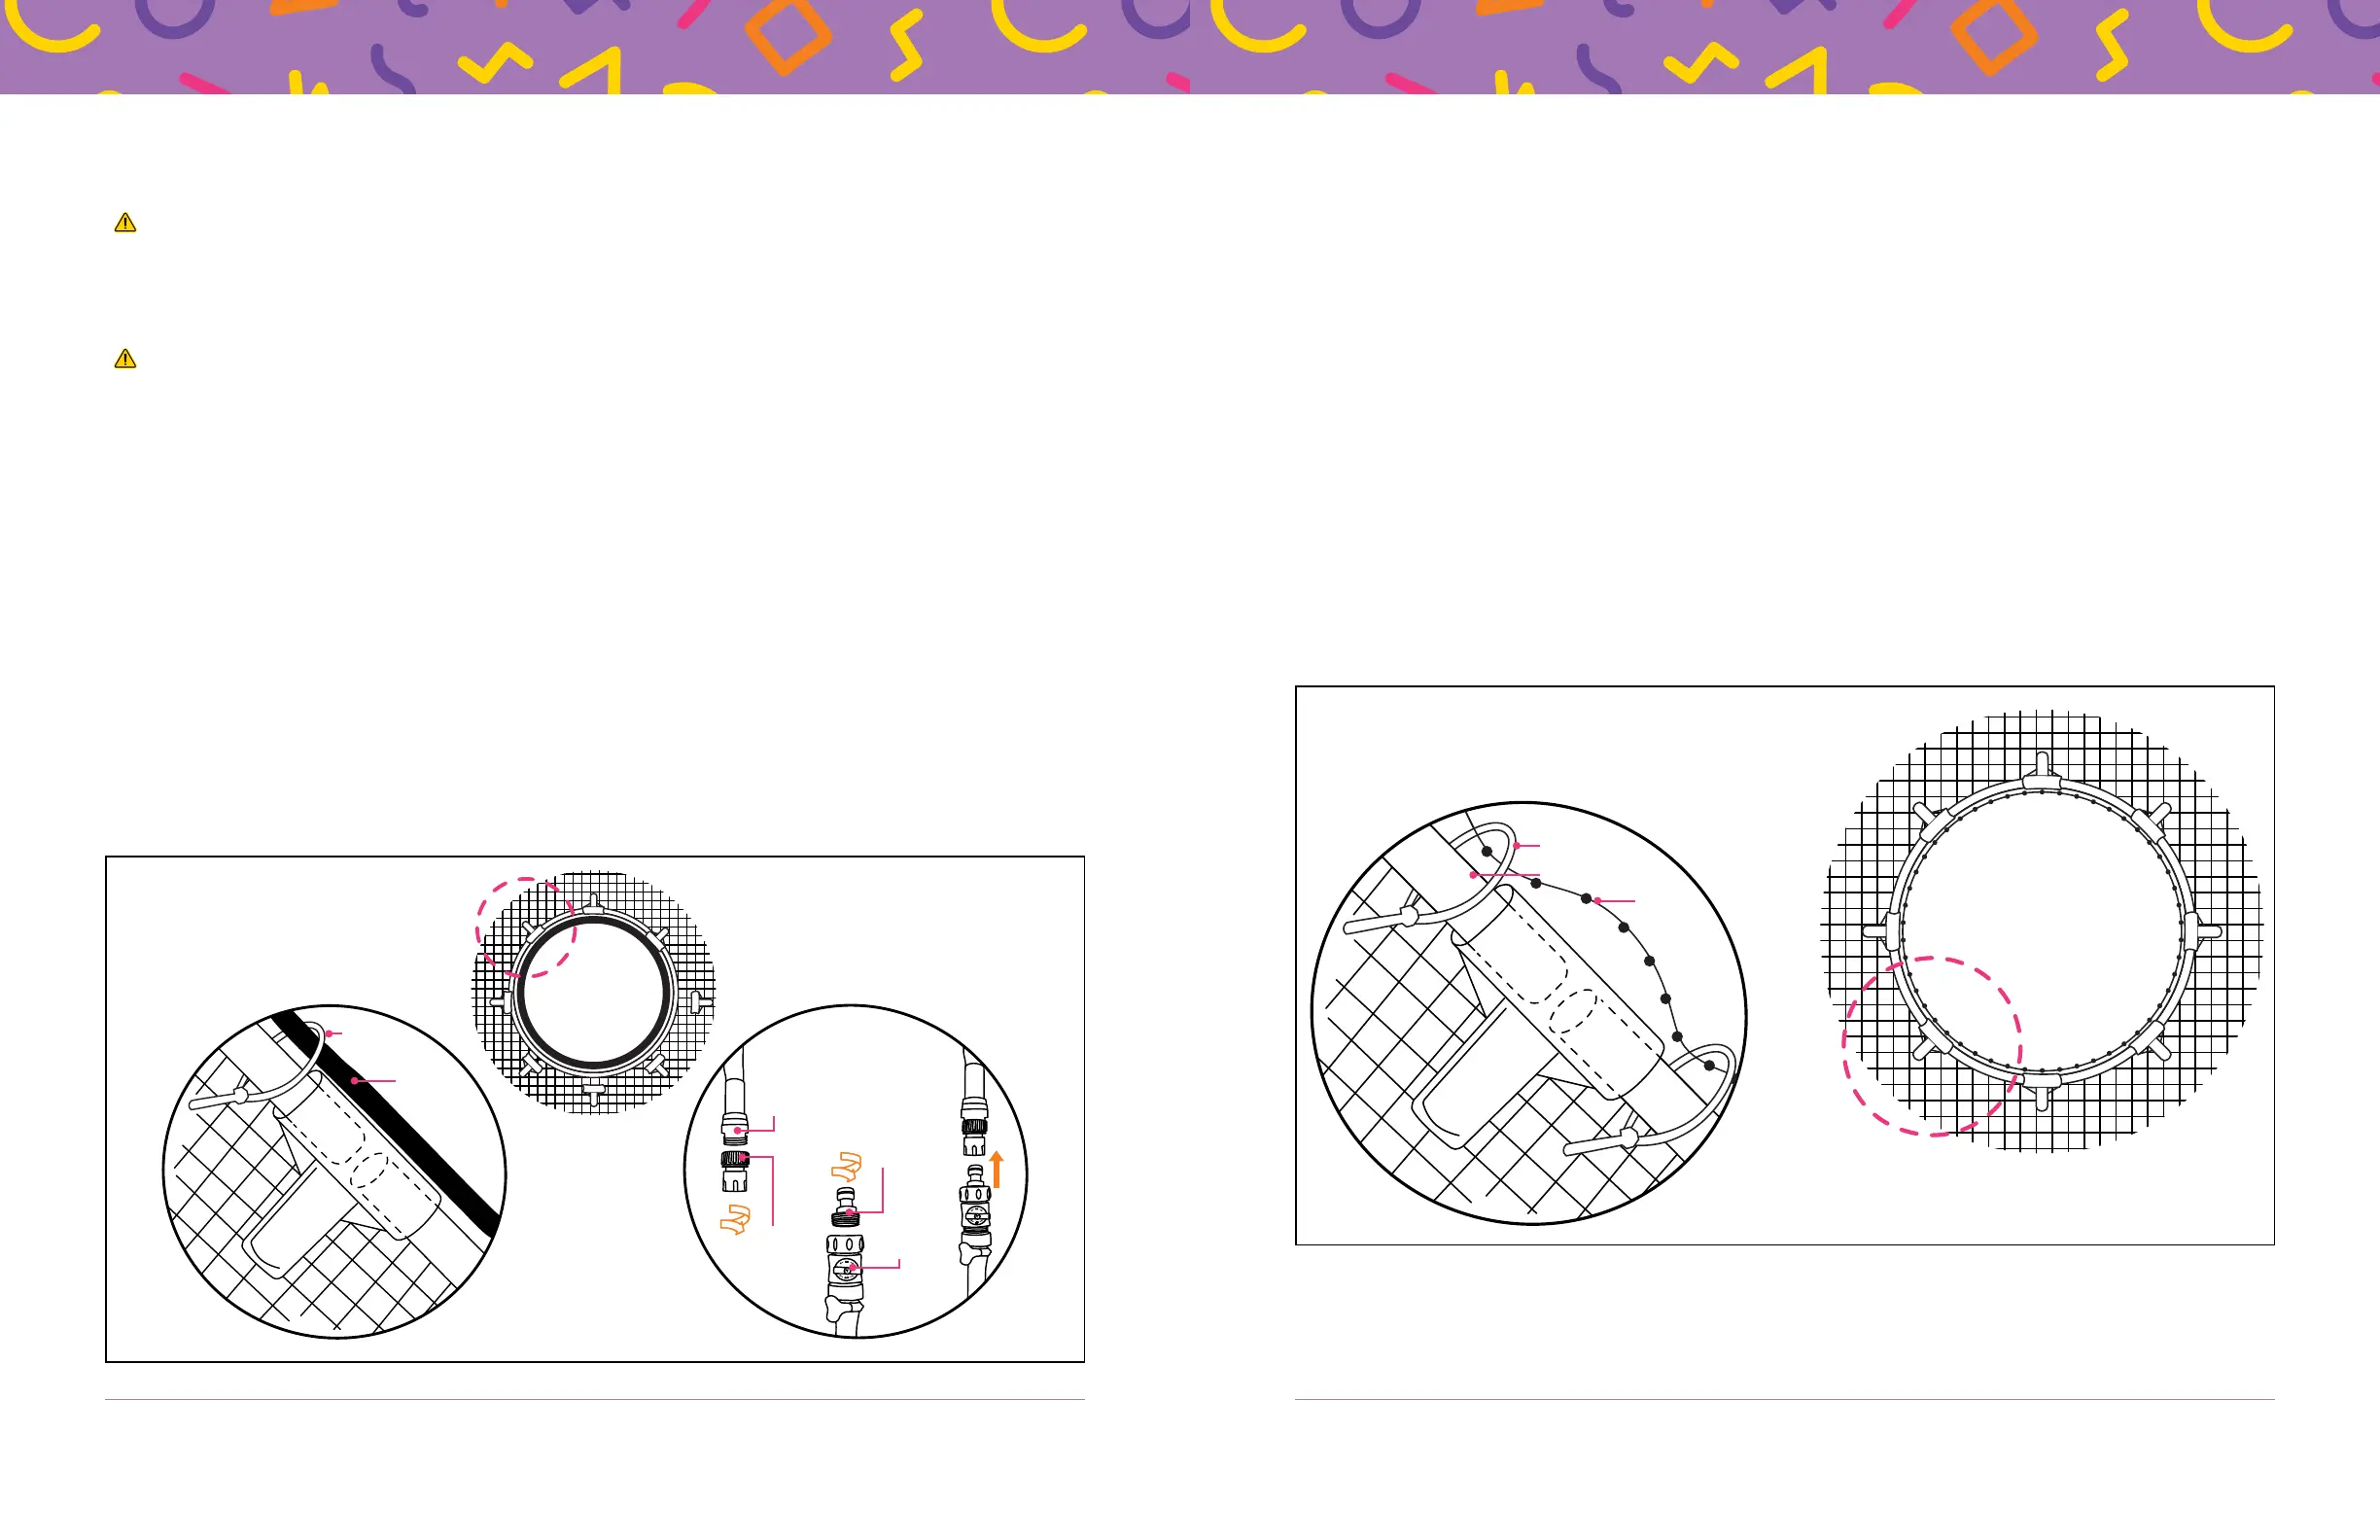
1. Locate the sprinkler hose kit (K). The kit contains a sprinkler hose with a water flow valve, a hose
adapter, a quick-connect joint, and large and small zip ties.
2. Ensure the water flow valve is screwed tightly onto the sprinkler hose. Then screw the small
black quick-connect joint into the water flow valve.
3. Screw the hose adapter onto a garden hose. Then insert the quick-connect joint into the hose
adapter. It will click into place.
4. Zip tie the sprinkler hose to the fiberglass poles (I) at the top of the safety net. See Figure 7.
a. The small holes in the sprinkler hose should face up or toward the inside of the trampoline.
Both large and small zip ties are included; choose whichever works best for your needs.
b. Do not fasten the zip ties too tightly or water flow will be restricted.
5. To use the sprinkler hose: Turn on the water at the faucet, then turn the water flow valve
counterclockwise to turn on the sprinkler hose. Turn the water flow valve clockwise to turn off
the sprinkler. Remove the quick-connect joint from the hose adapter to disconnect the hoses.
NOTE
:
Be careful not to pinch or damage the sprinkler hose as you continue the assembly steps.
Zip Tie
Sprinkler
Hose
Hose
Adapter
Quick-Connect
Joint
Garden
Hose
Water Flow
Valve
Option B: Install the LED Light Kit
1. Locate the LED light kit (L). The kit contains a remote control, zip ties, adhesive strips, and one
string of LED lights connected to an AA battery case (AAbatteries not included).
2. Set aside the remote control and five zip ties to secure the battery cord and case in Step13.
3. Zip tie the string of LED lights to the ring of fiberglass poles (I) at the top of the safety net. See
Figure 8.
a. Zip ties go around the fiberglass poles near the T-connectors.
b. Do not secure the long flat battery cord and battery case yet.
4. Optional: You may use the included adhesive strips to help secure the lights to the fiberglass
poles if desired.
NOTES
:
• Be careful not to pinch the battery cord or string of lights as you continue the assembly steps.
• If there is extra length at the end of the LED light string after securing it around the top of the net,
you can let it hang down for decorative effect or you can double up the lights in one section.
Zip Tie
I
LED
Lights
Figure 7
Figure 8


 To Next Page
 Loading...
