14 Joyberri | Upsurge Pro 12ft Trampoline
15 Joyberri | Upsurge Pro 12ft Trampoline
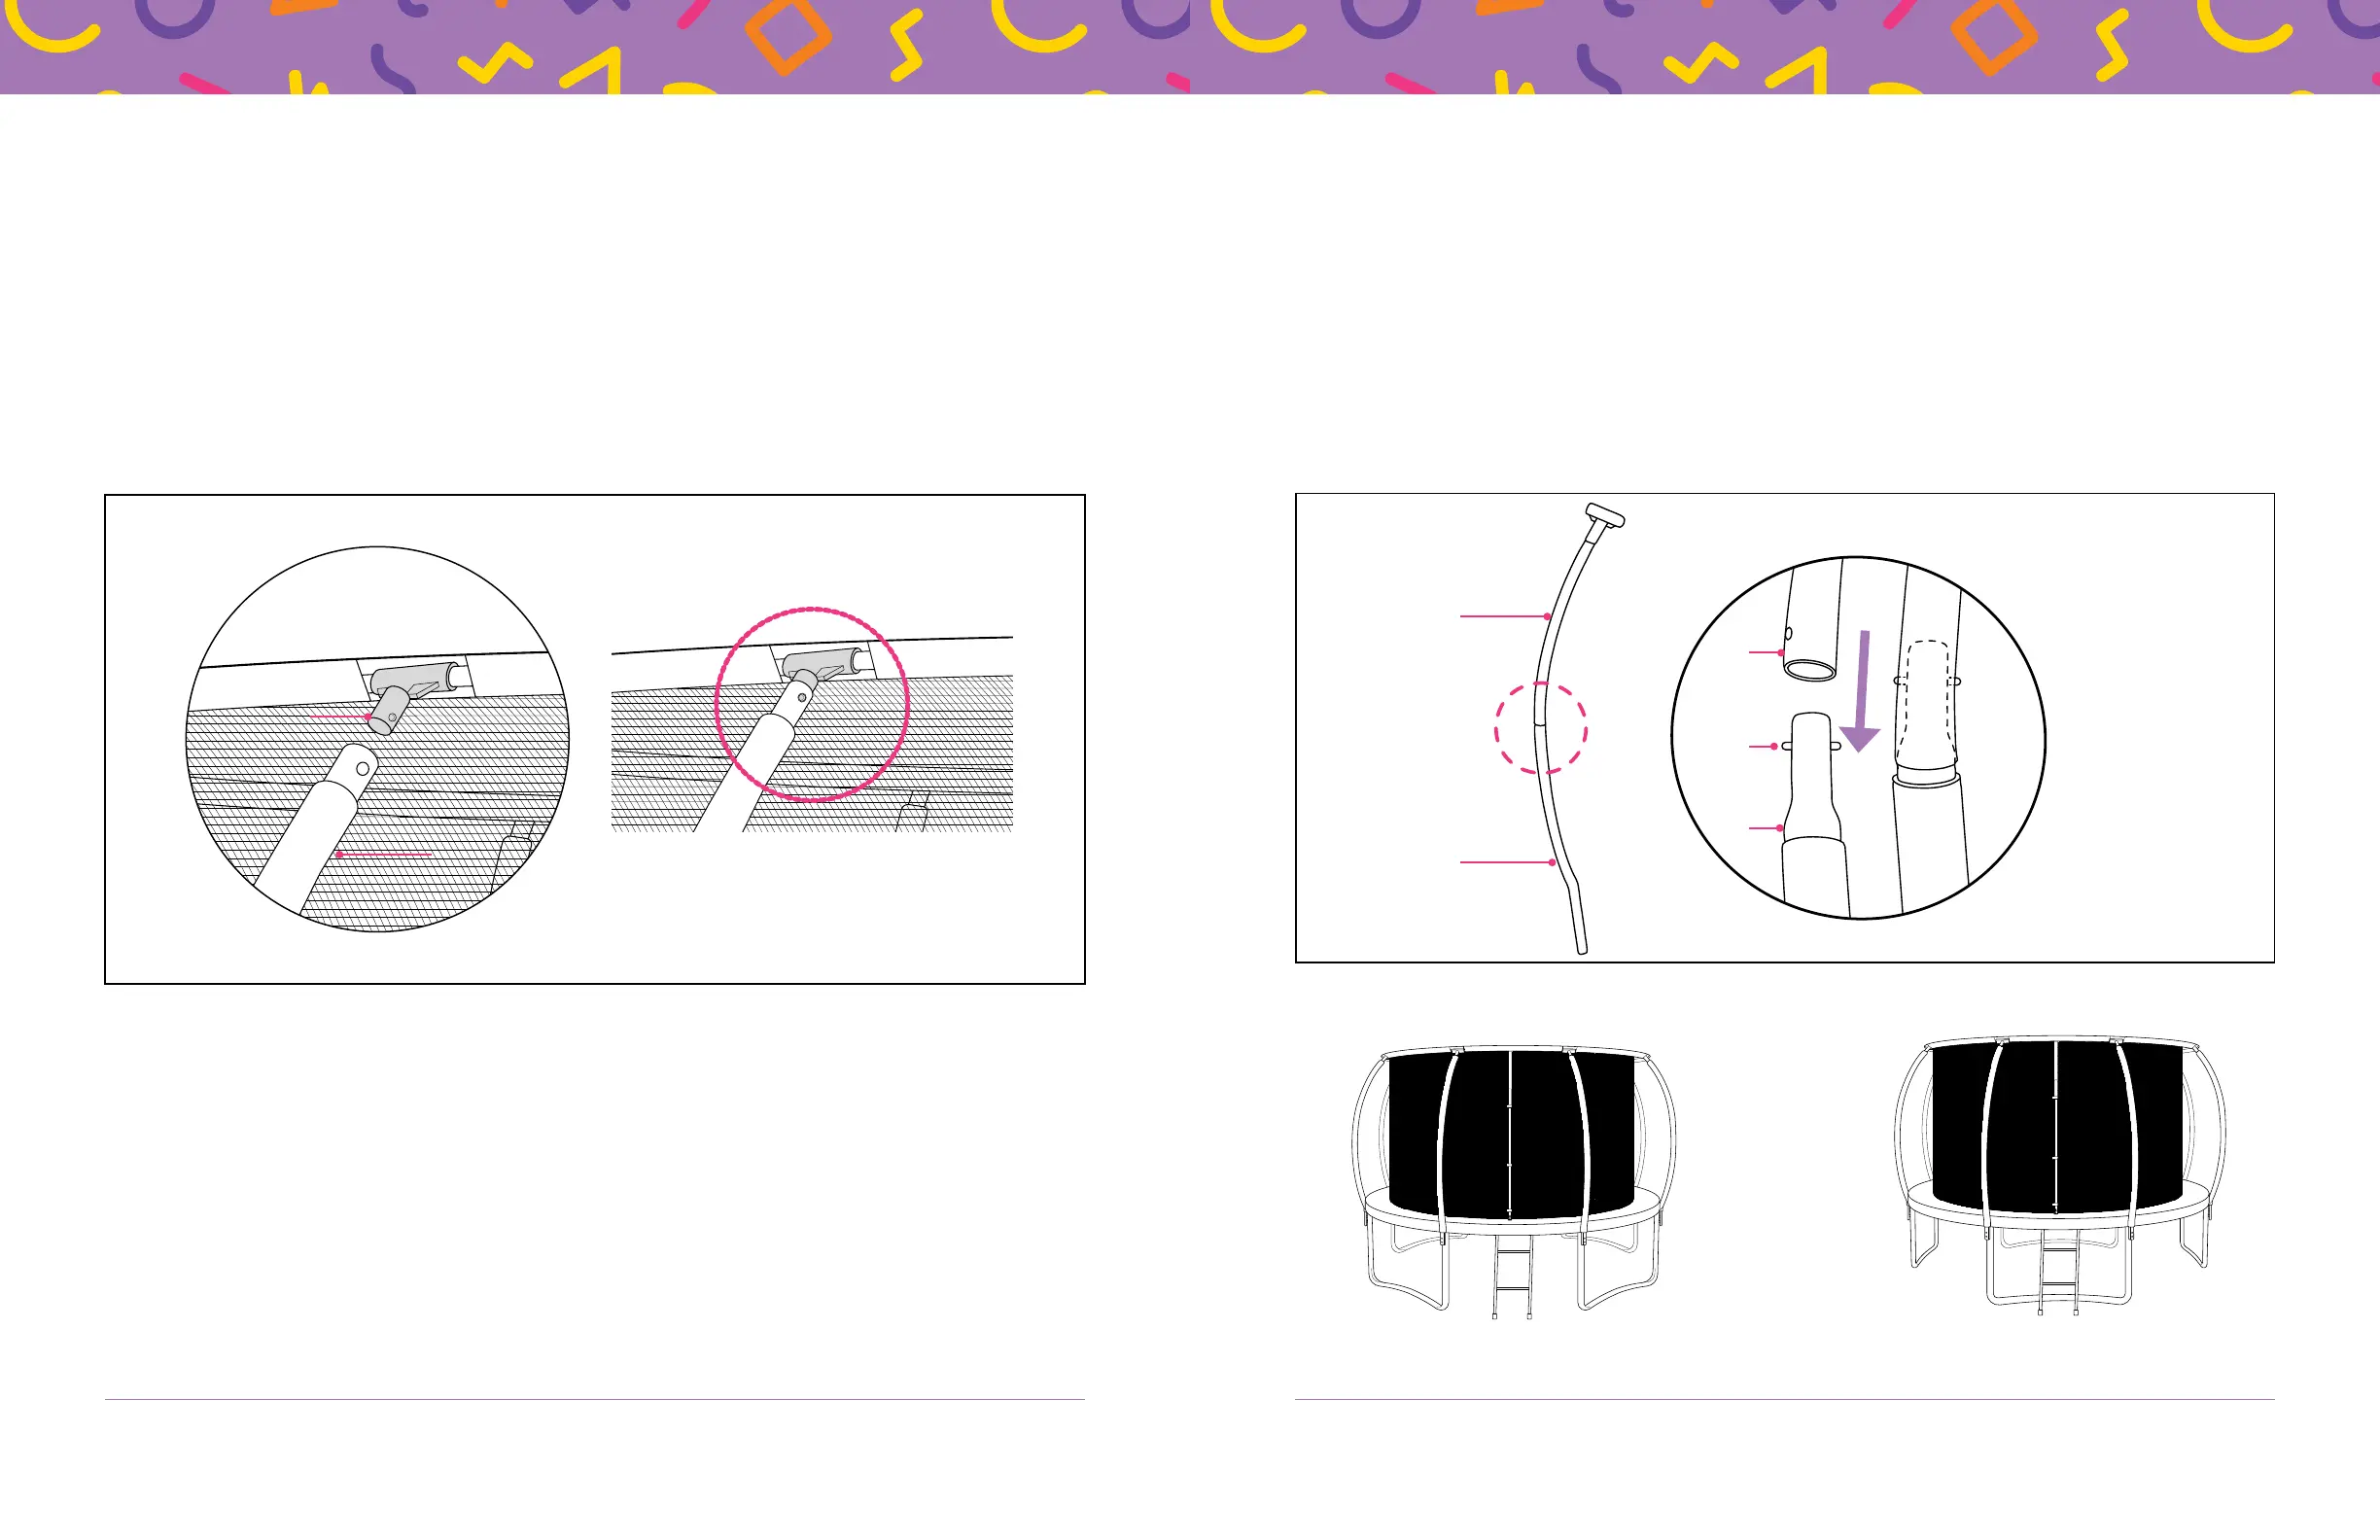
STEP 7
:
Attach the Upper Poles to the Net
1. Locate the eight upper poles (M).
2. Insert the TOP of an upper pole into the bottom of a plastic T-connector (J) connected to the
top of the safety net. See Figure 9.
a. The two parts connect securely via a spring button on the T-connector.
b. Press the spring button in as you slide the poles together. Be careful not to pinch your
fingers.
c. You may need to wiggle the upper pole slightly to get the spring button to click into place.
3. Repeat step 2 until all of the upper poles are installed.
STEP 8
:
Attach the Upper Poles to the Lower Poles
1. Hold the top of the net and the T-connector with one hand as you lift the upper pole.
2. Slide the upper pole (M) onto the proper lower pole (G). Ensure the net is oriented so that the
zipper is in between leg poles, not over the leg. See Figure 10.
a. The two poles connect securely via a spring button at the top of the lower pole.
b. Press the spring button in as you slide the poles together. Be careful not to pinch your
fingers.
c. You may need to wiggle the upper pole slightly to get the spring button to click into place.
3. Repeat steps 1–2 to install the remaining upper poles.
M
G
M
G
Spring
Button
Figure 10
Figure 9
Correct Incorrect
J
M


 To Next Page