17 Joyberri | Upsurge Pro 12ft Trampoline
Joyberri | Upsurge Pro 12ft Trampoline16
STEP 9
:
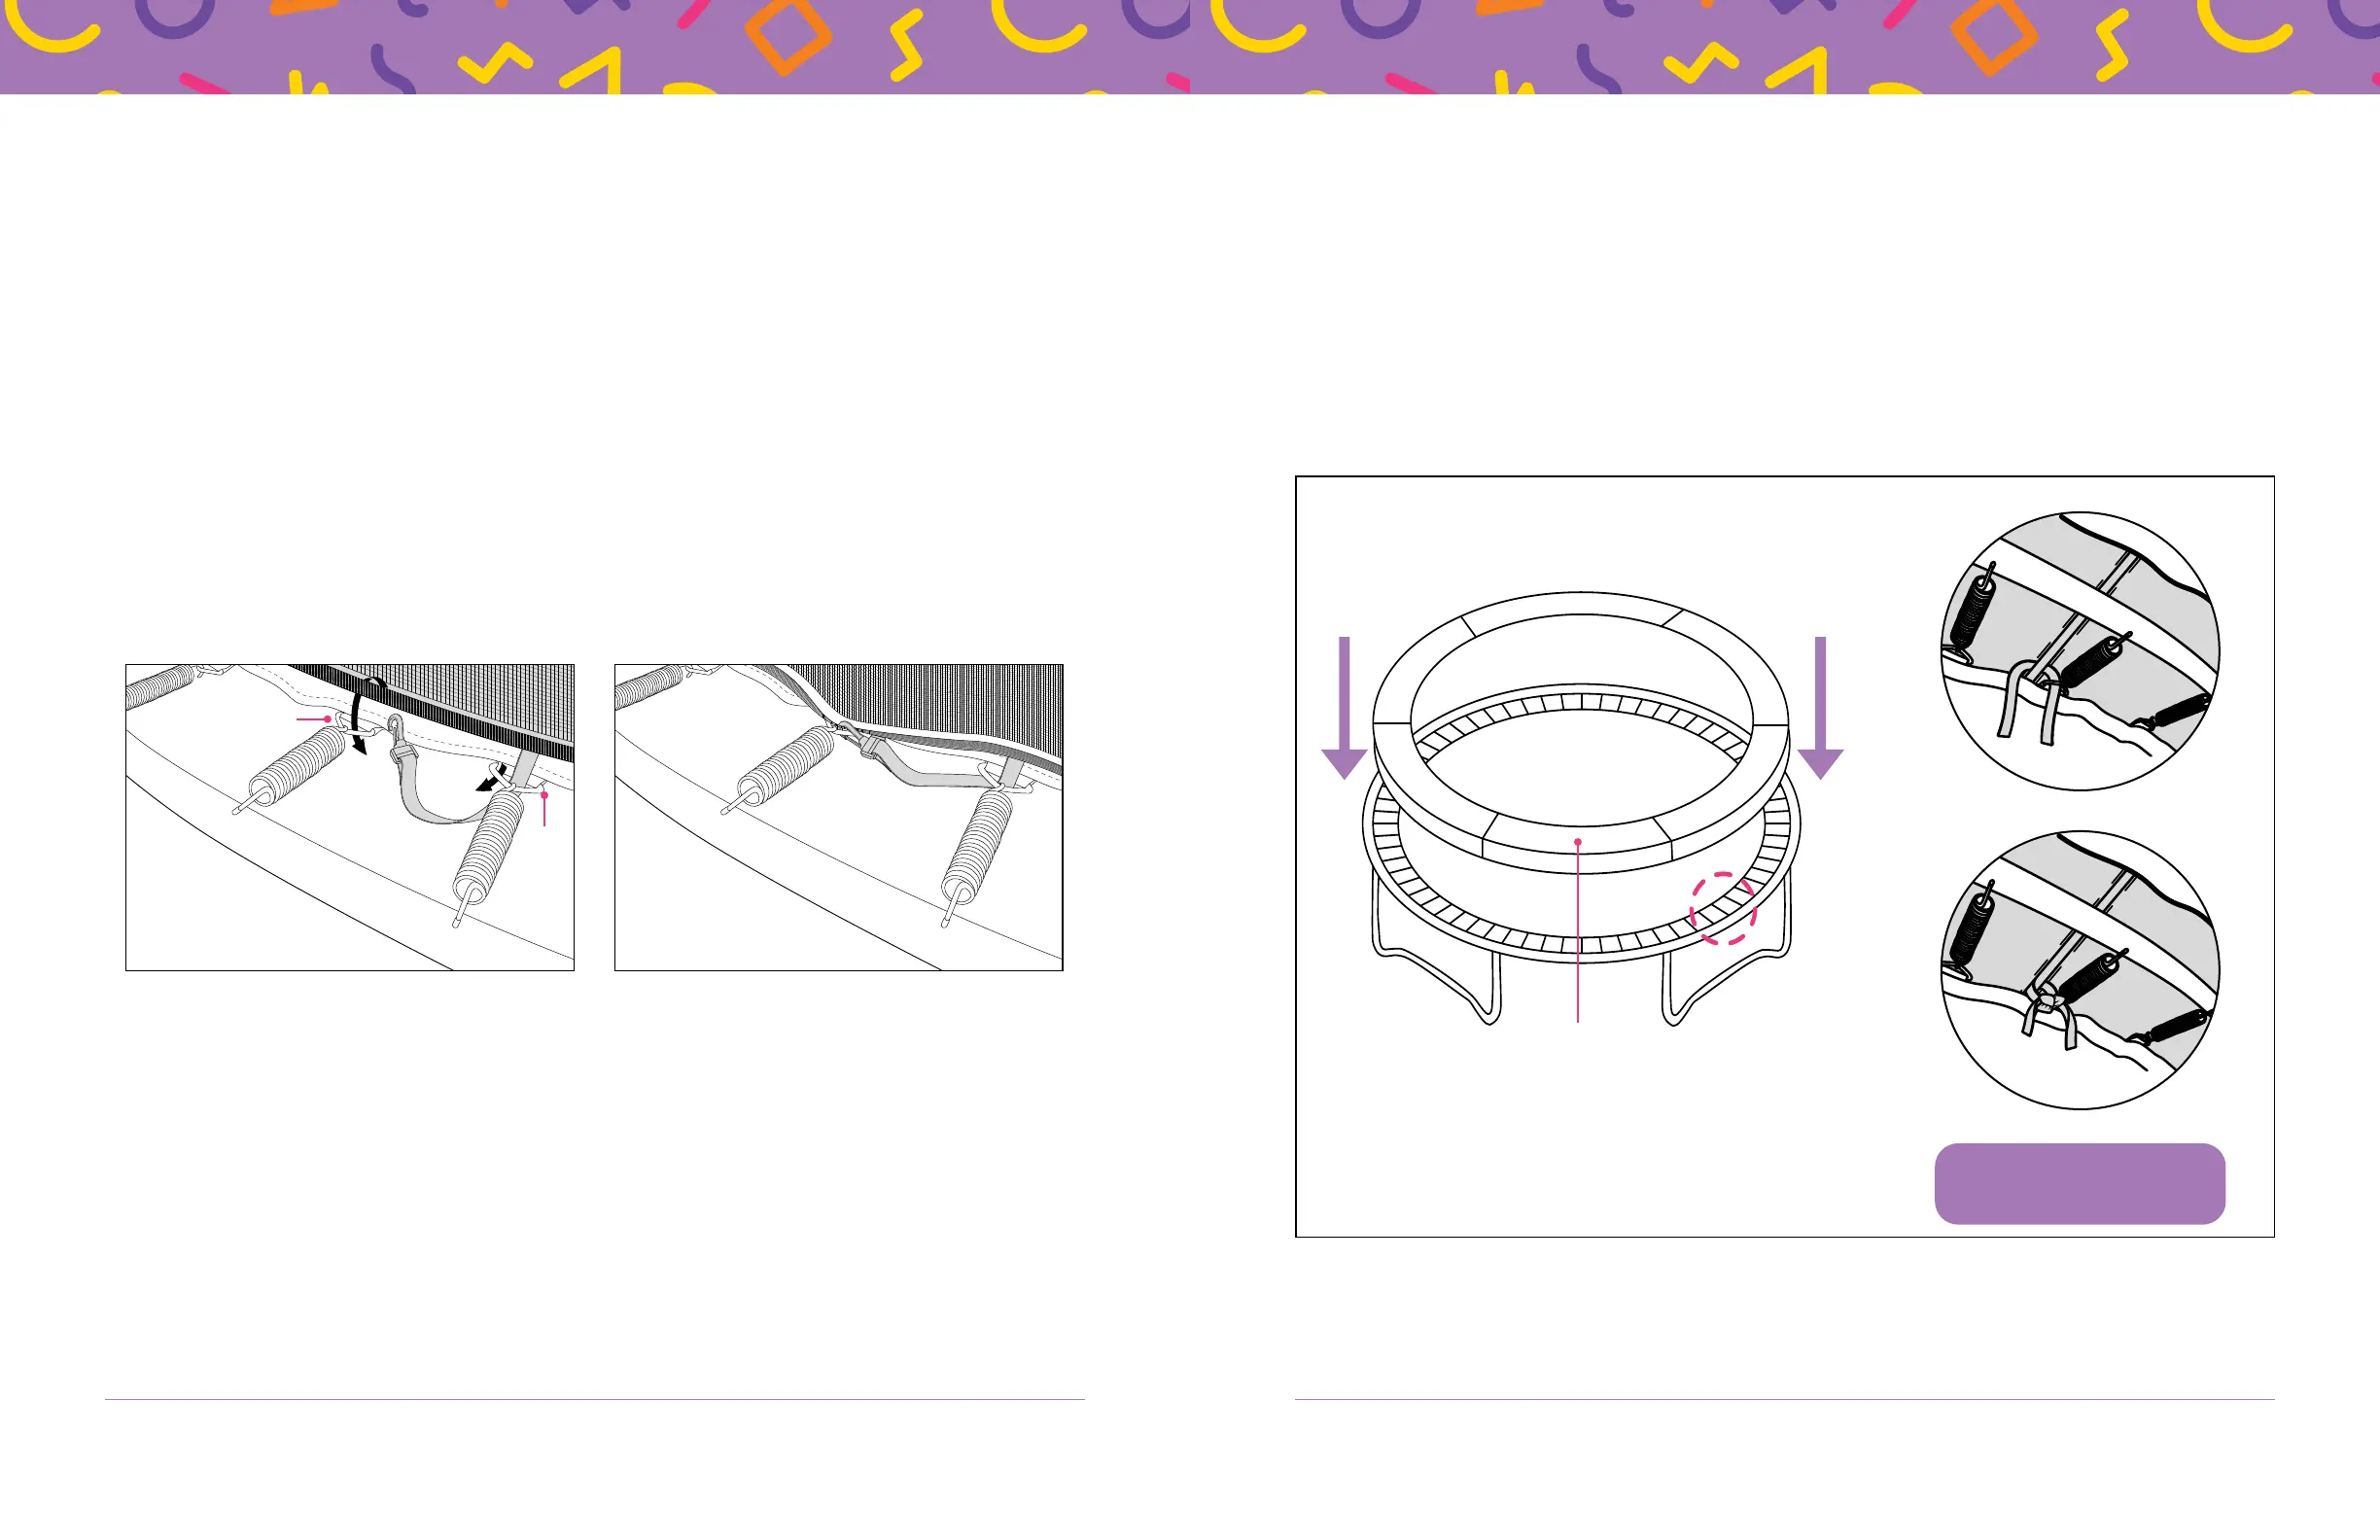
Secure the Bottom of the Net to the Trampoline Mat
The bottom of the net has flat ropes with plastic clips at the end. Each plastic clip needs to be
threaded through a V-ring on the mat, back through the bottom of the net, and attached to the
neighboring V-ring to secure the net.
1. Thread the plastic clip through the V-ring directly below it. See Figure 11a.
2. Pass the clip over to the neighboring spring and thread the top portion of the clip through the
fabric strip at the bottom of the net that lies just above the neighboring spring. See Figure 11a.
NOTE
:
When threading the top of the clip through the bottom of the net, you may need to
wiggle it a bit to work it through. Do not yank too hard, or you could tear it.
3. Attach the clip to the neighboring V-ring to secure the bottom of the net. See Figure 11b.
4. Continue repeating steps 1–3 until you have worked your way around the entire trampoline
such that all clips are threaded through the bottom of the net and attached to their neighboring
V-rings.
Figure 11a
V-ring
1
2
3
V-ring
Figure 11b
Figure 12
STEP 10
:
Attach the Frame Cover
1. Locate the padded frame cover (N). It comes in multiple sections.
2. Lay the frame cover on top of the trampoline, shiny side down. The elastic straps will face down.
3. Secure the sections together with the Velcro
®
.
4. Stretch the edges of the cover over the frame rails. Make sure all of the metal components (the
frame, springs, and T-connectors) are fully covered by the frame cover. See Figure 12.
5. Tie the inner elastic straps to the V-rings. You may need to crawl under the trampoline to see
and reach the inner straps. See Figure 12.
N
NOTE: These views are from
underneath the trampoline.


 To Next Page
 Loading...
