Do you have a question about the JST CS10-WC110 and is the answer not in the manual?
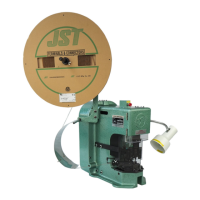
This document describes the JST Crimp Tool, specifically models CS 10 and WC 110, designed for processing JST contacts. It serves as an instruction manual, providing guidance in both English and German.
The JST Crimp Tool is a specialized hand tool used for crimping electrical contacts onto wires. Its primary function is to create a secure and reliable electrical connection by deforming the contact around the wire, ensuring both mechanical strength and electrical conductivity. The tool is designed for precision, featuring a locator and specific profiles to ensure the contact is positioned correctly for an optimal crimp. The crimping process involves several steps, from opening the tool and positioning the contact to inserting the wire and closing the tool to complete the crimp. The integrated ratchet mechanism ensures that the crimp cycle is completed fully, preventing partial crimps and ensuring consistent quality.
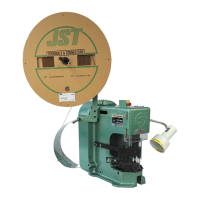
The manual specifies the tool's compatibility with JST contacts, particularly the SXH-001T – 0.6 series. It supports a range of wire gauges, specifically AWG 28-22, AWG 28-26, AWG 24, and AWG 22, indicating its versatility for different wire sizes within this range. The tool features distinct crimping profiles tailored to these wire gauges, ensuring the correct deformation of the contact for each size. The "Made in Germany" label suggests a high standard of manufacturing quality and precision engineering. The presence of a "Flap locator" and a "Positioner/Locator" highlights the tool's design for accurate contact placement, which is crucial for effective crimping.
The manual outlines a clear, step-by-step process for using the crimp tool, making it user-friendly even for those new to crimping.
The tool's design, with its distinct profiles for different wire gauges (AWG 28-26, AWG 24, AWG 22), allows for precise crimping across a range of applications. The visual aids in the manual, depicting each step with clear images, enhance the ease of use and understanding. The ergonomic design, suggested by the handle shape, aims to provide comfortable operation during repetitive tasks.
While the manual does not explicitly detail maintenance procedures, the robust construction implied by "Made in Germany" suggests a durable tool requiring minimal maintenance under normal operating conditions. General best practices for tool maintenance, such as keeping the tool clean and free of debris, would apply to ensure its longevity and consistent performance. Regular inspection of the crimping profiles for wear or damage would also be advisable to maintain crimp quality. The ability to "loosen" and "click out" the flap locator might also suggest that certain components could be adjusted or cleaned if necessary, though this is not explicitly stated as a maintenance step. The focus of the manual is primarily on correct usage to ensure optimal crimping results, which inherently contributes to the tool's effective lifespan.
| Brand | JST |
|---|---|
| Model | CS10-WC110 |
| Category | Crimp tool |
| Language | English |