4
© 2017 JT Communications LLC, Ocala, Florida, USA
All radiohts reserved.
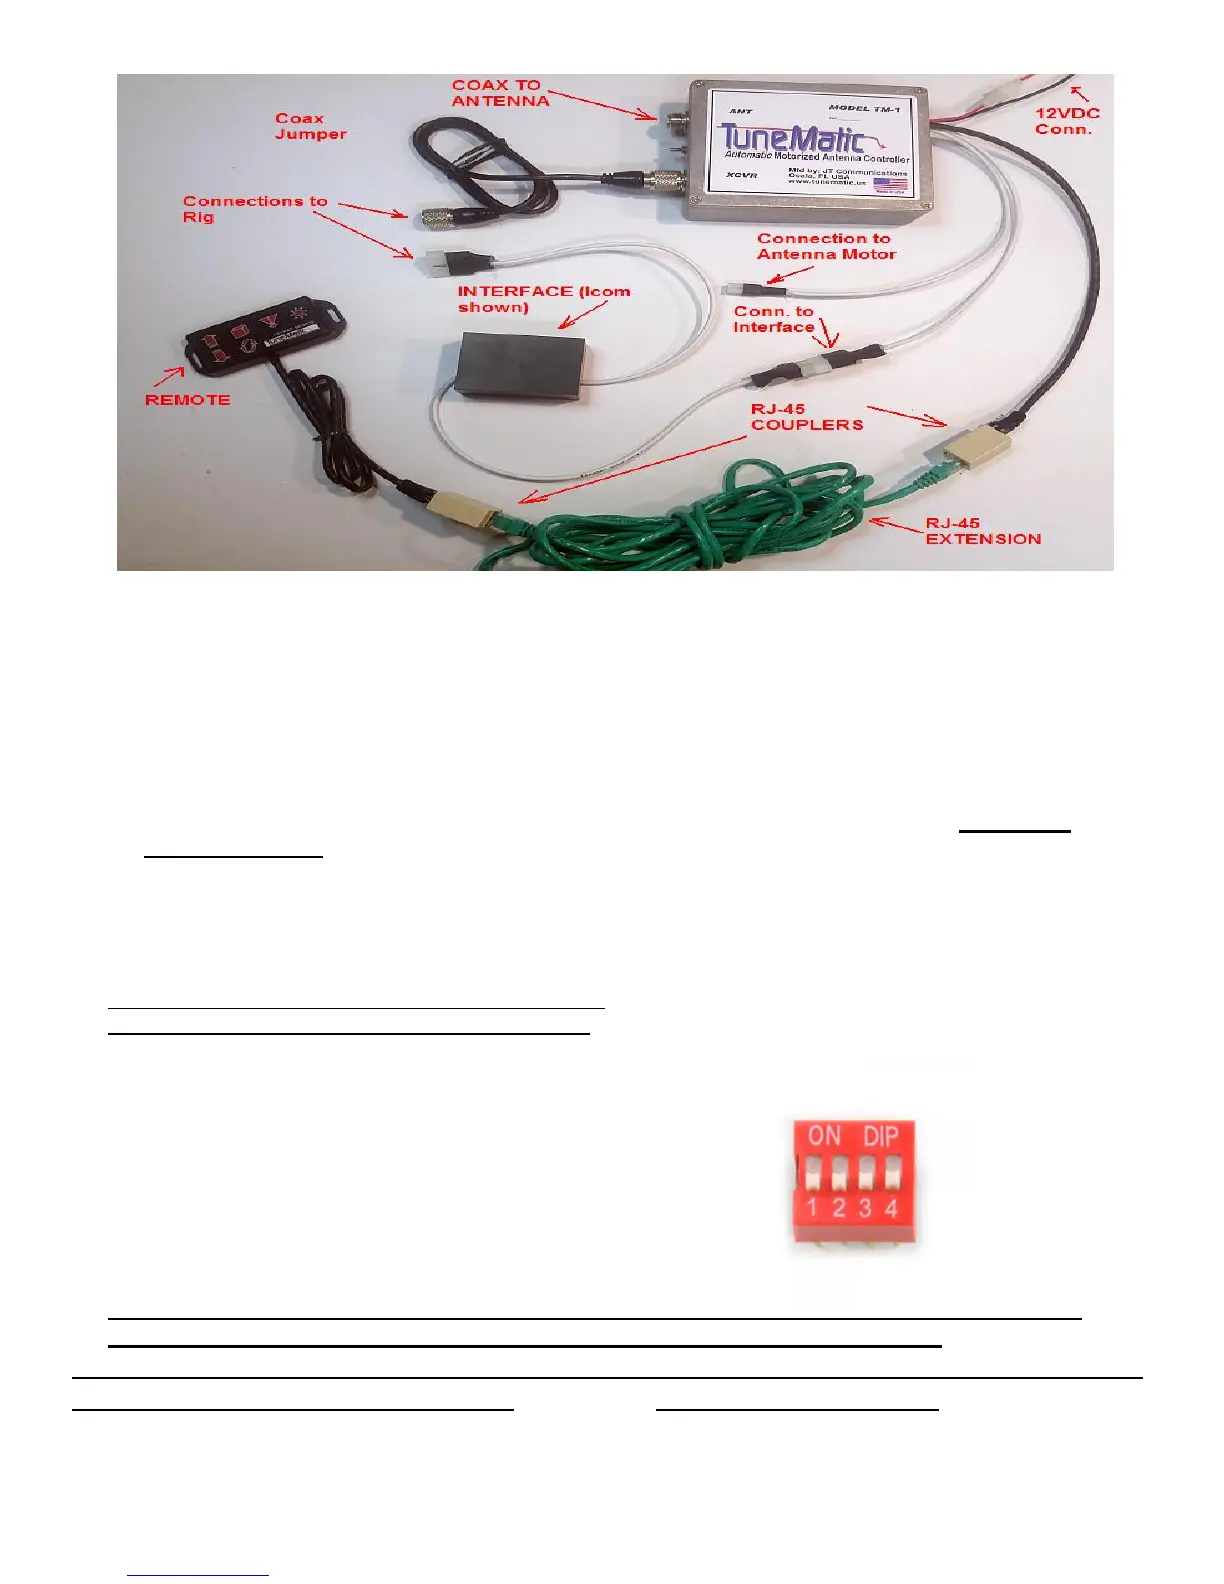
a) Plug motor control cable from motor to TuneMatic Antenna Motor connector.
b) Connect 3’ RF coax jumper from HF radio to RF connection labeled RADIO of TuneMatic,
c) If applicable, connect HF amp to RF connection labeled ANT of TuneMatic and HF amp RF OUTPUT to
antenna. If you do not have an HF amplifier, connect antenna lead to this connection of TuneMatic.
d) Connect remote head with RJ-45 couplers (and/or RJ-45 extension cable if needed).
e) Connect interface connector from TuneMatic to TuneMatic interface, and associated cables from
interface to radio (review interface supplement for specific radio connections).
f) If using Amp relay option, connect optional Amp bypass cable- See the amp option supplement
sheet (supplied) for details.
g) Connect DC power leads to 12-14V DC ignition battery line-OBSERVE POLARITY! NEGATIVE
GROUND ONLY! A good frame ground connection can be used to the vehicle chassis for added RF
shielding from the threaded stud with a heavy braided lead.
h) Remove TuneMatic enclosure cover and locate motor current limit DIP switches on the PC board, Set
switches for antenna manufacturer’s recommended current limit setting. These switches select the
antenna stall current, and are set as follows- note that 1=ON (UP) and 0=OFF(DOWN).
Antenna current setting NOTE: DIP SWITCH #4 NOT USED
Switch number 1 2 3 4
Lowest setting 200mA 0 0 0 -
LittleTarheel 250 mA 1 0 0 - *FACTORY DEFAULT SETTING
Diamond 300 mA 0 1 0 -
*Hi-Q, Scorpion 500 mA 1 1 0 -
700 mA 0 0 1 -
*Tarheel Models 75 to 400, 900 mA 1 0 1 -
*Tarheel Models 1000 – 1200 1100 mA 0 1 1 –
Highest setting 1300mA 1 1 1 -
*Most of the larger antennas can be set to 900 or 1100 mA, depending on operating temperature.
NOTE: IT IS IMPORTANT TO SET THIS LIMIT PROPERLY, as damage can occur to the
antenna motor if set too high, or will prematurely trip if setting is too low.
Keep in mind, current draw is dependent on supply voltage, and current may not reach
trip point with lower supply voltage. These are recommended settings, and the actual
setting may vary slightly.
 Loading...