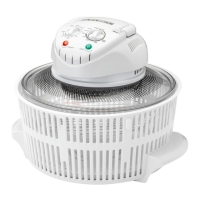
Halogen Oven
Oven base1.
Carrying handles2.
Glass bowl3.
Oven lid, with controls & indicators4.
High rack (shown inside bowl)5.
Low rack6.
Tongs (for lifting racks - see inset)7.
Power cable and plug8.
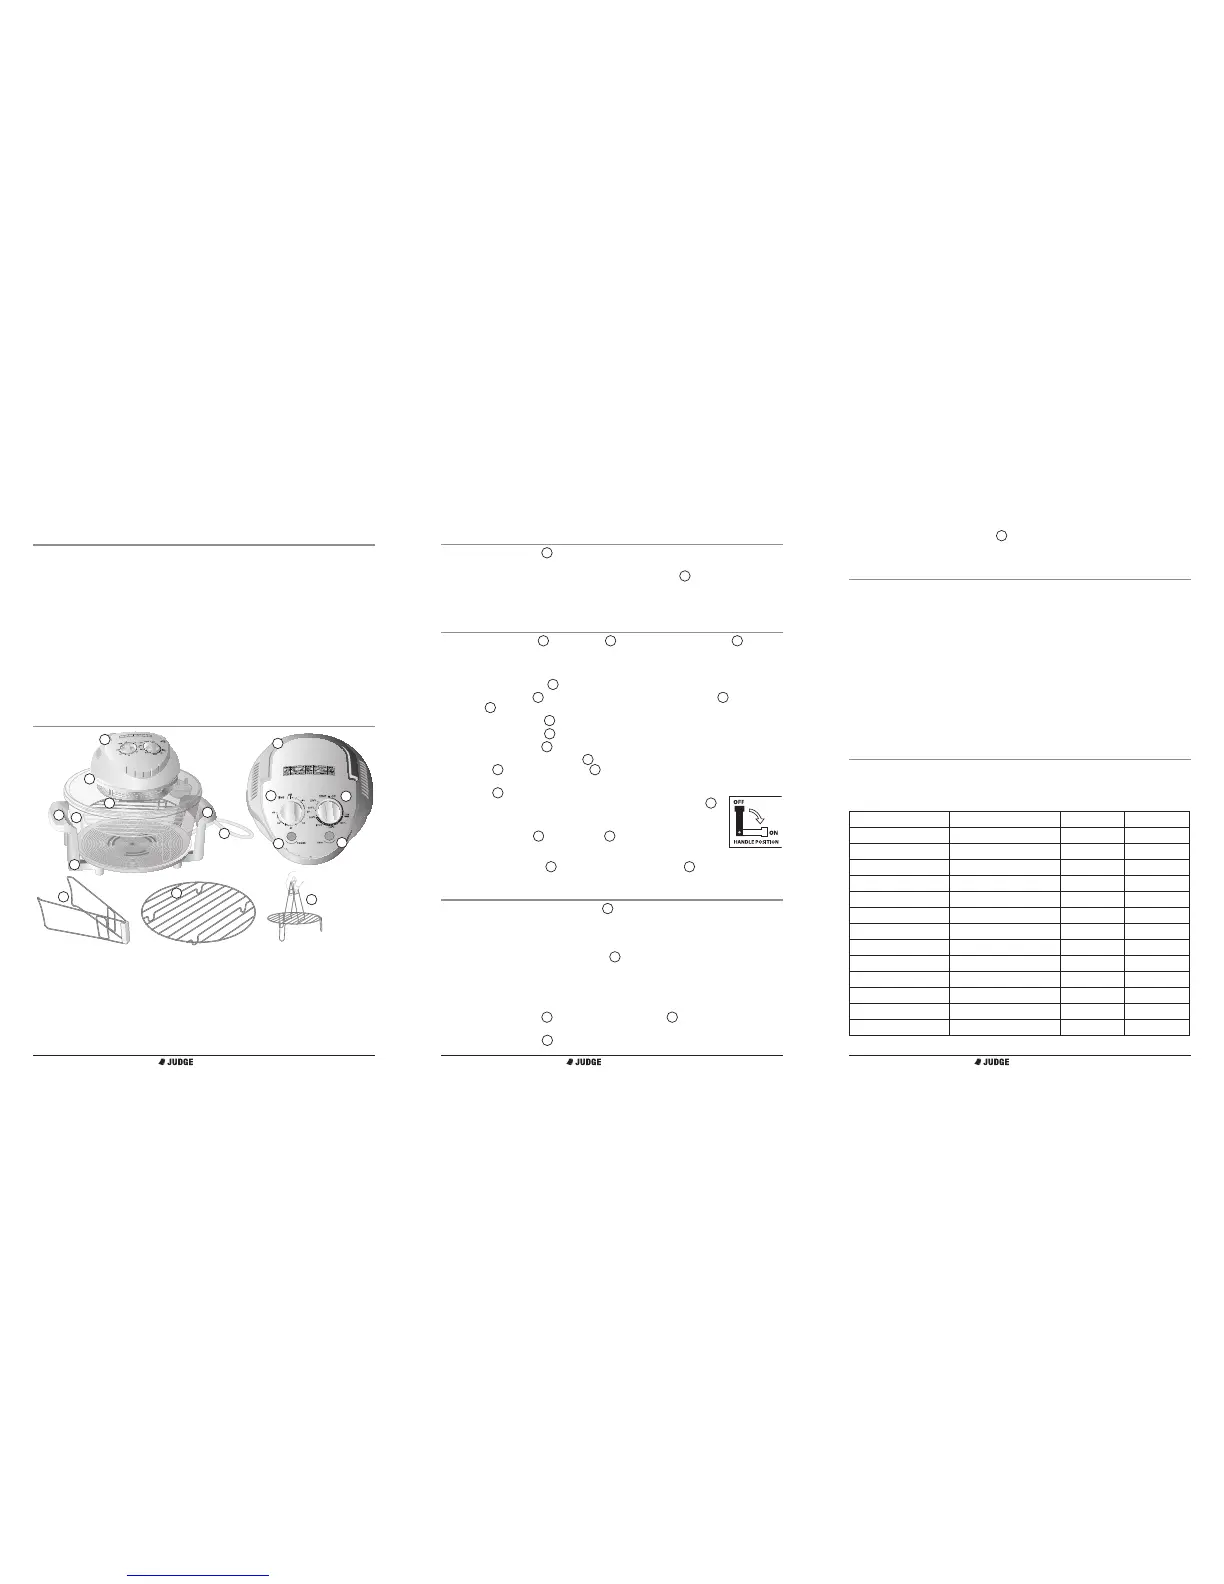
Controls & Indicators
TIME control9.
TEMP (temperature) control10.
Handle / ON-OFF switch11.
POWER indicator12.
HEAT indicator13.
Before First Use
Wipe the Glass Bowl 1.
3
clean with a damp sponge or dishcloth.
Follow steps 3 to 7 of Using The Oven, with a temperature setting of 250°C
2.
and a time of 5 minutes, then unplug the Power Cable
8
and allow the Oven
to cool.
You might notice a slight burning odour while the Oven is running, as
•
lubricants are removed from the heating element.
Using The Oven
Place the High Rack 1.
5
or Low Rack
6
centrally in the Glass Bowl
3
. The
choice of rack depends upon the food to be cooked, with the low rack being
used for larger items - see Cooking Guide.
Place the food centrally on the rack, ensuring that it is at least 3cm from the
2.
wall of the Glass Bowl
3
, to allow maximum air circulation.
Place the Oven Lid
3.
4
securely and centrally on the Glass Bowl
3
. Leave the
Handle
11
in the upright OFF position - note the handle label.
Plug the Power Cable
4.
8
into the power socket.
Set the TEMP control
5.
10
to the required temperature - see Cooking Guide.
Set the TIME control
6.
9
to the required time - see Cooking Guide.
Immediately lower the Handle
7.
11
to the ON position; both the POWER
indicator
12
and HEAT indicator
13
will illuminate.
The Oven will heat up rapidly and run for the set time minutes. The HEAT
•
indicator
13
will switch off and back on during this period as the
Oven maintains the set temperature. The POWER indicator
12
will remain on until the timer switches off, when a bell will sound,
to alert you that the cooking time has been reached.
Note: The Glass Bowl
3
and Oven Lid
4
will become hot. Ensure
that the Oven is at least 8cm from any surface and take care not to
touch the hot areas. Always use Oven mits when handling and lift
by the Carrying Handles
2
. After removing the Oven Lid
4
, place it on a heat
resistant surface, as the underside becomes hot during cooking.
Cleaning
Note: Always unplug the Power Cable
8
and allow the Oven to cool before
cleaning, including between self cleaning and manual cleaning.
The Oven has a self-cleaning function, which will minimise manual cleaning. To
use this, proceed as follows:
Pour clean water into the Glass Bowl
1.
3
to a depth of 5cm; for greater
cleaning action a small amount of mild dishwashing detergent may be added.
Follow steps 3 to 7 of Using The Oven, with a temperature setting of “Wash”
2.
and a time of 12 minutes.
For manual cleaning, proceed as follows:
Wipe the Glass Bowl
1.
3
, Oven Lid and fan housing
4
with a sponge or
dishcloth, using a mild dishwashing detergent and warm water.
Rinse the Glass Bowl
2.
3
well to remove all detergent.
1
3
2
4
7
Identifying The Parts
Note: Never immerse the Oven Lid
4
in any liquid, or allow liquids to get into the
lid. Do not use a steel wool pad, abrasive material, solvents or cleaning powders;
if scrubbing is necessary, use a nylon or polyester mesh pad.
Cooking Techniques
Roasting• - place meats directly on rack.
Toasting• - place bread directly on rack; can also bring new life to stale food.
Baking• - place food in a metal or tempered glass baking pan, up to 30cm dia.
Steaming• - place food in an aluminium foil pouch with a small amount of water.
Frying• - dip food in cooking oil, allow excess oil to drain and place directly on rack,
or in heat resistant container.
Defrosting• - set temperature to “Thaw” and check every 5-10 minutes.
Cooking from frozen• - reduce suggested temperature on packaging by 20°C,
suggested cooking time by 30-50%.
Remember to distribute food evenly in the Oven to ensure an even ow of air
•
around the food.
You may wish to spray the racks with a non-stick food spray before use to
•
prevent the food sticking.
Cooking Guide
Note: This is a guide only and supplements the guide on the lid. Observe the food
cooking and ensure that it is thoroughly cooked before serving. It may be neces-
sary to use a container to prevent small food items, such as chips, falling through
the rack.
Cooking time Temp Rack Position
Roast Beef or Lamb 35 min/kg + 20 min 180-190°C low rack
Roast Pork 55 min/kg + 20 min 180-190°C low rack
Steak: rare to well done 3-7 min each side 250°C high rack
Sausage 5-8 min each side 250°C high rack
Pork or Lamb Chop 6-8 min each side 250°C high rack
Chicken 20-30 min/kg + 15 min 190-250°C low rack
Chicken Parts 15-20 min 190-200°C high rack
Fish 10-15 min 200-220°C high rack
Pizza 10-13 min 150-180°C high rack
Small Cakes and Buns 8-10 min 200-230°C low rack
Cake - one layer 20-25 min 200°C low rack
Loaf 35-40 min 150°C low rack
Chips/French Fries 10-20 min 200°C high rack
8
9
10
11
12
5
6
Features
The Halogen Oven circulates air heated by halogen technology to cook food
quickly and economically, whilst still using conventional culinary techniques. This
circulated, hot, dry air method of cooking has many advantages:
It can cook most dishes which would normally require a conventional oven.
1.
It can roast, bake, grill, steam, reheat or defrost.2.
Electricity consumption is less than half that of a conventional oven.3.
Food is cooked much more quickly than in a conventional oven.4.
Food retains less fat, lowering calorie and cholesterol consumption.5.
Carrying handles allow food to be brought to the table in the oven bowl.6.
It is easily transported, so can be used away from home.7.
Food is cooked evenly, without drying out, burning or smoke.8.
A self cleaning function minimises manual cleaning.9.
2
11
13
7
 Loading...