Do you have a question about the JUKI DMN-5420N-7 and is the answer not in the manual?
Defines DANGER, WARNING, and CAUTION risk classifications for machine operation.
Interprets the meaning of pictorial warning symbols and cautionary labels on the machine.
Emphasizes reading the manual, keeping it accessible, and using safety goggles.
Stresses the importance of keeping safety devices installed and warning labels visible.
Advises against unintended use or modification of the machine to prevent accidents.
Recommends trained operators and employers to establish training plans for safe operation.
Lists critical procedures and situations where the machine's power must be turned off.
Provides guidelines for safe handling, lifting, and unpacking of the sewing machine.
Covers safe installation of tables, legs, cables, wiring, and grounding.
Details critical safety checks and actions required before and during machine operation.
Specifies the correct oil type and handling precautions for machine lubrication.
Outlines safe practices for machine repair, adjustment, and cleaning by qualified personnel.
Details recommended environmental conditions for safe and optimal machine performance.
Defines suitable fabric types, sewing speeds, and stitch lengths for the machine.
Lists key specifications like needle type, presser foot lift, and lubricating oil.
Provides sound pressure and power level data for the sewing machine.
Step-by-step guide for correctly installing the oil pan on the machine table.
Instructions for securely attaching the belt cover and bobbin winder.
Details how to adjust the knee lifter for ergonomic operation.
Guides on the proper mounting of the thread stand assembly.
Provides precise instructions for inserting and securing the sewing machine needle.
Explains the correct procedure for inserting the bobbin into the bobbin case.
Describes how to set the desired stitch length using the adjustment dial.
Details the method for increasing or decreasing presser foot pressure.
Illustrates the step-by-step process for guiding the upper thread through the machine.
Explains how to adjust thread tension for balanced stitch quality.
Covers adjustments for the stroke and pressure of the thread take-up spring.
Explains how to set the needle's final stop position after thread trimming.
Details how to adjust pedal pressure and stroke for comfortable operation.
Explains how to use the foot pedal for various sewing speeds and functions.
Describes the use of the hand lifter to raise the presser foot.
Explains the operation and adjustment of the reverse feed stitching mechanism.
Guides on installing and using the wiper mechanism correctly.
Details the critical alignment procedure between the needle and hook for proper stitching.
Explains the process for safely replacing the counter knife.
Describes how to adjust the feed dog's timing for accurate fabric feeding.
Explains how to adjust the horizontal tilt of the feed dog for fabric feeding.
Details the procedure for adjusting the vertical height of the feed dog.
Details how to adjust the height and angle of the presser foot.
Guides on attaching the waste cloth guide and oil drainage guide.
Describes how to set the correct starting position of the moving knife.
Explains how to adjust the pressure of the counter knife against the moving knife.
Provides instructions for safely removing and installing the moving knife.
Details the operation, attachment, and positioning of the cloth cutting knife.
Explains how to adjust the machine's cutting width by replacing specific parts.
Lists and describes other interchangeable parts, such as needle plate covers.
Describes the process for correctly attaching the gauge for precise sewing.
| Model | DMN-5420N-7 |
|---|---|
| Number of Needles | 1 |
| Stitch Type | Lockstitch |
| Max Stitch Length | 5 mm |
| Feed Mechanism | Drop feed |
| Lubrication | Automatic lubrication |
| Motor Power | 550 W |
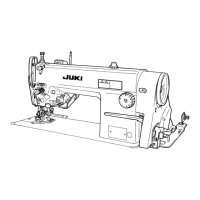
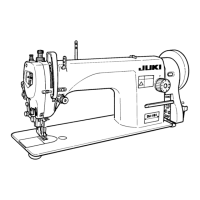
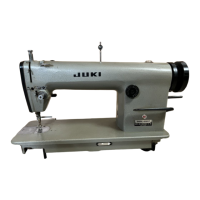
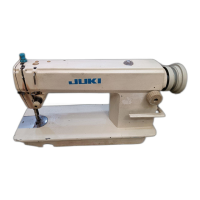
| Type | Lockstitch sewing machine |
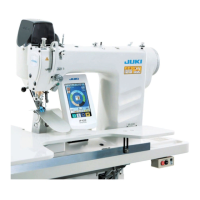
| Motor Type | Servo Motor |
| Sewing Speed | 5, 000 sti/min |
| Needle | DB × 1 (#11) #9~#18 |
| Hook | Rotary Hook |
| Lubricating Oil | JUKI Genuine Oil |
| Maximum Sewing Speed | 5000 stitches/min |
| Needle Size | DB × 1 (#11) #9~#18 |