Do you have a question about the JUKI LK-1900 and is the answer not in the manual?
Defines hazard levels: Danger, Warning, Caution, with descriptions of potential risks.
Illustrates and explains standard warning symbols and labels used on the machine for safety.
Outlines fundamental safety rules and practices to be followed before and during machine operation.
Details safety devices and warning labels to ensure safe operation and prevent accidents.
Prohibits unauthorized usage and modifications to the machine, emphasizing manufacturer responsibility.
Stresses the importance of proper operator training and education for safe machine handling.
Specifies situations and procedures requiring the machine's power to be turned off for safety.
Describes various safety devices installed on the machine, like covers and guards.
Safety guidelines for moving the sewing machine, emphasizing proper lifting and securing.
Instructions for safely unpacking the sewing machine, including handling wooden crates.
Covers the installation process, including table assembly and component securing.
Details safe practices for connecting and managing electrical cables and wiring.
Explains the importance and method of proper grounding for electrical safety.
Provides safety guidelines related to the sewing machine motor and its operation.
Checks and preparations required before starting the sewing machine to ensure safety.
Safety measures to be observed while the sewing machine is in operation.
Instructions for proper lubrication and handling of lubricating oil for machine maintenance.
Guidelines for performing maintenance and repairs safely, emphasizing qualified personnel.
Specifies environmental conditions required for safe and optimal machine operation.
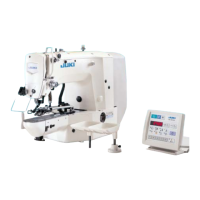
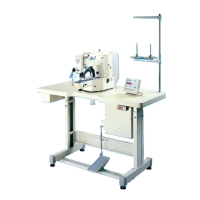
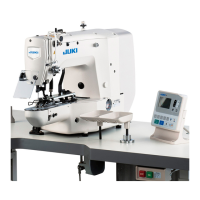
Identifies and labels the main components of the sewing machine unit.
Details the various switches and indicators on the operation and control boxes.
Provides step-by-step instructions for assembling the sewing machine table and its components.
Guides on how to correctly connect the power cord according to voltage specifications.
Explains the procedure for changing the machine's voltage settings between different ranges.
Instructions for securely fixing the main sewing machine unit to the table.
Details how to install the protective cover for the sewing machine motor.
Steps for mounting the operation box and connecting its cables.
Illustrates how to connect various cords for machine operation and control.
Provides instructions for organizing and securing the machine's cords.
Guides on connecting the air hoses for pneumatic type machines.
Explains the importance and procedure for installing the eye protection cover.
Instructions for assembling and installing the thread stand.
Details how to attach the transportation bolt for securing the machine during transit.
Explains the procedure for lubricating various parts of the sewing machine.
Step-by-step guide on how to properly insert and secure a new needle.
Instructions for threading the upper thread through the sewing machine head.
Procedure to verify the sewing pattern shape before starting to prevent needle interference.
Instructions on how to start and perform the sewing process.
Steps to select and switch to a different sewing pattern.
Instructions for winding thread onto the bobbin, both during and independently of sewing.
Initial step to power on the machine and prepare for settings.
Procedure for selecting and setting the desired pattern number for sewing.
How to adjust the horizontal (X-axis) magnification or reduction ratio of the sewing pattern.
How to adjust the vertical (Y-axis) magnification or reduction ratio of the sewing pattern.
Procedure to set the upper limit for the sewing machine's speed.
Final step to confirm and save the configured settings.
Explains how to register and use function keys for quick pattern recall.
Demonstrates sewing with registered patterns P1 and P3 sequentially.
How to create and use sequences of registered patterns (C1, C2, C3).
Using the counter to track bobbin usage and stop sewing when depleted.
Important operational notes and warnings to prevent common sewing issues.
Procedure for setting the correct height of the needle bar for optimal stitch formation.
How to align the needle with the shuttle mechanism for proper stitch interlacing.
Procedure for adjusting the height of the work clamp foot for different materials.
How to adjust the tension disk's lift for proper thread tension control.
Instructions for adjusting the thread trimmer knives (moving and fixed).
Procedure for cleaning the filter on the control box fan.
How to drain accumulated oil from the polyethylene oiler.
Guidelines for safely replacing fuses in the machine's electrical system.
Procedure to access and activate the memory switch settings.
How to configure the maximum sewing speed using memory switch No. 01.
Adjusting the initial sewing speed for the first few stitches.
Configuring which patterns can be called or disabled via the memory switch.
Lists specifications for standard sewing patterns, including dimensions and stitch counts.
Explains how to configure machine settings using DIP switches on the control box.
Visual guide showing stitch diagrams for various standard sewing patterns.
Catalog of different work clamp feet (pressers) with their part numbers and specifications.
Instructions for connecting optional foot pedals to the sewing machine.
Addresses issues with skipped stitches during the initial sewing phase.
Troubleshooting common causes of thread breakage and synthetic fiber issues.
Identifies reasons for frequent needle breakage and provides solutions.
Diagnoses problems with thread trimming and offers corrective actions.
Troubleshooting causes of skipped stitches during the sewing process.
Addresses issues where the needle thread appears on the wrong side of the material.
Solutions for thread breakage occurring specifically during the thread trimming operation.
| Brand | JUKI |
|---|---|
| Model | LK-1900 |
| Category | Sewing Machine |
| Language | English |