Do you have a question about the JUKI LK-1900A and is the answer not in the manual?
Provides essential guidelines for safe operation of the sewing machine.
Details the technical specifications and performance parameters of the sewing machine.
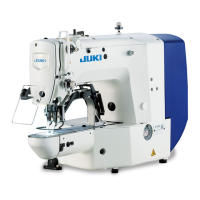
Identifies and explains the main components and parts of the sewing machine unit.
Describes the function and meaning of each switch and indicator on the operation panel.
Instructions for mounting the electrical box and attaching the connecting rod.
Procedure for installing the head support rod and the power switch assembly.
Guide for mounting the power switch and connecting the power source cord.
Steps for fitting the main unit and installing drain receiver and head support rubber.
Instructions for installing the safety switch and safely tilting the sewing machine head.
Steps for mounting the operation panel onto the machine table or under it.
Diagrams and instructions for connecting various cables within the control box.
Details on securing the cord clamp and installing the motor cover.
Guidelines for organizing cables and installing the eye protection cover for safety.
Steps for assembling and installing the thread stand unit onto the machine table.
Instructions for proper lubrication and attaching the needle before operation.
Detailed steps for threading the machine and handling the bobbin case.
Guide on winding bobbins and adjusting needle and bobbin thread tension.
Adjusting the thread take-up spring and consulting tension setting examples.
Procedure for setting pattern number, X/Y scale, speed, and thread tension.
Setting Y-scale, max speed, and thread tension for sewing parameters.
Steps to memorize settings and verify the sewing pattern path for safety.
Initiating sewing and instructions for changing between different sewing patterns.
Detailed steps for winding thread onto a bobbin, both during and independently of sewing.
Explanation of the thread clamp device and its function in preventing sewing troubles.
How to use pattern keys (P1-P5) to register and select sewing patterns.
Step-by-step guide to registering custom settings to pattern keys.
Demonstrates performing sewing using registered pattern keys.
How to combine multiple registered patterns for sequential sewing operations.
Guide to performing sewing operations using the programmed pattern combinations.
Using the bobbin thread counter and temporary stop functions.
Details on individually setting needle thread tension for different sewing stages.
Important warnings and adjusting needle bar height to prevent stitch skipping.
Steps for aligning the needle and shuttle for optimal stitch formation.
Adjusting work clamp foot lift and the moving and counter knives for trimming.
Adjusting the needle thread clamp device and the wiper position.
Procedures for draining oil, adjusting hook lubrication, and replacing fuses.
Procedure for changing the machine's voltage settings for different power sources.
Instructions for replenishing grease in specific machine parts to resolve errors.
Steps to enter, change, and exemplify memory switch settings.
Setting soft start speed and configuring pattern data calling operability.
Setting the counter operation mode and other memory switch configurations.
A comprehensive table listing memory switch indications, functions, and settings.
Instructions for setting DIP switches on the SDC and MAIN circuit boards.
Details pattern specifications including length, crosswise dimensions, and stitch counts.
Illustrates standard sewing patterns with stitch diagrams and dimensions.
Lists different work clamp foot types, their specifications, and associated feed plates.
Information on the LK-1900 data ROM and its insertion into the MAIN p.c.b.
Instructions for connecting an optional pedal (PK-57) to the sewing machine.
A list of error codes, their descriptions, and corrective measures for troubleshooting.
Addressing needle thread slippage, breakage, and splitting during operation.
Troubleshooting thread breaks during trimming and thread appearance on the material's wrong side.
Resolving thread clamp entanglement and issues with uneven needle thread length.
Troubleshooting for needle thread not shortening and bobbin thread knotting.
Outlines the specific features and capabilities of the LK-1901A model.
Steps for setting up the LK-1901A sewing machine and preparing it for operation.
Procedure for adjusting the material closing amount using the regulator.
How to adjust the vertical movement (lift) of the work clamp foot on the LK-1901A.
Adjusting work clamp pressure and setting the material closing operation.
Guide to selecting and confirming sewing patterns for eyelet buttonhole bartacking.
Details the specifications specific to the LK-1902A belt-loop attaching machine.
Steps for installing the LK-1902A machine and preparing it for operation.
Instructions for threading the machine head with thread for belt-loop attachment.
Selecting patterns and combining work clamp feet with feed plates for sewing.
Lists the specifications unique to the LK-1903A button sewing machine.
Steps for installing the LK-1903A sewing machine and preparing it for use.
Recommendations for selecting appropriate needles and threads for button sewing.
Overview of different sewing modes and patterns available for button sewing.
Selecting patterns and adjusting sewing width for button sewing.
Procedure for adjusting the button clamp jaw lever to align with the button.
Adjusting the feed plate and button clamp jaw lever for proper operation.
Adjusting button clamp lift and work clamp unit pressure.
Adjusting the wiper spring and installing the save button bar accessory.
Classification of machine models based on applicable button sizes and specifications.
Specifications and procedure for attaching shank buttons as an optional feature.
Adjusting the height of the needle bar and the feed plate base.
Adjusting the button clamp support and checking the needle entry point.
Steps for adjusting the button clamp base and feed plate for material contact.
Adjusting the button support rubber and link for proper operation.
Detailed diagram and dimensions for the longitudinal installation type table.
Detailed diagram and dimensions for the lateral installation type table.
| Stitch Type | Lock Stitch |
|---|---|
| Power Consumption | 550 W |
| Thread Take-up | Rotary type |
| Lubrication | Automatic |
| Needle Type | DP×5 |
| Presser Foot Lift | 17 mm |
| Needle Size Range | #11 - #18 |
| Presser Foot Lift Type | Automatic / Manual |
| Bobbin | Rotating hook |
| Motor | Servo motor |