− 68 −
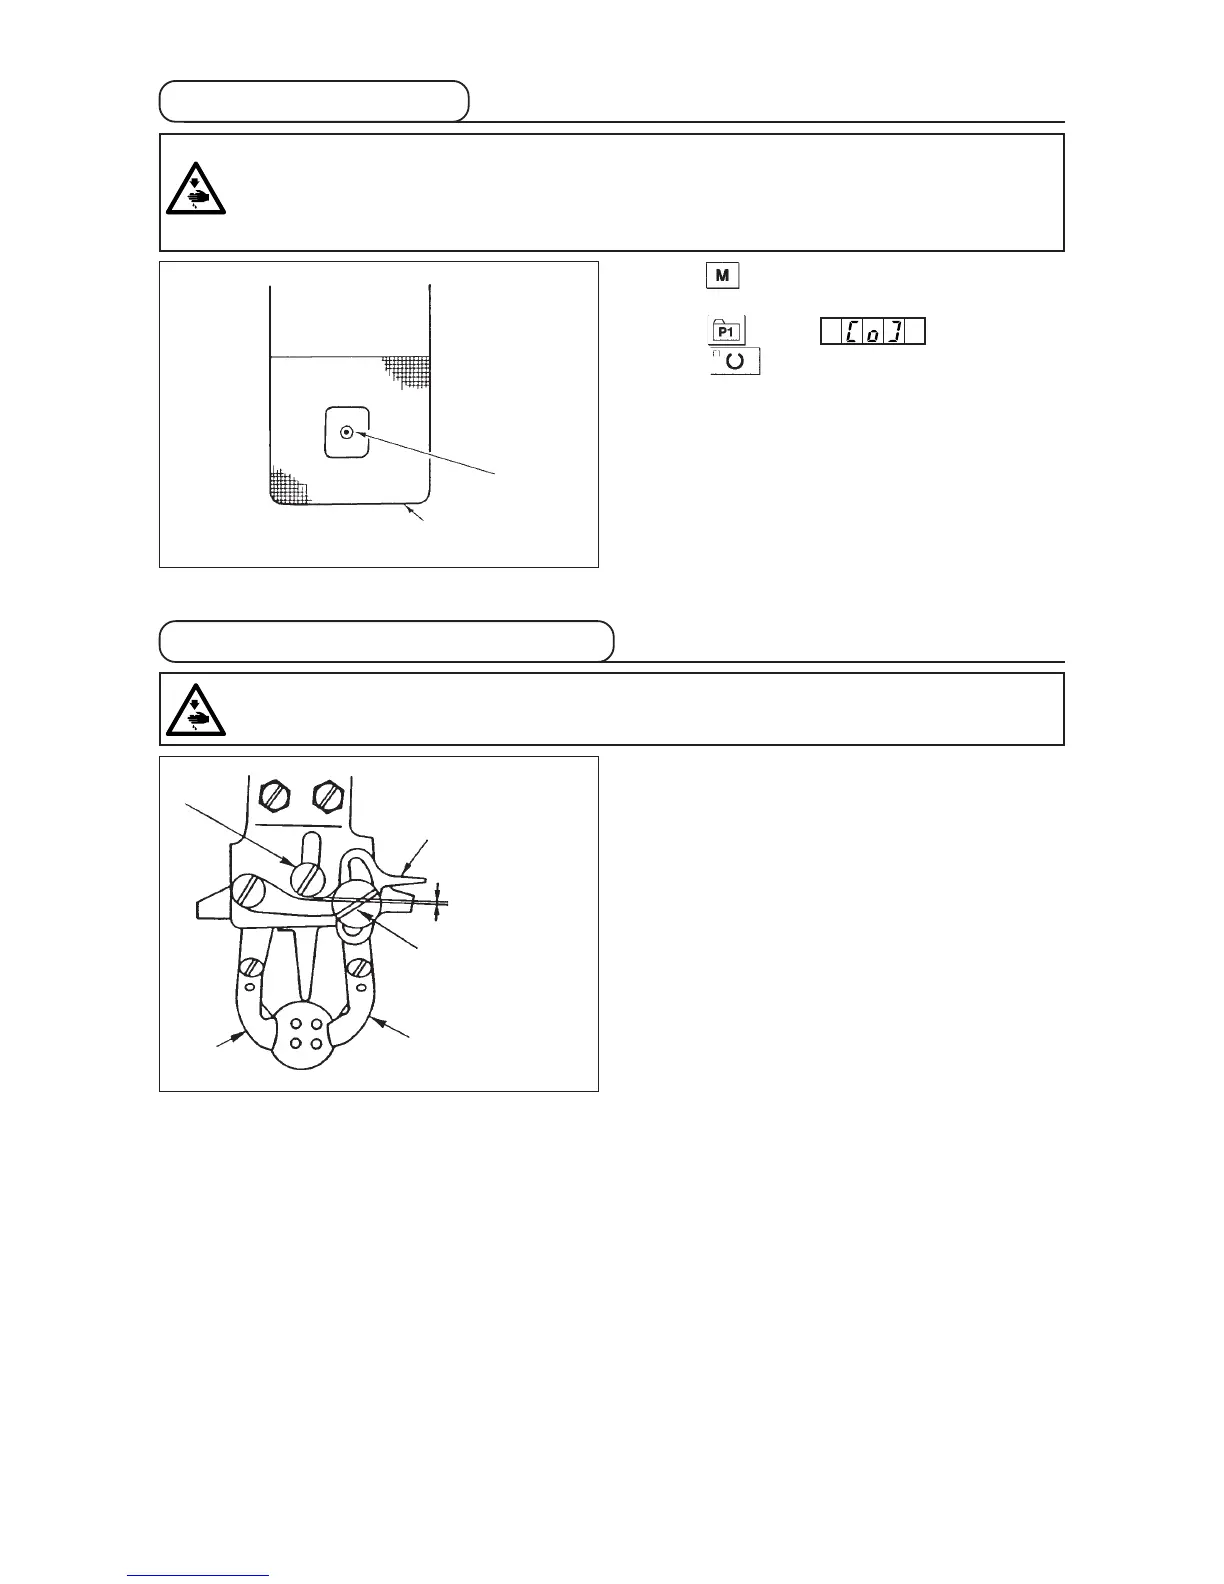
6. Adjusting the feed plate
Bring the machine to its stop-motion state. Then lift
button clamp q. Loosen screw w in the button clamp
jaw lever and adjust so that a clearance of 0.5 to 1
mm is provided between button clamp jaw lever e and
hinge screw r when placing a button in between button
clamps q. Then tighten screw w in the button clamp
jaw lever.
q
w
7. Adjusting the button clamp jaw lever
q
w
r
e
q
WARNING :
When change of the shape of the button, change of the sewing pattern or enlargement/reduction of the
sewing width is performed, make sure of the shape of the sewing pattern. If the feed plate interferes with
the needle hole guide, it will result in the danger of the needle breakage or the like. Also, if the pedal is
depressed during the adjustment, the button clamp unit will go up or come down. So, be careful.
1) Press key in the state that the swing LED goes
off using the operation panel.
2) Press key. /
3) Press key. The button clamp unit goes to
the origin position and goes up.
3) Adjust feed plate q so that needle hole guide w
comes to the center of the recessed part of feed
plate q.
WARNING :
Turn OFF the power before starting the work so as to prevent accidents caused by abrupt start of the
sewing machine.
0.5mm to 1mm




 To Next Page