Do you have a question about the JUKI LU-2266N-7 and is the answer not in the manual?
Explains DANGER, WARNING, CAUTION labels for immediate, potential, and minor injury risks.
Details symbols for moving parts, electrical shock, heat, laser, head contact, and their meanings.
Emphasizes reading manuals, keeping them handy, and other general safety advice.
Covers correct installation, maintenance of safety devices, and visibility of warning labels.
Warns against unintended use or modification of the machine.
Stresses the need for trained operators and employer-provided training plans.
Lists essential operations (threading, needle change, cleaning) requiring power disconnection.
Safe lifting, moving, and handling of the machine during transport.
Procedures for safe unpacking, checking for nails, and handling the machine's center of gravity.
Guidelines for setting up the machine, including table, cabling, grounding, and motor.
Checks to perform before turning on the power, like connectors and cables.
Precautions to avoid injury from moving parts, needle area, and pinching hazards.
Guidance on using specified JUKI oil/grease and handling accidental contact or ingestion.
Procedures for repair, adjustment, cleaning, fuse replacement, and ventilation.
Conditions for safe operation, including noise, voltage, temperature, humidity, and disposal.
Avoidance of needle, moving parts, ensuring safety covers are attached, and careful handling.
Ground wire, power plug handling, thunder/lightning safety, and fire prevention via plug cleaning.
Explains DANGER, WARNING, CAUTION labels for immediate, potential, and minor injury risks.
Details symbols for moving parts, electrical shock, heat, laser, head contact, and their meanings.
Emphasizes reading manuals, keeping them handy, and consulting specialists if needed.
Covers correct installation, maintenance of safety devices, and visibility of warning labels.
Warns against unintended use or modification of the machine.
Stresses the need for trained operators and employer-provided training plans.
Lists essential operations (threading, needle change, cleaning) requiring power disconnection.
Safe lifting, moving, and handling of the machine during transport.
Procedures for safe unpacking, checking for nails, and handling the machine's center of gravity.
Guidelines for setting up the machine, including table, cabling, grounding, and motor.
Checks to perform before turning on the power, like connectors and cables.
Precautions to avoid injury from moving parts, needle area, and pinching hazards.
Guidance on using specified JUKI oil/grease and handling accidental contact or ingestion.
Procedures for repair, adjustment, cleaning, fuse replacement, and ventilation.
Conditions for safe operation, including noise, voltage, temperature, humidity, and disposal.
Avoidance of needle, moving parts, ensuring safety covers are attached, and careful handling.
Ground wire, power plug handling, thunder/lightning safety, and fire prevention via plug cleaning.
Explains DANGER, WARNING, ATTENTION labels for immediate, potential, and minor injury risks.
Details symbols for moving parts, electrical shock, heat, laser, head contact, and their meanings.
Emphasizes reading manuals, keeping them handy, and consulting specialists if needed.
Covers correct installation, maintenance of safety devices, and visibility of warning labels.
Warns against unintended use or modification of the machine.
Stresses the need for trained operators and employer-provided training plans.
Lists essential operations (threading, needle change, cleaning) requiring power disconnection.
Avoidance of needle, moving parts, ensuring safety covers are attached, and careful handling.
Ground wire, power plug handling, thunder/lightning safety, and fire prevention via plug cleaning.
Explains PELIGRO, ADVERTENCIA, PRECAUCIÓN labels for immediate, potential, and minor injury risks.
Details symbols for moving parts, electrical shock, heat, laser, head contact, and their meanings.
Emphasizes reading manuals, keeping them handy, and consulting specialists if needed.
Covers correct installation, maintenance of safety devices, and visibility of warning labels.
Warns against unintended use or modification of the machine.
Stresses the need for trained operators and employer-provided training plans.
Lists essential operations (threading, needle change, cleaning) requiring power disconnection.
Safe lifting, moving, and handling of the machine during transport.
Procedures for safe unpacking, checking for nails, and handling the machine's center of gravity.
Guidelines for setting up the machine, including table, cabling, grounding, and motor.
Checks to perform before turning on the power, like connectors and cables.
Precautions to avoid injury from moving parts, needle area, and pinching hazards.
Guidance on using specified JUKI oil/grease and handling accidental contact or ingestion.
Procedures for repair, adjustment, cleaning, fuse replacement, and ventilation.
Conditions for safe operation, including noise, voltage, temperature, humidity, and disposal.
Avoidance of needle, moving parts, ensuring safety covers are attached, and careful handling.
Ground wire, power plug handling, thunder/lightning safety, and fire prevention via plug cleaning.
Explains PERICOLO, AVVERTIMENTO, ATTENZIONE labels for immediate, potential, and minor injury risks.
Details symbols for moving parts, electrical shock, heat, laser, head contact, and their meanings.
Immediate danger of death or severe injury if handled improperly or dangerous situations are not avoided.
Potential danger of severe injury if handled improperly or dangerous situations are not avoided.
Emphasizes reading manuals, keeping them handy, and consulting specialists if needed.
Covers correct installation, maintenance of safety devices, and visibility of warning labels.
Warns against unintended use or modification of the machine.
Stresses the need for trained operators and employer-provided training plans.
Lists essential operations (threading, needle change, cleaning) requiring power disconnection.
Avoidance of needle, moving parts, ensuring safety covers are attached, and careful handling.
Ground wire, power plug handling, thunder/lightning safety, and fire prevention via plug cleaning.
Explains DANGER, WARNING, CAUTION labels for immediate, potential, and minor injury risks.
Details symbols for moving parts, electrical shock, heat, laser, head contact, and their meanings.
Emphasizes reading manuals, keeping them handy, and consulting specialists if needed.
Covers correct installation, maintenance of safety devices, and visibility of warning labels.
Warns against unintended use or modification of the machine.
Stresses the need for trained operators and employer-provided training plans.
Lists essential operations (threading, needle change, cleaning) requiring power disconnection.
Safe lifting, moving, and handling of the machine during transport.
Procedures for safe unpacking, checking for nails, and handling the machine's center of gravity.
Guidelines for setting up the machine, including table, cabling, grounding, and motor.
Checks to perform before turning on the power, like connectors and cables.
Precautions to avoid injury from moving parts, needle area, and pinching hazards.
Guidance on using specified JUKI oil/grease and handling accidental contact or ingestion.
Procedures for repair, adjustment, cleaning, fuse replacement, and ventilation.
Conditions for safe operation, including noise, voltage, temperature, humidity, and disposal.
Avoidance of needle, moving parts, ensuring safety covers are attached, and careful handling.
Ground wire, power plug handling, thunder/lightning safety, and fire prevention via plug cleaning.
Lists technical specifications of the sewing machine models.
Covers the process of installing the sewing machine.
Details how to adjust the belt tension for proper machine operation.
Instructions for installing the synchronizer support rod.
Steps for correctly attaching the belt cover.
Procedures for installing the knee switch control device.
Steps for installing the air drive unit.
Instructions for assembling and installing the thread stand.
Guidance on lubrication procedures and oil types.
Steps for correctly installing the needle.
Instructions for inserting and removing the bobbin.
Steps for threading the hook with the lower thread.
Procedures for installing the thread guide.
Steps for winding the bobbin with thread.
How to adjust the oil level in the hook.
Steps for threading the upper thread through the machine head.
How to adjust the stitch length.
Adjusting thread tension for needle and bobbin.
Adjusting the thread take-up spring.
How to operate the hand lifter for the presser foot.
How to adjust the pressure of the presser foot.
Adjusting the needle to hook timing.
How to adjust the hook needle guard.
Adjusting the bobbin case opening lever.
Adjusting the counter knife position and pressure.
Adjusting the lifting height of the presser foot and walking foot.
Table showing maximum sewing speeds under different conditions.
Steps to reset the safety clutch after it has been activated.
Explanation of the machine's control panel switches and their functions.
How to install and use the knee switch, and its dual function.
Common sewing problems, their causes, and solutions.
Important checks before initial operation to prevent maloperation or damage.
Important checks before operation to prevent machine malfunction or damage.
Important checks before starting the machine to prevent malfunctions or damage.
Important checks before using the machine to prevent malfunction or damage.
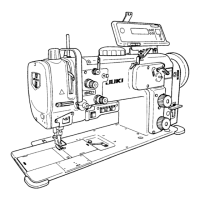
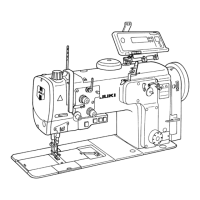
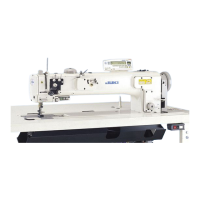
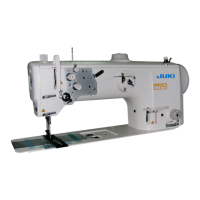
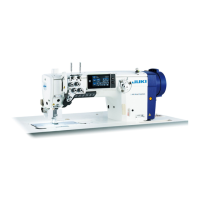
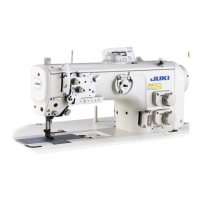
Identifies the machine models covered.
Lists typical applications for the sewing machines.
Specifies the maximum sewing speeds for the models.
Details the maximum stitch length for normal and reverse feed.
Specifies the type of needle required for the machine.
Indicates the lift height of the presser foot via manual or knee control.
Specifies the type of lubricating oil to be used.
Provides noise level measurements (LPA, LWA) according to ISO standards.
Instructions for mounting the sewing machine head with two or more people, ensuring safety.
Steps for attaching the oil pan, drain plug, oil seal, washers, and waste oil container.
Steps for inserting hinges, engaging rubber hinges, lowering the head, and securing the head support bar.
How to adjust belt tension by changing motor height to achieve 15mm sag with a 9.8N load.
Steps to attach the synchronizer support rod to the arm using a nut.
Steps to fix the rear belt cover, fit the front cover into notches, and secure with screws.
Instructions for fixing the auxiliary plate and adjusting clearance for tilting the machine head.
Steps to attach the knee switch base to the table and secure the cord.
Steps to install the air regulator and air control unit onto the machine table.
Illustrates connecting air hoses to the machine based on type, ensuring correct numbering and routing.
How to adjust air pressure between 0.4-0.5 MPa using the regulator knob.
Instructions for filling the oil tank to the H level using JUKI New Defrix Oil No. 1.
Procedures for checking oil level, adding oil when it drops to L level, and verifying circulation.
Warnings about using specified oil, closing the cap, applying drops for first use/disuse, and running in the machine.
Steps for monthly filter cleaning, including removing screws, cleaning magnet and filter element.
Steps for correctly installing the needle, ensuring the long groove faces left.
Steps for attaching needles, ensuring long grooves face inward.
Steps to lift the latch, take out/put in the bobbin, and release the latch.
Steps for passing the thread through the hook, lever, and thread hole.
Steps to install the needle thread guide rod with a nut.
Steps to attach the bobbin winder thread guide using screws.
Steps for passing thread, tilting presser, adjusting thread amount, correcting uneven winding.
How to adjust oil amount using the adjustment screw, checking with paper.
Detailed steps for threading the upper thread through the machine head guides.
How to adjust stitch length using the stitch dial, including reverse feed.
Adjusting tension nut for remaining thread length after cutting.
How to increase or decrease needle thread tension.
How to increase or decrease bobbin thread tension.
How to adjust the stroke of the thread take-up spring.
How to adjust the tension of the thread take-up spring.
Instructions for using the hand lifter to raise or lower the presser foot.
How to adjust the presser foot pressure using the regulating dial.
Steps to check and adjust the relation between needle and hook for proper timing.
How to adjust the position of the counter knife.
How to adjust the pressure of the moving knife.
How to check and adjust the hook needle guard position for proper needle alignment.
Steps to adjust the bobbin case opening lever for correct clearance.
Details the correct position of the counter knife relative to the needle plate and slide plate.
How to adjust the knife pressure.
How to adjust the lifting height of the presser foot and walking foot using a dial.
Table showing maximum sewing speeds based on stitch length and vertical movement of presser foot.
Table showing maximum sewing speeds based on needle gauge (for LU-2266N-7).
Steps to reset the safety clutch after excessive load, involving pressing a button and turning the handwheel.
Explains the function of the reverse feed switch for stitching forward or backward.
Explains the switch to maximize alternating vertical movement of walking foot.
Function of the switch to cancel or add automatic reverse stitching.
Function of the needle lifting switch.
How to install and use the knee switch, and its dual function.
Causes and corrective measures for thread breakage, fraying, or wear.
Causes and corrective measures for skipped stitches.
Causes and corrective measures for loose stitches.
Cause and correction for thread slipping off the needle eyelet after trimming.
Cause and correction for thread slipping off the needle eyelet at the start of sewing.
Causes and corrective measures for blunt knives or improper adjustment.
Causes and corrective measures for thread not being cut after trimming.
Causes and corrective measures for thread breakage after trimming.
| Type | Lockstitch |
|---|---|
| Max. Stitch Length | 5 mm |
| Needle Bar Stroke | 36 mm |
| Lubrication system | Automatic |
| Reverse feed | Yes |
| Stitch Type | Lockstitch |
| Max. sewing speed | 2, 500sti/min |
| Needle | DB x 1 |
| Hook | Rotary hook |
| Lubricating oil | JUKI Machine Oil |
| Thread trimmer | Automatic thread trimmer |
| Motor | Servo motor |
| Sewing Speed | 2, 500sti/min |
| Presser Foot Lift | Manual: 5.5 mm, Knee: 13 mm |