Do you have a question about the JUKI LZ-2290CS and is the answer not in the manual?
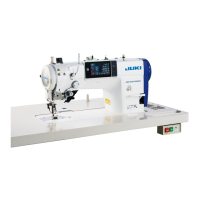
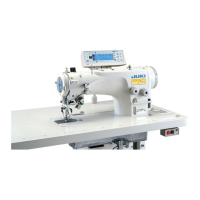
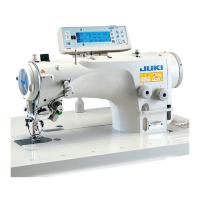
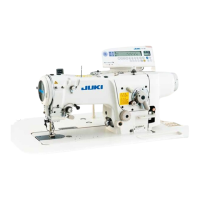
Details on the sewing machine head's model, application, speed, width, and needle.
Technical specifications for the control box, including voltage, frequency, and environment.
Detailed diagram of the sewing machine table with dimensions and hole placements.
Important safety and handling guidelines for machine setup, carrying, and placement.
Steps for physically installing the sewing machine head onto the table.
Procedure for safely removing the needle bar stopper for transportation.
Steps for installing and positioning the knee-lifter mechanism.
How to adjust the knee lifter's presser foot lift height.
Instructions for assembling and installing the thread stand unit.
Procedure for inserting the needle thread guide pin into the machine head.
Steps to prepare and mount the electrical control box onto the table.
Guide to installing the reactor box, connecting wires, and securing it.
How to mount the power switch and connect the power source cord.
Detailed steps for connecting internal and external cords to the control box PCBs.
Instructions for managing and securing internal cords within the control box.
Steps to attach the connecting rod to the pedal lever for operation.
Adjusting the pedal angle and installing the connecting rod.
Explains the four steps of pedal operation: low speed, high speed, stop, and trim.
Instructions for filling the oil tank and ensuring proper lubrication.
Guide for basic operations like selecting language, keys, and starting sewing.
Procedures for adjusting needle and bobbin thread tension for optimal sewing.
Adjusting strength and amount of thread taken by the take-up spring.
Adjusting pressure, height, and micro-lifting mechanism of the presser foot.
How to adjust the stitch length for different sewing products.
Guide on how to modify the sewing machine's operational speed.
Adjusting the intensity and color of the LED hand light.
Explanation of the one-touch reverse feed stitching mechanism.
Allocating various operations to hand and machine head switches.
How to sew patterns with mirror inversion and its settings.
Instructions for using the optional gauge for fagoting stitch.
Procedure for adjusting the oil amount in the hook for proper lubrication.
Overview of the sewing screen, its displays, and modes (Operator/Maintenance).
Information on registering, selecting, and managing sewing patterns.
Elements composing a sewing pattern: start/end reverse feed and pattern function.
How to view and manage the list of stored sewing patterns.
How to enable and set reverse feed stitching at the beginning of sewing.
Step-by-step guide for editing various sewing patterns.
How to configure various sewing shapes like zigzag, scallop, and blind stitch.
Explanation of Bobbin thread, Sewing, and Pitch time counters and their settings.
Table of memory switch items, their ranges, and units for system configuration.
A table listing error codes, descriptions, causes, and items to check for troubleshooting.
Instructions for cleaning the cooling fan and hook section of the sewing machine.
Guidelines for applying grease to the machine's moving parts.
Instructions for safely replacing fuses in the control box.
How to adjust hook timing using the dedicated adjustment mode.
Procedure for setting the correct height of the needle bar.
Adjusting hook timing and needle guard for proper needle-hook interaction.
How to adjust the feed dog's height and inclination.
Information on grease shortage warnings, errors, and resetting procedures.
Functions for managing sewing patterns, including creation, copying, and deletion.
Guide to creating and editing polygonal-shape stitching patterns.
Information on combining different patterns for continuous sewing.
Function for combining multiple sewing patterns into a cycle pattern.
Creating and using custom patterns with specified entry points.
Creating and using condensation custom patterns with specific entry points.
How to assign functions to panel keys for customized operation.
How to register and manage maintenance warnings based on counter values.
| Max Stitch Length | 5 mm |
|---|---|
| Max Zigzag Width | 7 mm |
| Feed Method | Drop feed |
| Needle | DP×5 (#9~#18) |
| Hook | Rotary hook |